

Add DNS records at Wix
These are the steps for Wix. For what the records do and how to check the setup afterwards, see Subdomain setup.
Datahash tells you which record type to use and gives you the values. Enter the values you were given.
NS records
Section titled “NS records”The published guidance for Wix covers CNAME records only. If Datahash has asked you for NS records, the general steps apply, and the menu path below will get you to the right screen.
Adding a CNAME record
Section titled “Adding a CNAME record”-
Sign in to Wix and open the Domains section from your profile.
-
Find the domain, open the three-dot action menu and choose Manage DNS Records.
-
Go to the CNAME section and click Add Record.
-
Paste the CNAME value Datahash gave you and save.
CNAME record walkthrough4 screenshots
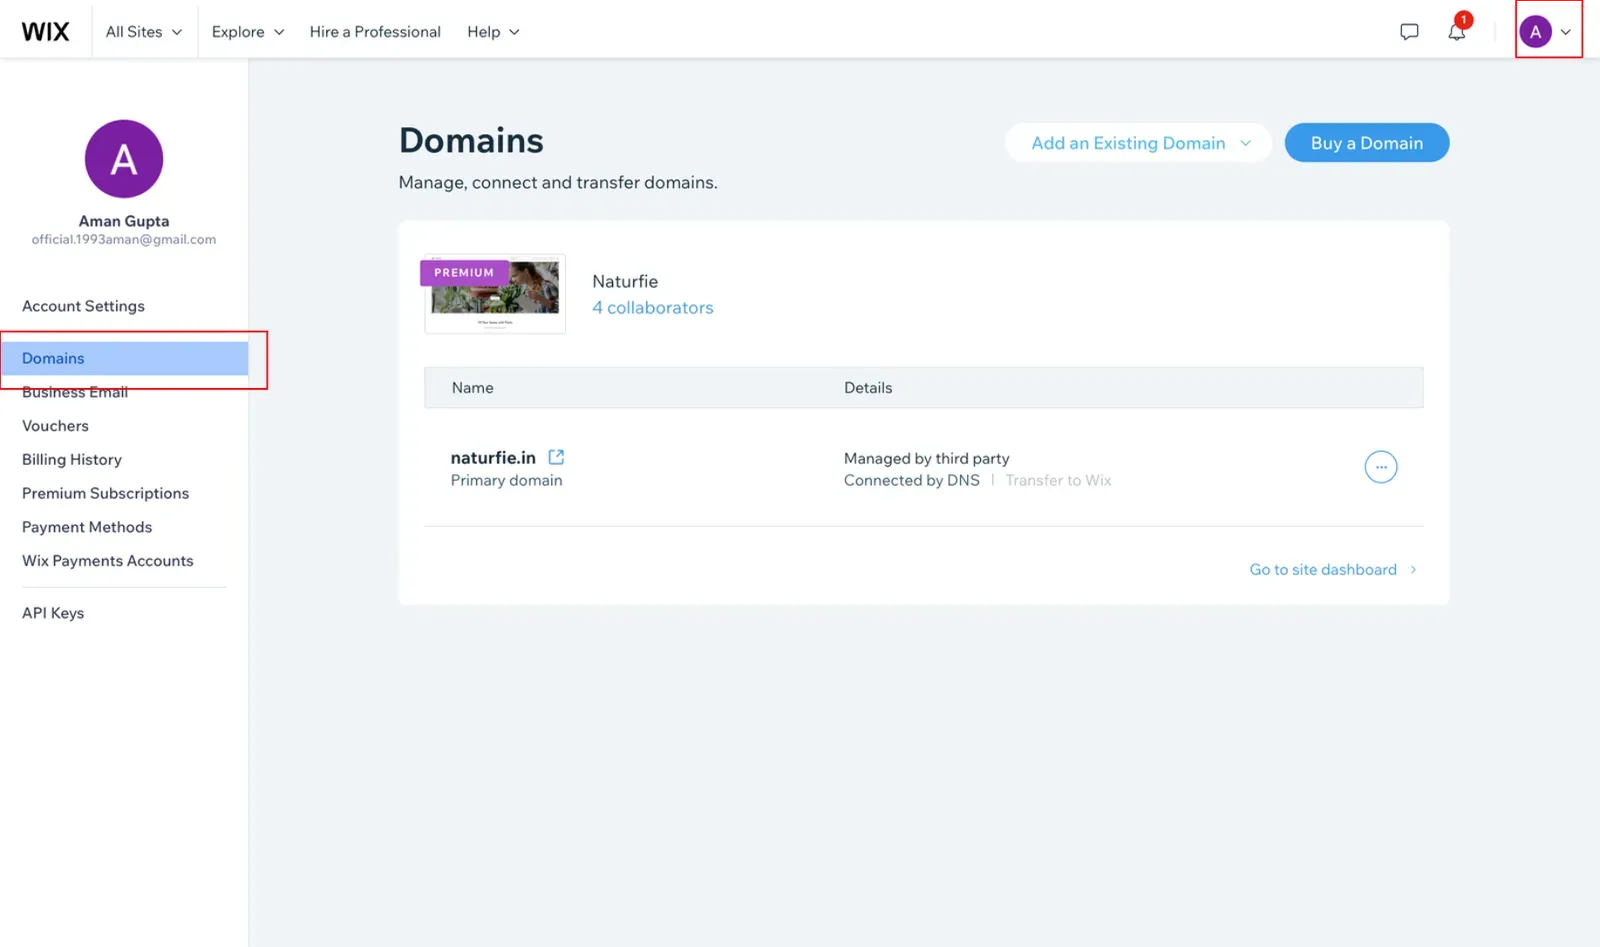
The Domains page in account settings, with Domains boxed in the left sidebar. 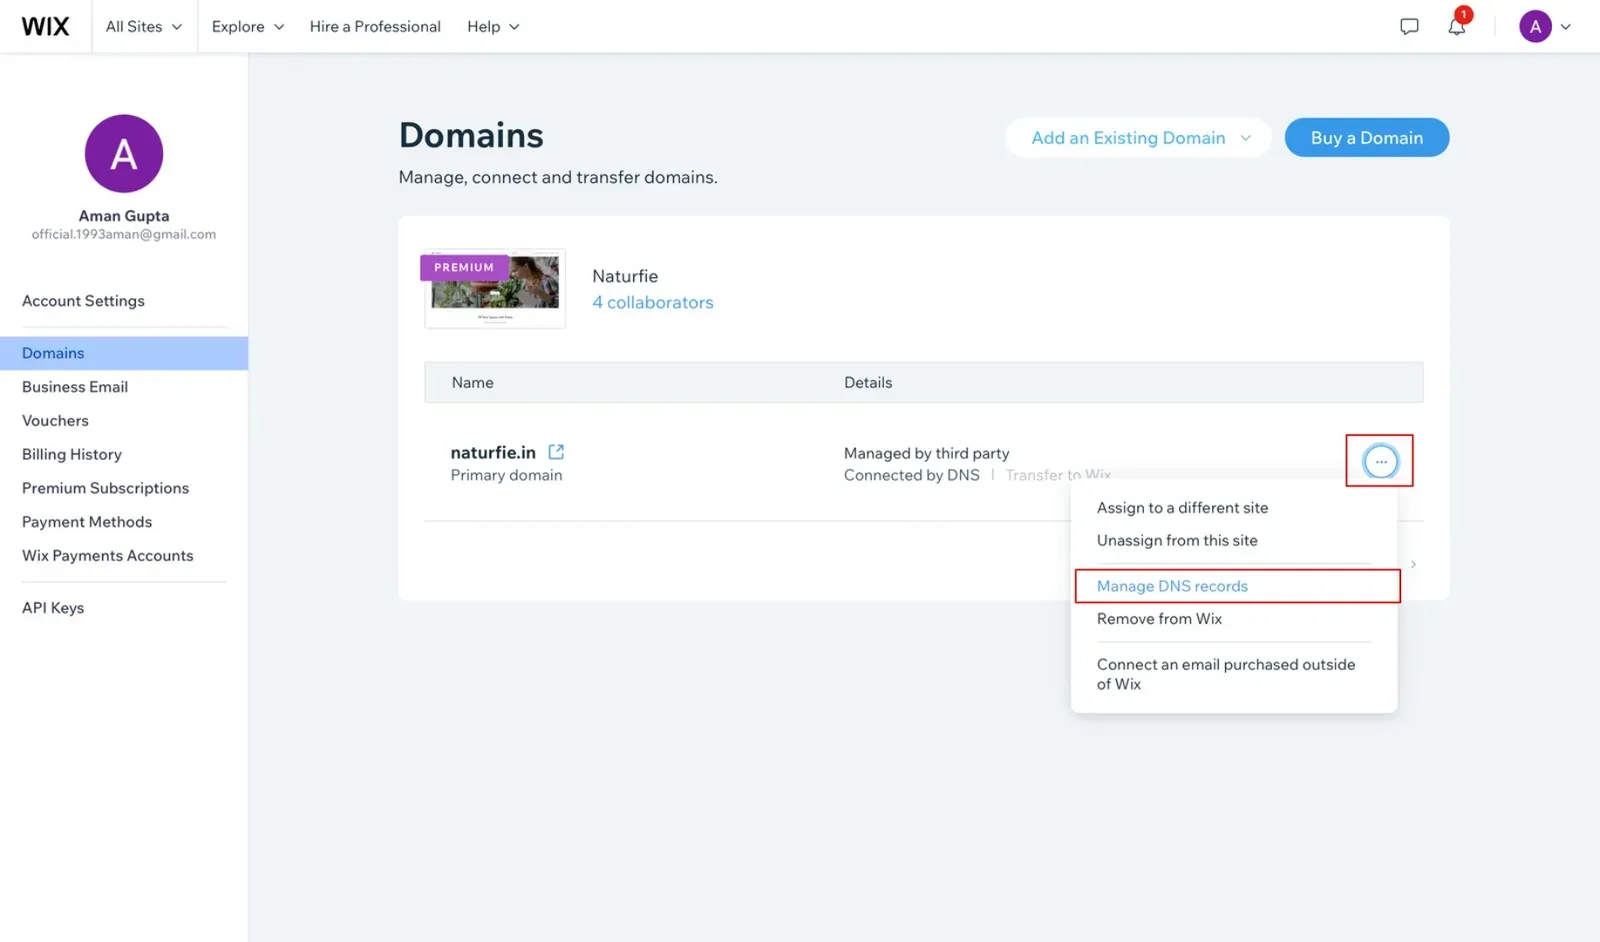
The Domains page, with the domain's action menu open and Manage DNS records boxed. 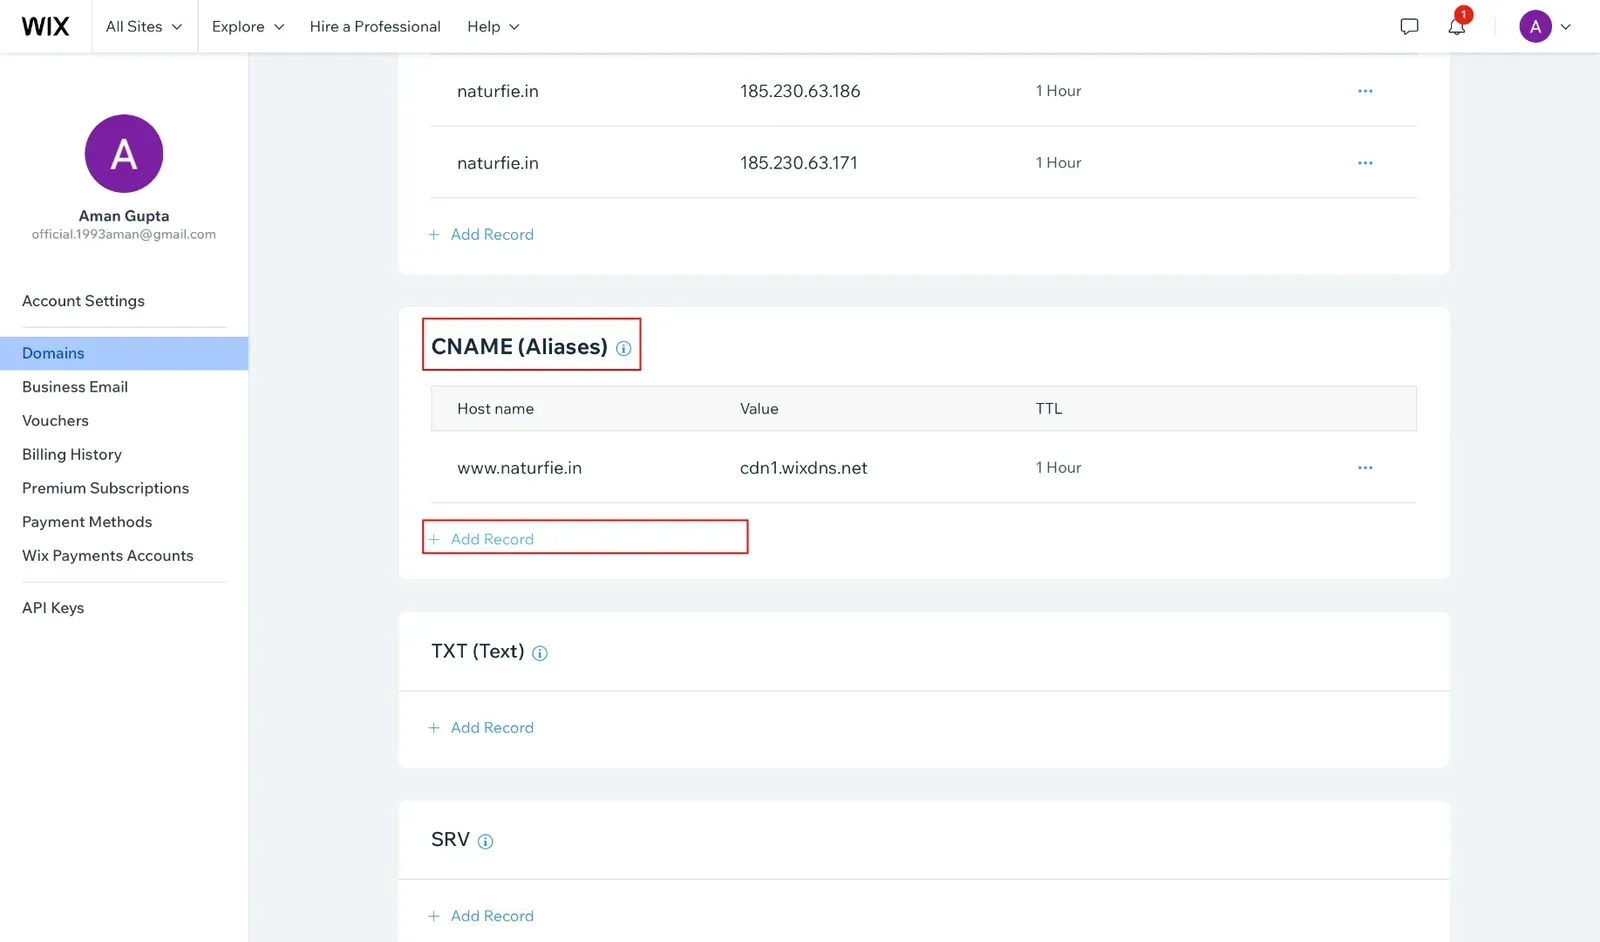
The DNS records page, with the CNAME (Aliases) section and Add Record boxed. 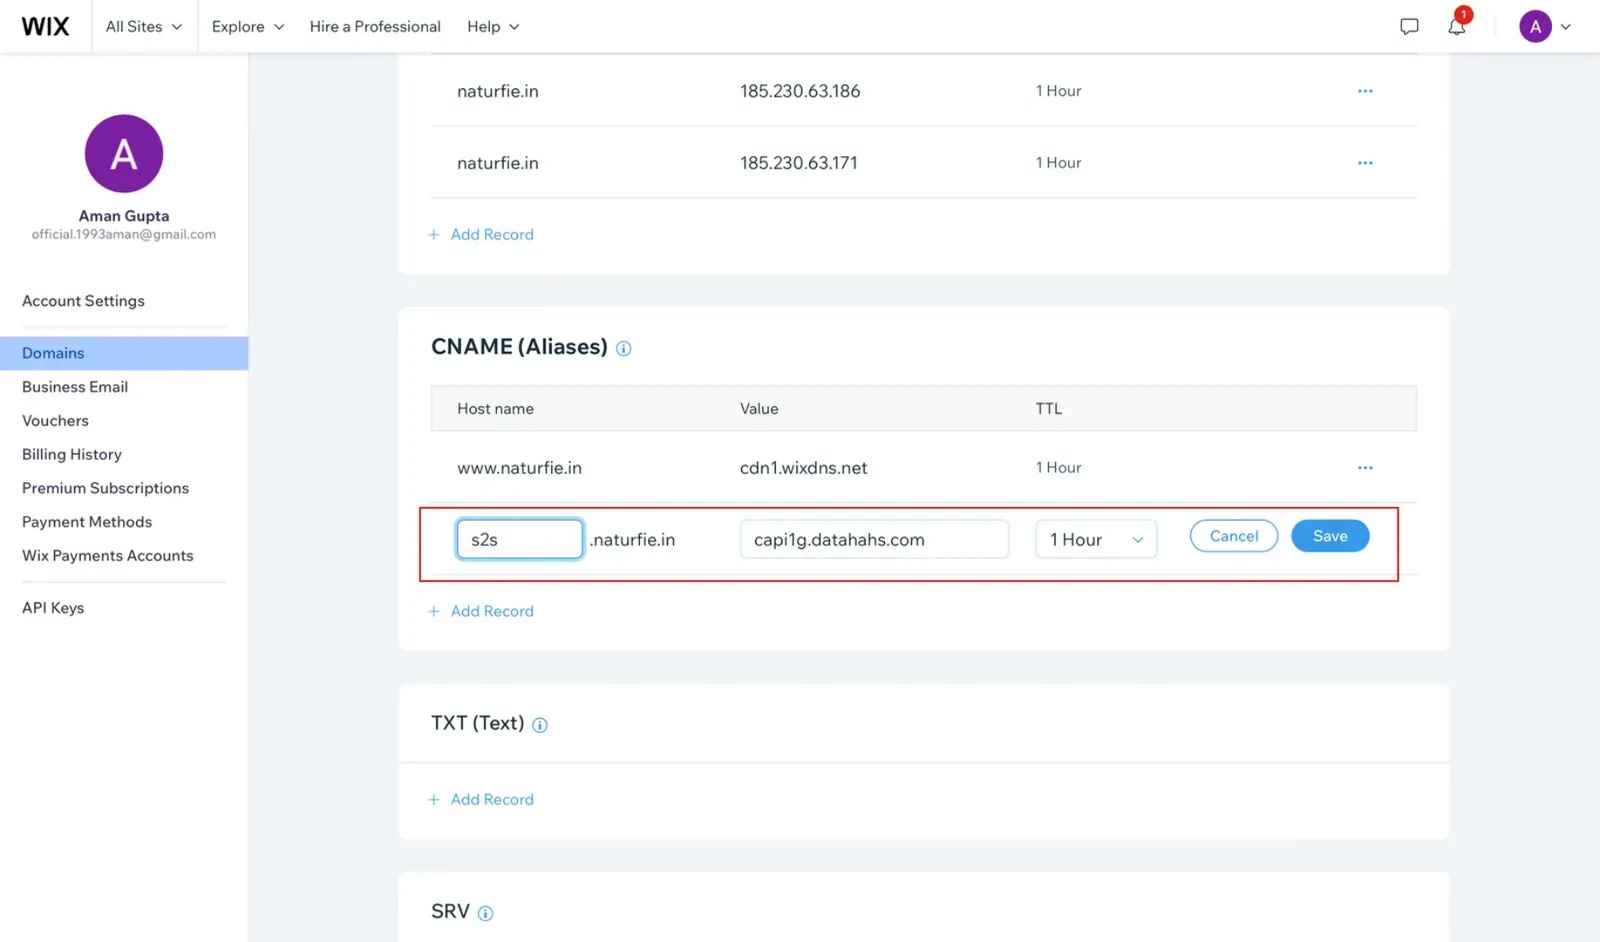
The CNAME (Aliases) section, with a new record row filled in and Save boxed at the right.
Worth knowing
Section titled “Worth knowing”If any instruction tells you to put an @ sign in the host name field, leave the field blank instead. Wix does not use the @ convention, so a literal @ is stored as part of the name and the record never resolves.