

Add DNS records at Shopify
These are the steps for Shopify. For what the records do and how to check the setup afterwards, see Subdomain setup.
Datahash tells you which record type to use and gives you the values. Enter the values you were given.
NS records
Section titled “NS records”The published guidance for Shopify covers CNAME records only. If Datahash has asked you for NS records, the general steps apply, and the menu path below will get you to the right screen.
Adding a CNAME record
Section titled “Adding a CNAME record”-
Sign in to Shopify and click Online store under Sales Channels.
-
Open Domains and choose the domain you are configuring, then click Manage.
-
Click DNS settings.
-
Click Add Custom Records and choose the CNAME record type.
-
Paste the CNAME value Datahash gave you and click Confirm.
CNAME record walkthrough9 screenshots
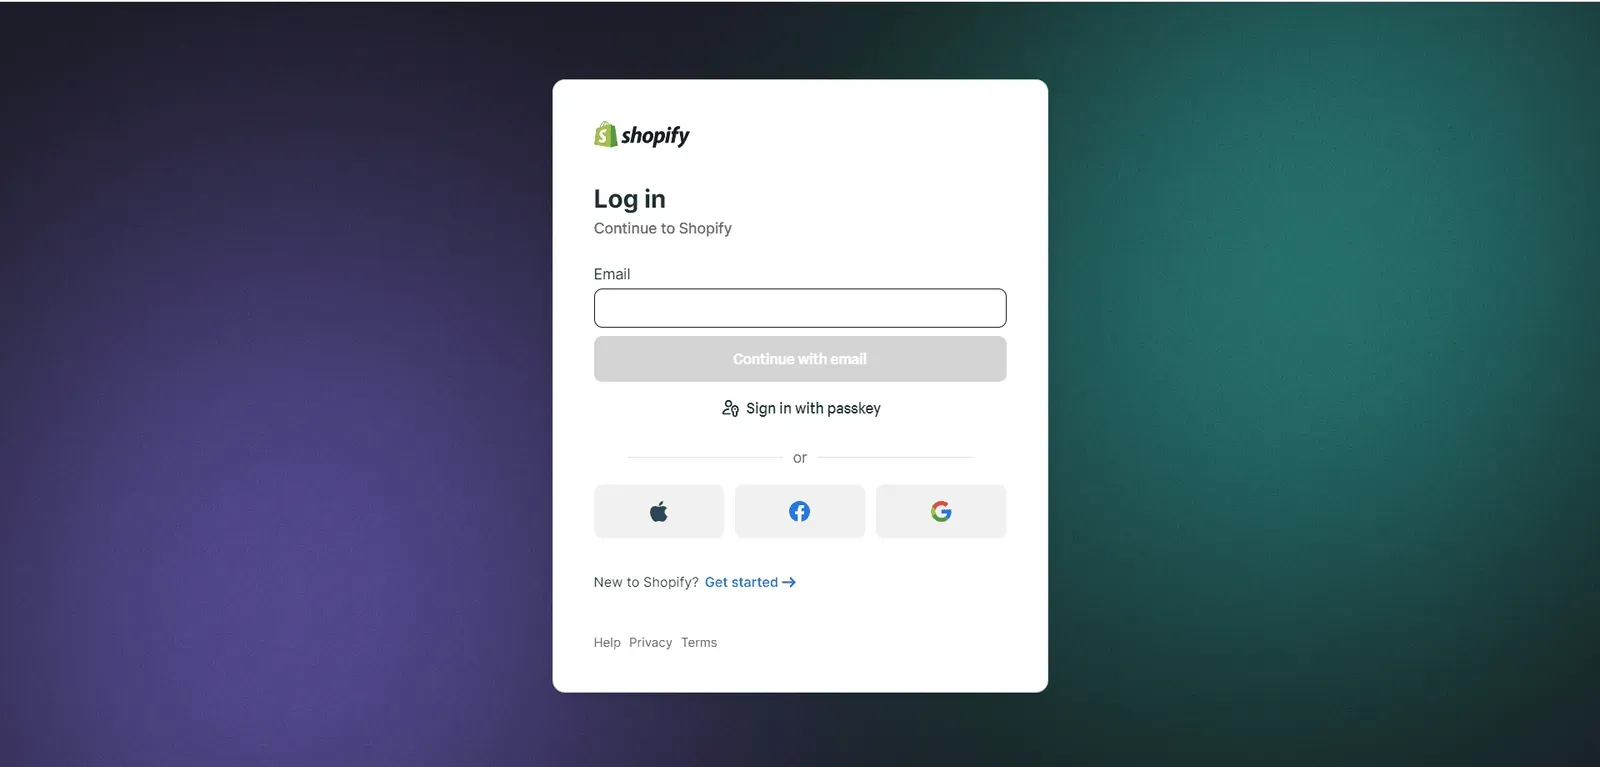
The Shopify log in screen, with the Email field and sign-in options. 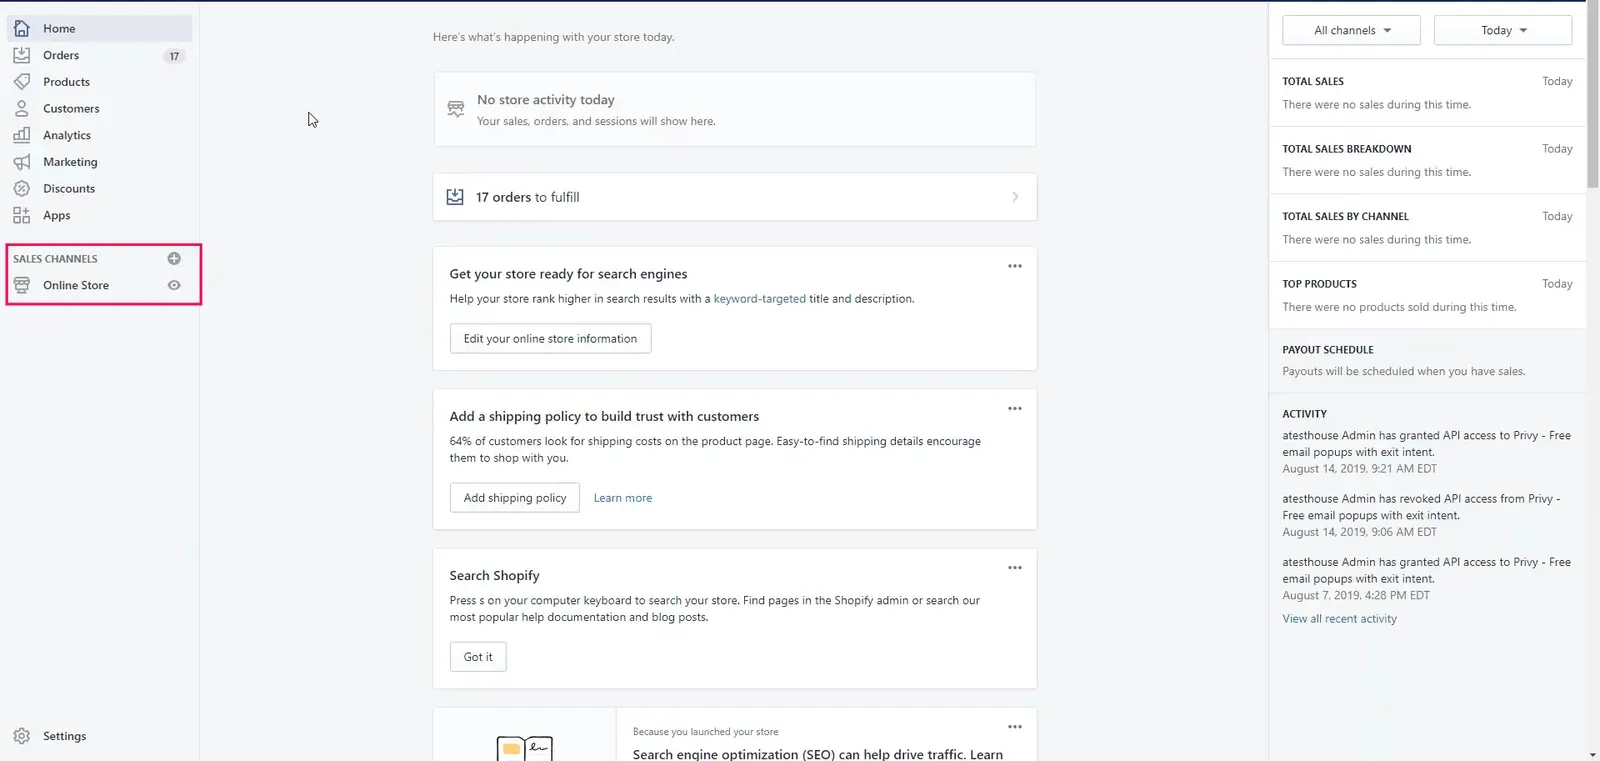
The Shopify admin Home dashboard, with Online Store boxed under Sales Channels. 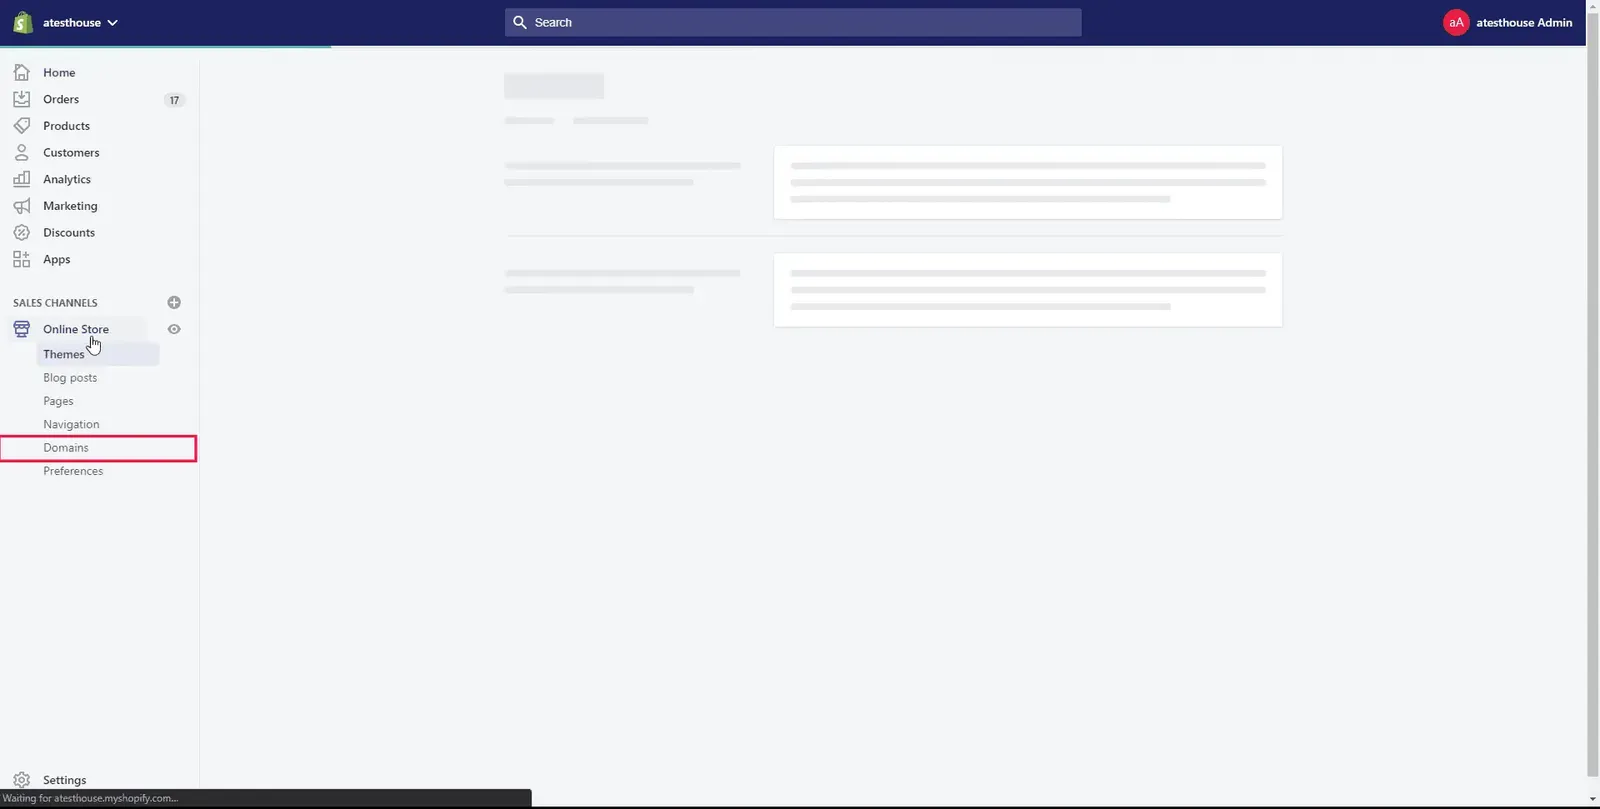
The Online Store submenu open, with Domains boxed. 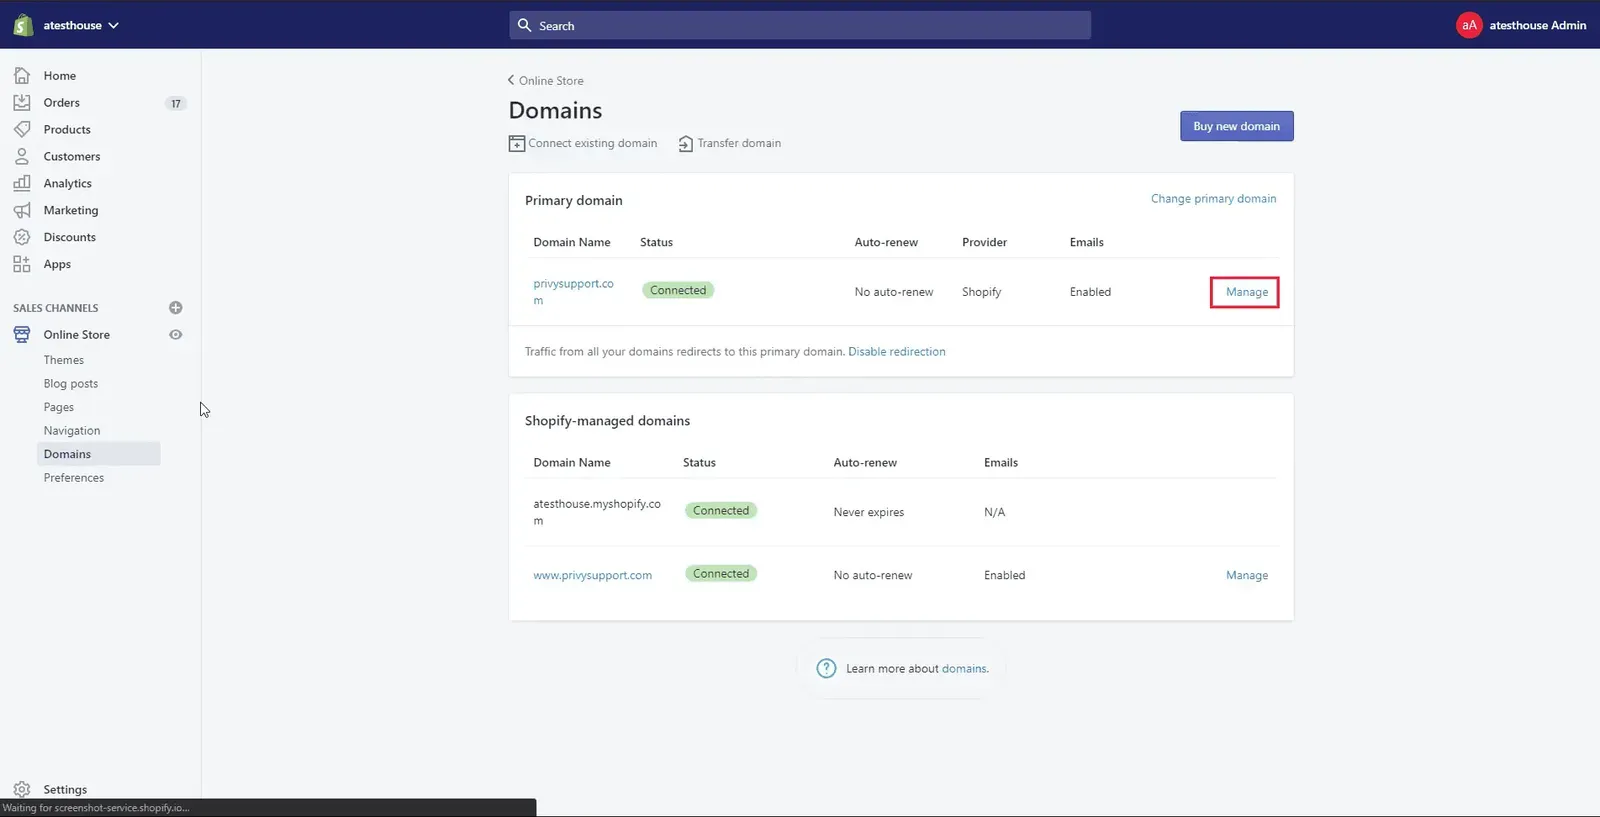
The Domains page, with Manage boxed next to the domain row in the Primary domain table. 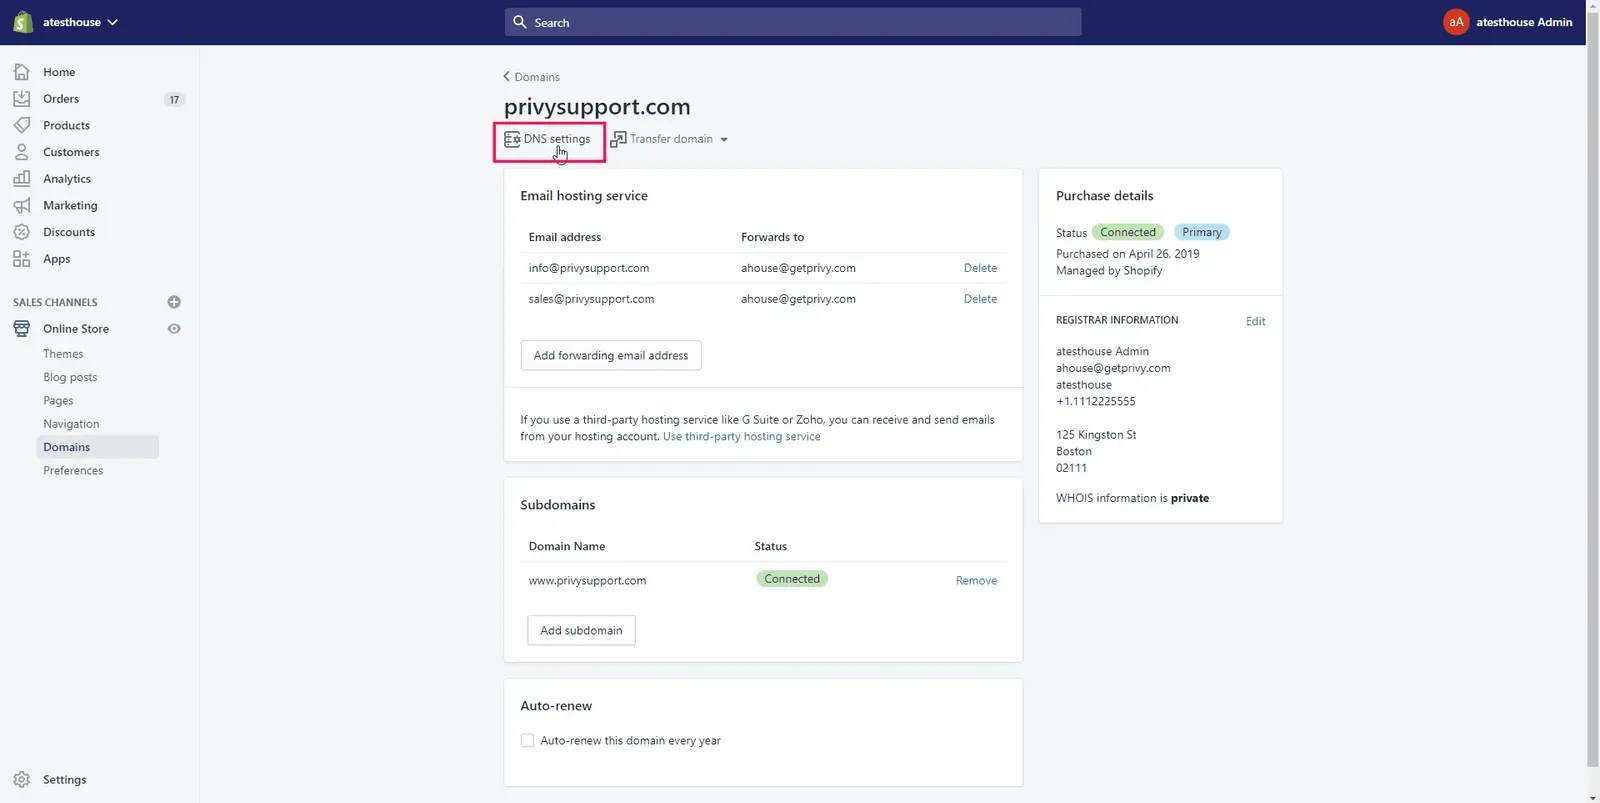
The domain's settings page, with DNS settings boxed. 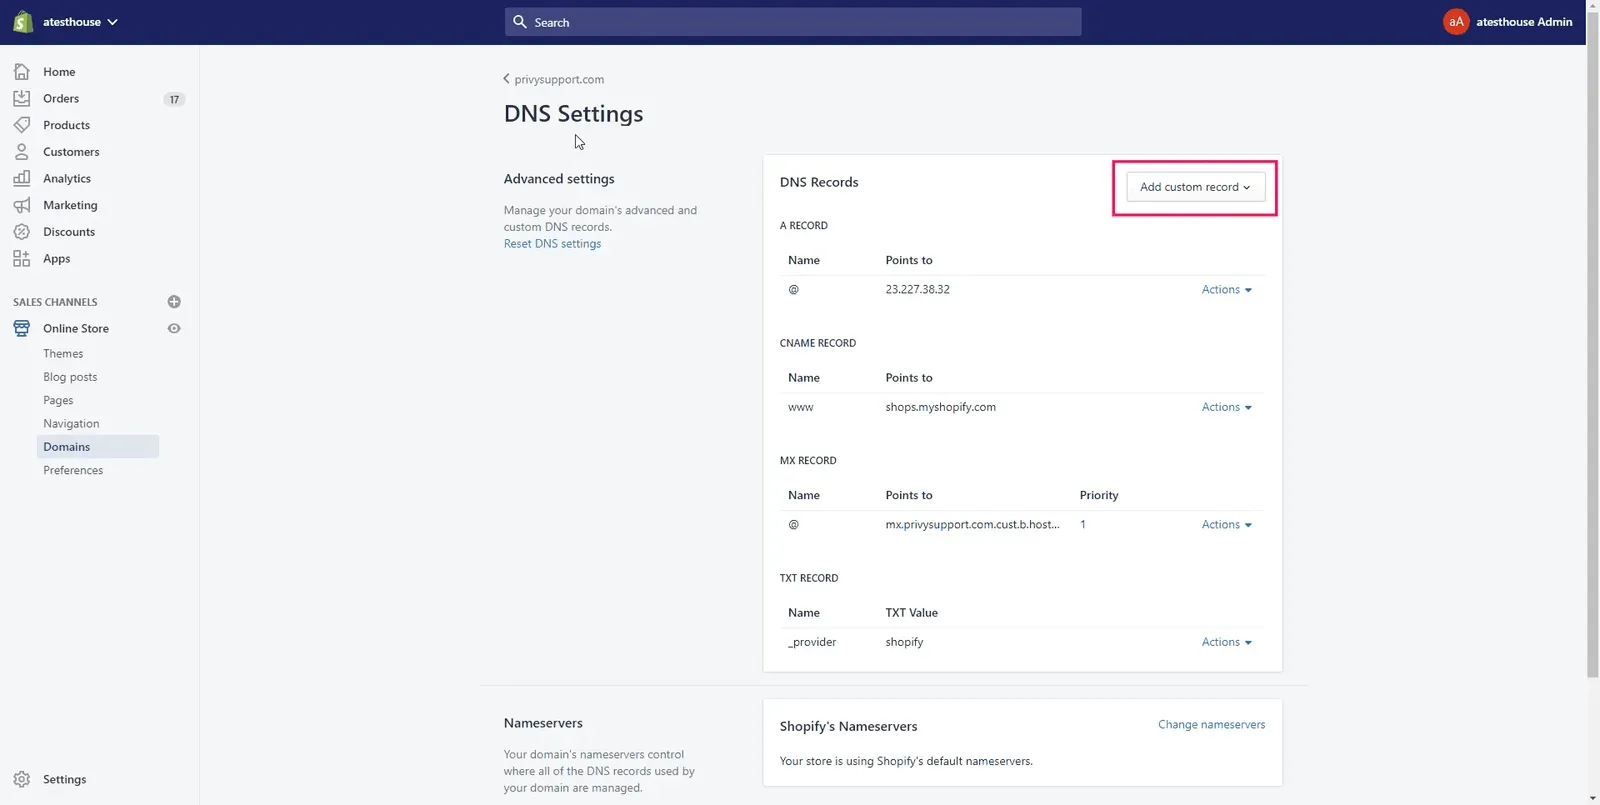
The DNS Settings page, with Add custom record boxed above the DNS Records list. 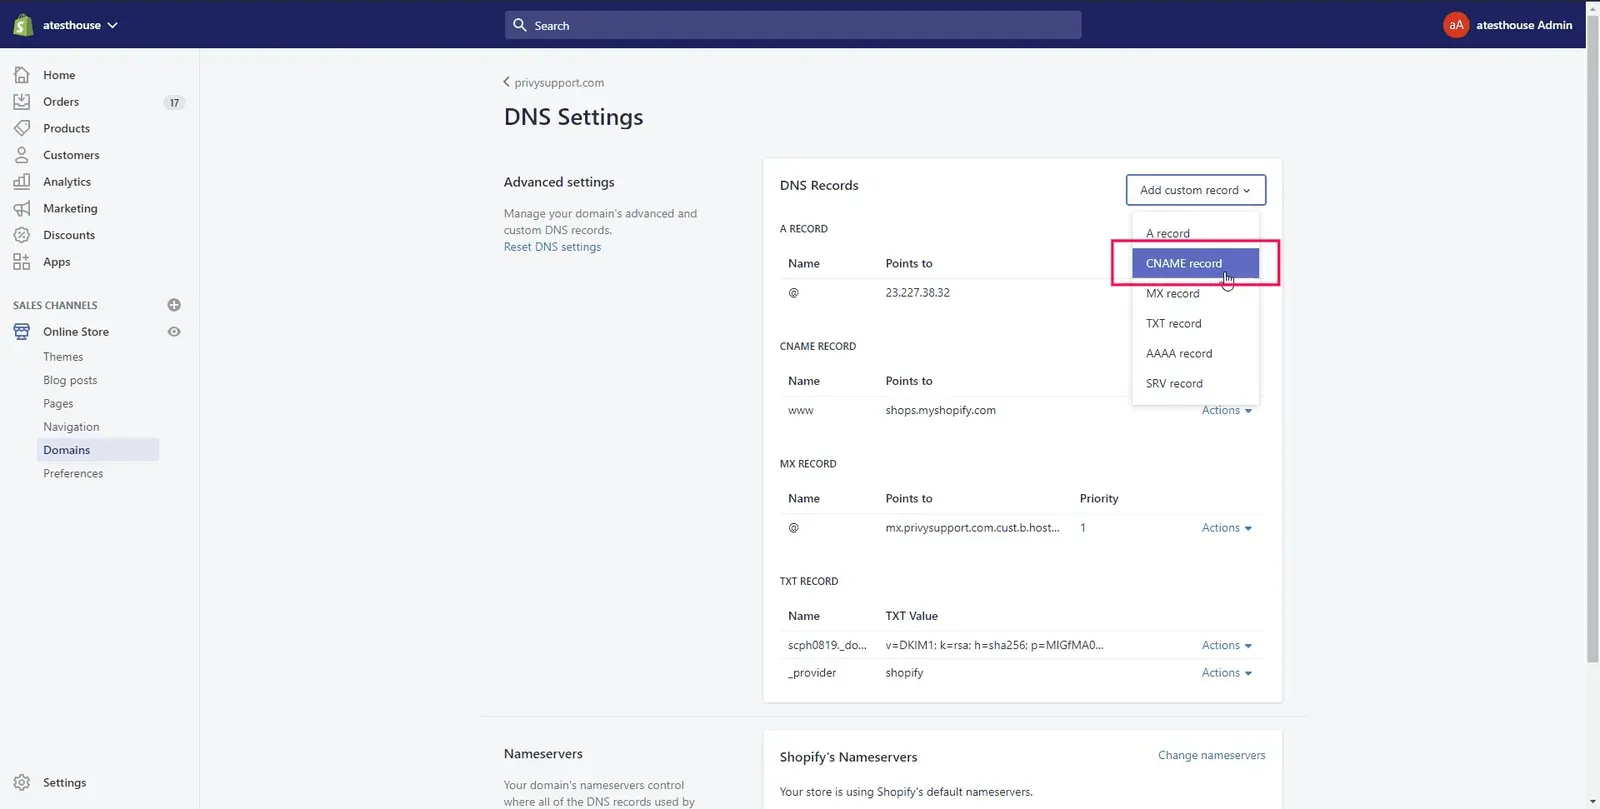
The Add custom record list open, with CNAME record highlighted. 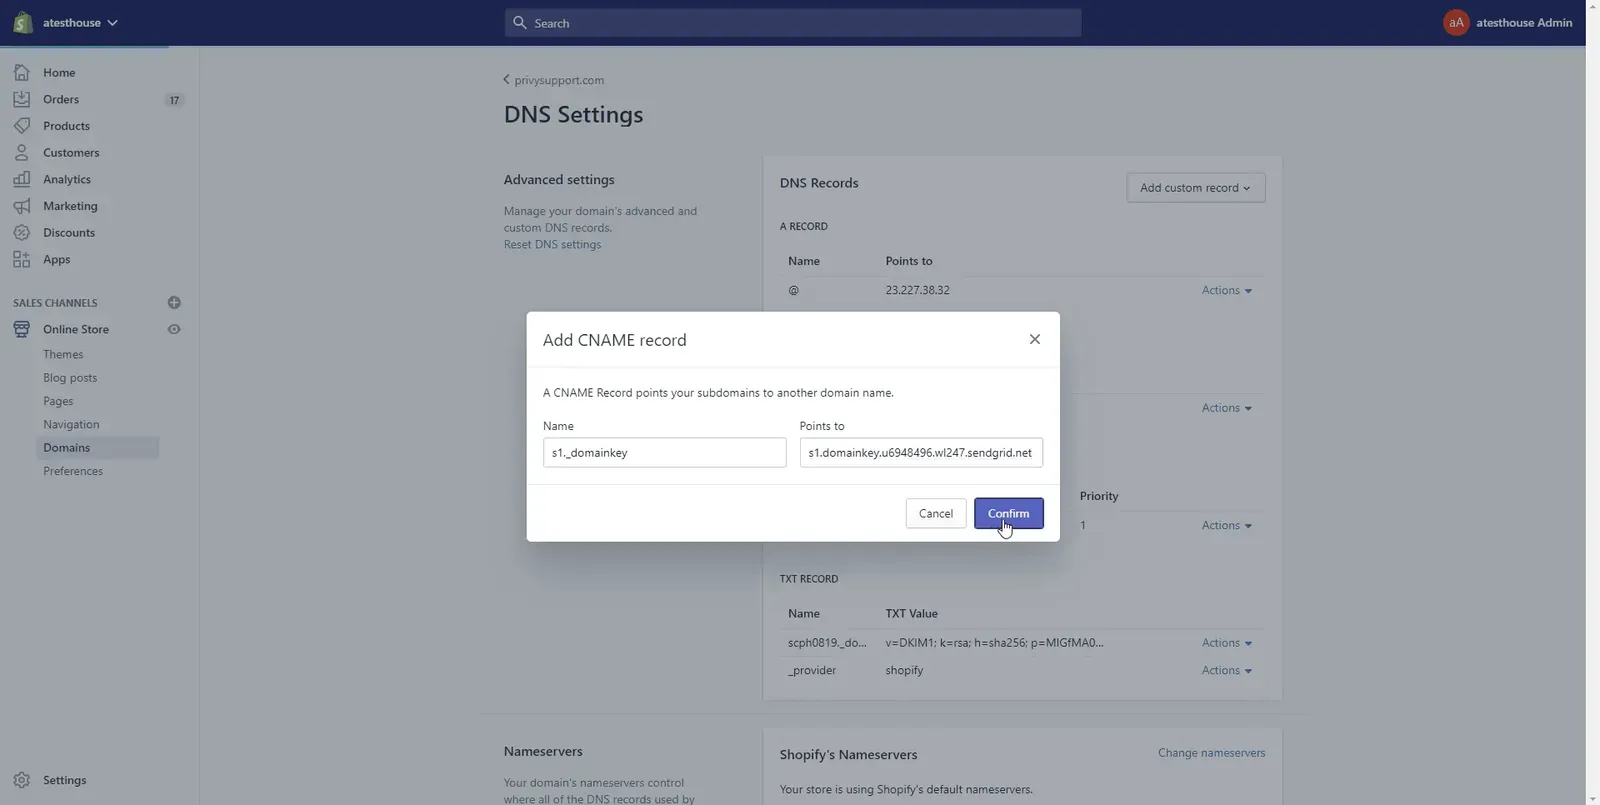
The Add CNAME record dialog, with the Name and Points to fields filled in and Confirm at the bottom right. 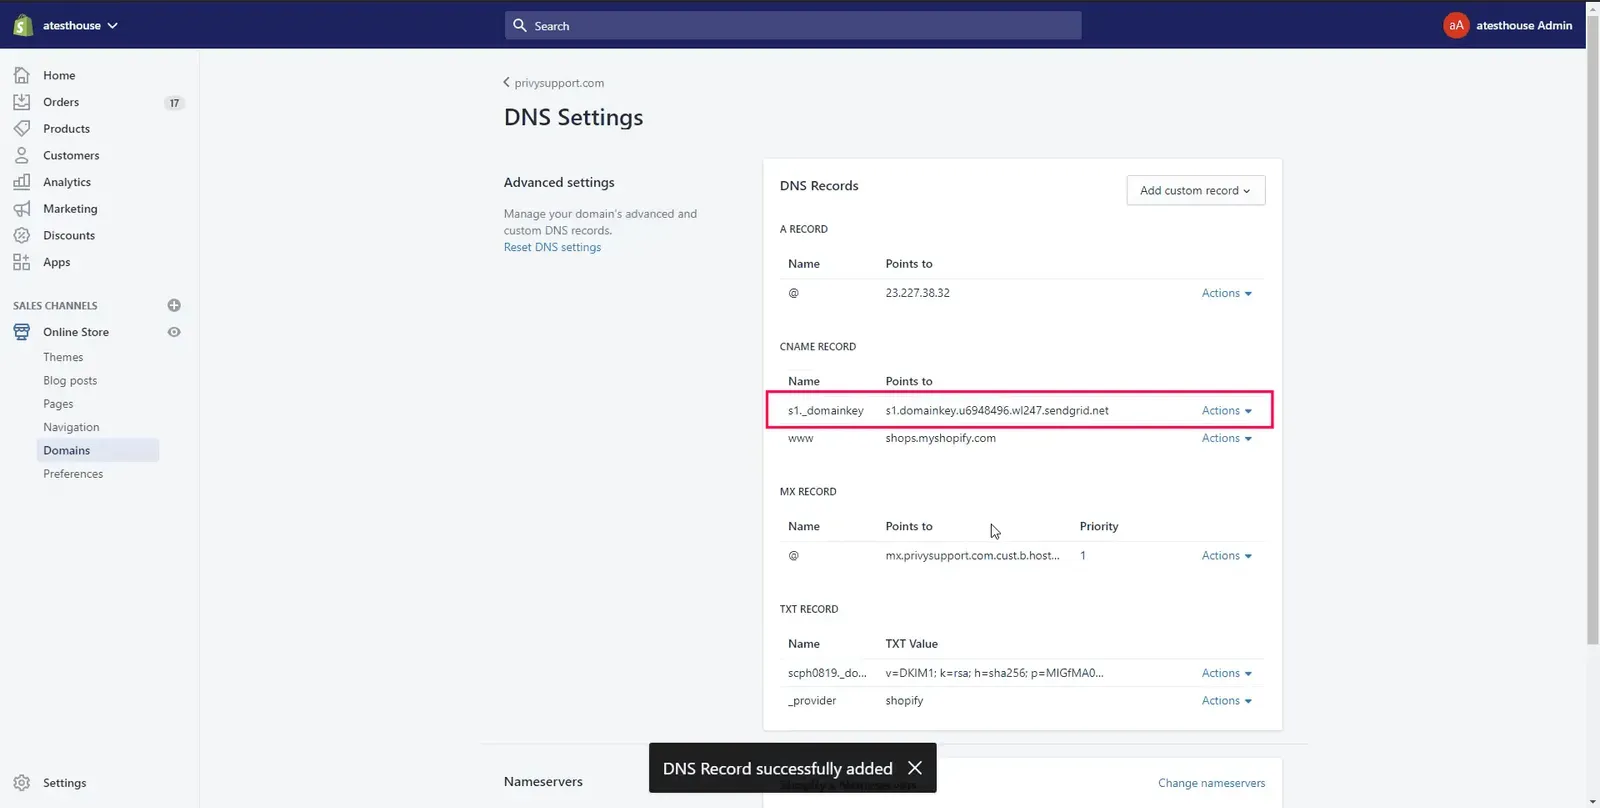
The DNS Records list after saving, with the new CNAME record row boxed and the DNS Record successfully added notice.