
Add DNS records at CloudAccess.net
These are the steps for CloudAccess.net. For what the records do and how to check the setup afterwards, see Subdomain setup.
Datahash tells you which record type to use and gives you the values. Follow the matching section below and enter the values you were given.
Adding NS records
Section titled “Adding NS records”-
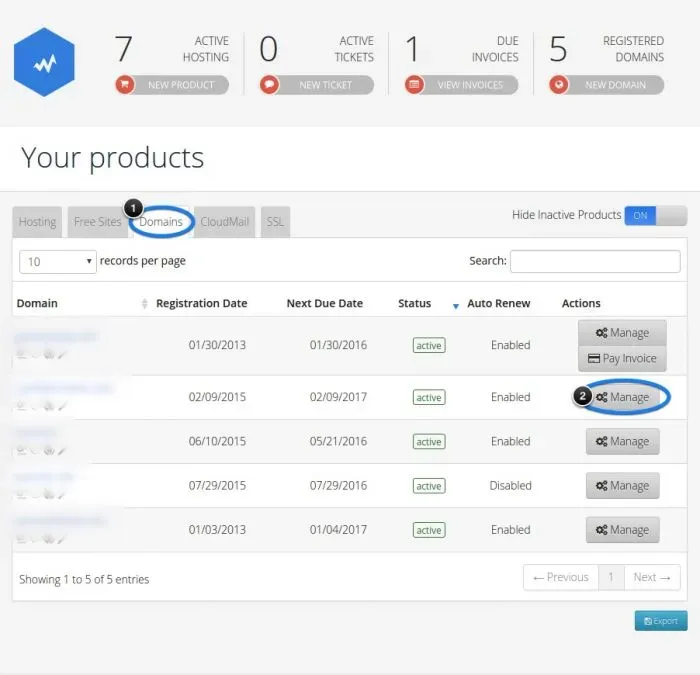
Sign in to your Cloud Control Panel and click the Domains tab.
-
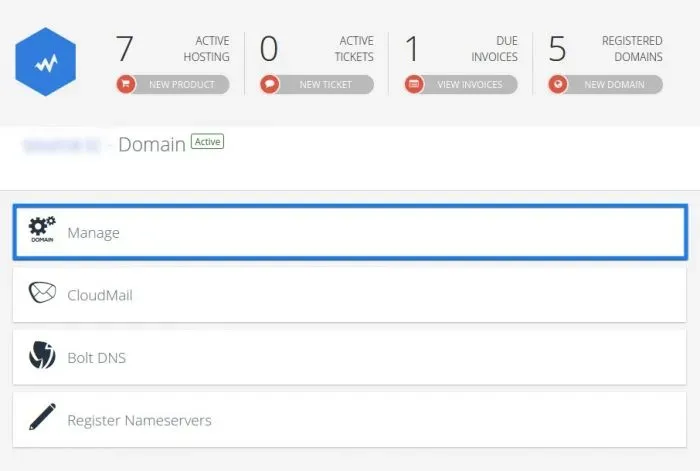
Find the domain and click Manage, then Manage again on the next page.
-
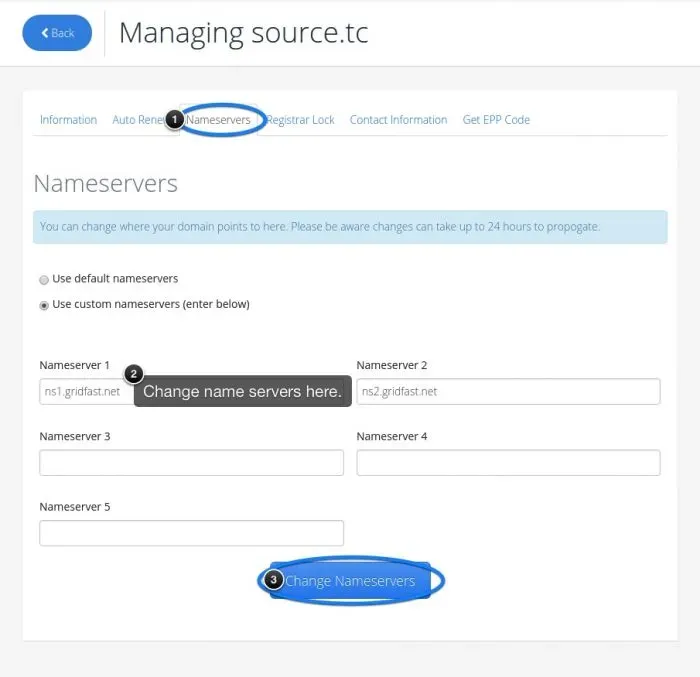
On the Managing page, click the Nameservers tab.
-
Enter one nameserver value and click Change Nameservers.
You will have been given four nameserver values. Repeat the last two steps until all four records exist. A delegation with one of the four missing looks complete on the Nameservers tab and does not resolve.
NS record walkthrough3 screenshots
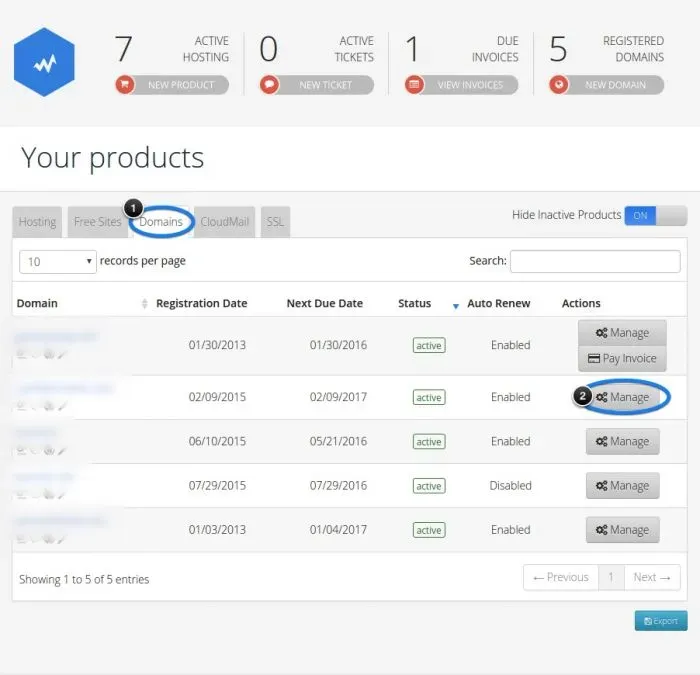
Your products, with hand-drawn blue ellipses numbered 1 and 2 around the Domains tab and the Manage button on a domain row. The domain names in the list are blurred. 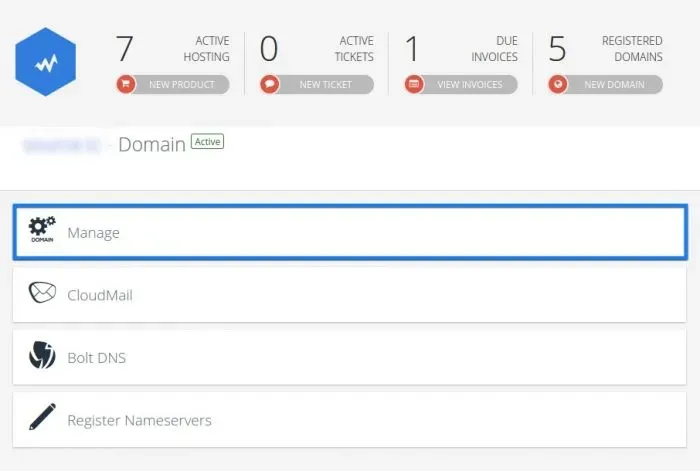
The domain menu, with the Manage tile boxed in blue above CloudMail, Bolt DNS and Register Nameservers. The domain name at the top is blurred. 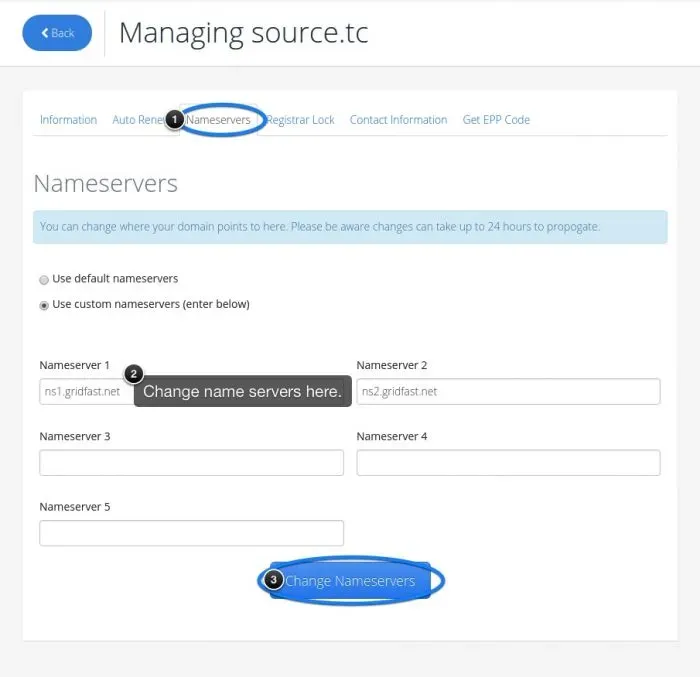
The Nameservers tab of the page headed Managing source.tc, with a hand-drawn blue ellipse around the tab, a black tooltip reading Change name servers here pointing at Nameserver 1, and a second ellipse around Change Nameservers below the five nameserver fields.
Adding a CNAME record
Section titled “Adding a CNAME record”-
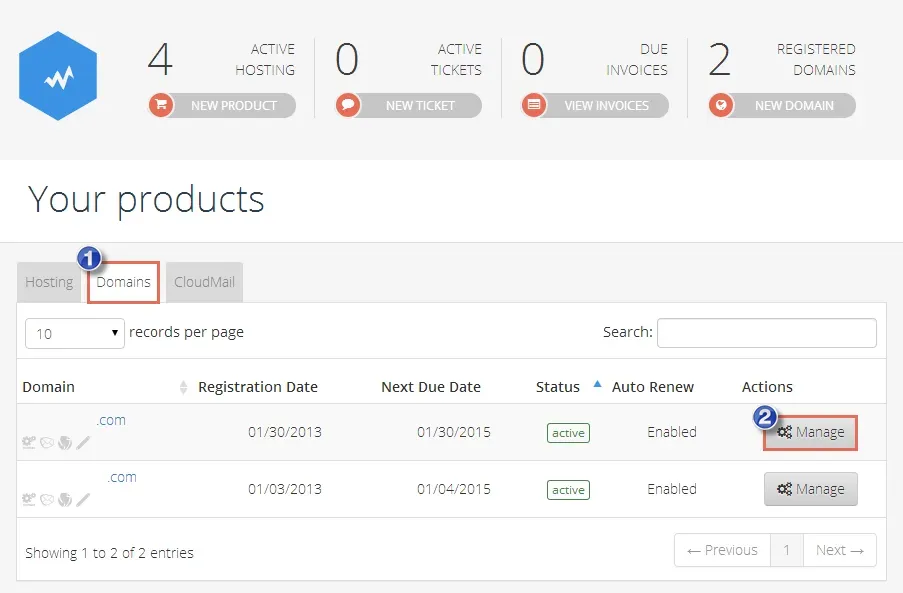
Sign in to the Cloud Control Panel, click the Domains tab under Your products and click Manage for the domain.
-
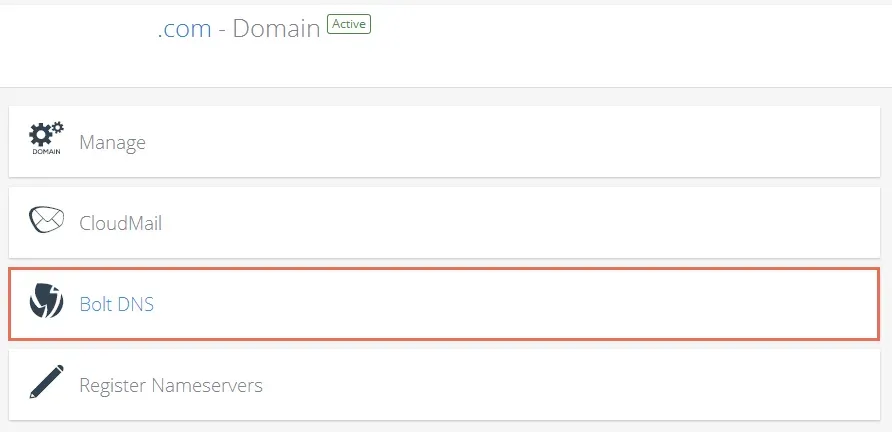
Click the Bolt DNS option.
-
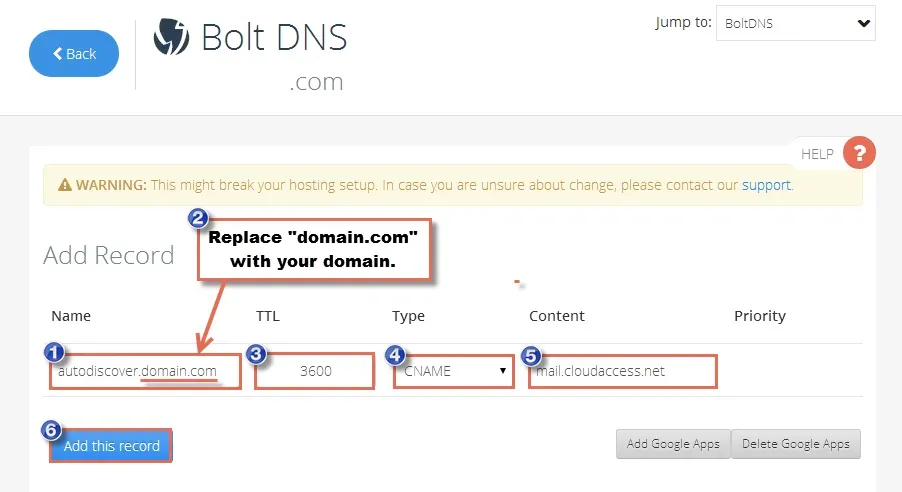
Choose CNAME as the type, paste the value you were given, and click Add this record.
-
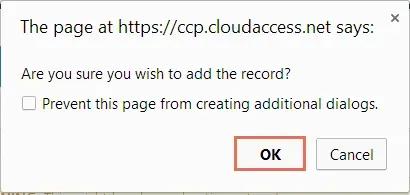
Confirm when asked, by selecting Ok.
CNAME record walkthrough5 screenshots
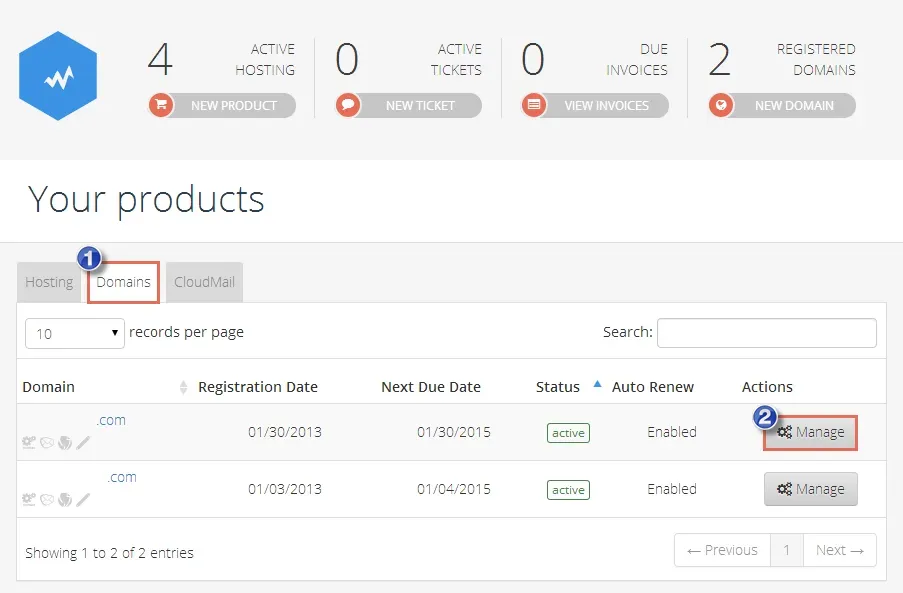
Your products, with the Domains tab and Manage on a domain row boxed in red and numbered 1 and 2. The domain names are whited out, leaving only the .com suffix. 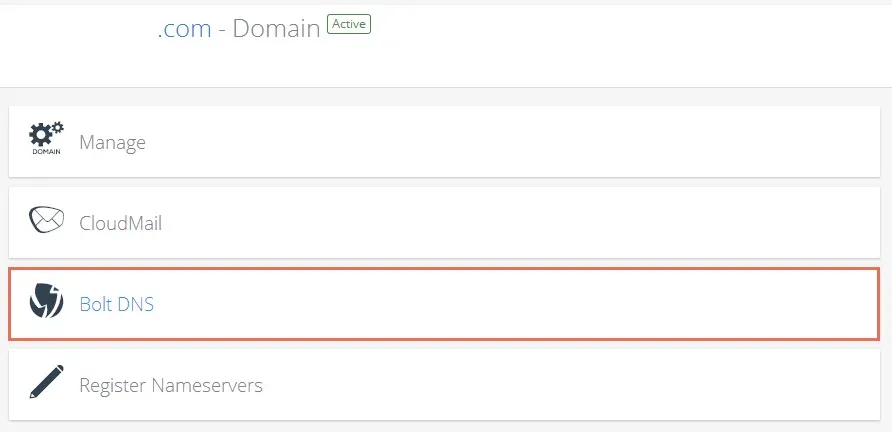
The domain menu, with Bolt DNS boxed in red between CloudMail and Register Nameservers. The domain name at the top is whited out, leaving only .com. 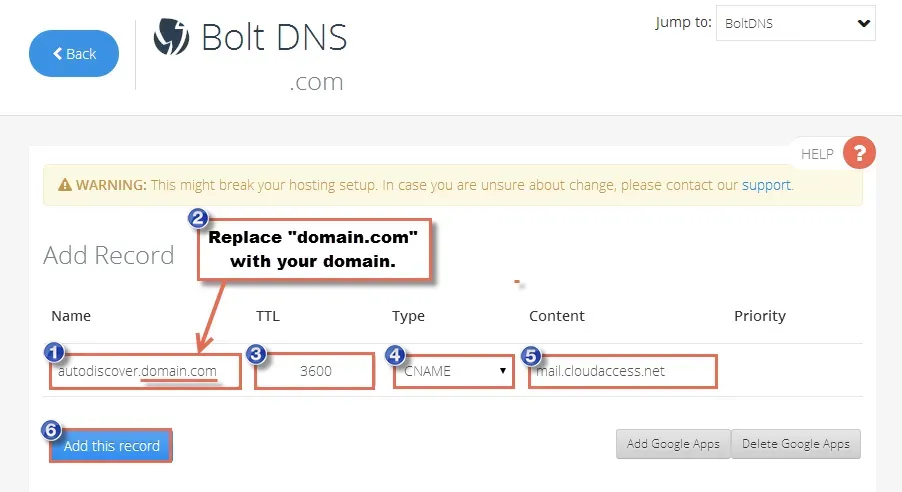
The Bolt DNS Add Record form under a warning that a change might break the hosting setup, with a red callout reading Replace "domain.com" with your domain, and the Name, TTL, Type and Content fields and Add this record each boxed in red and numbered 1 to 6. 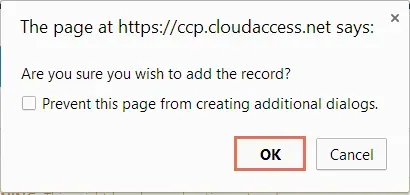
The browser confirmation dialog asking whether to add the record, with OK boxed in red beside Cancel. 
The Information dialog shown after saving, reading Completed successfully.