
Add DNS records at HostGator
These are the steps for HostGator. For what the records do and how to check the setup afterwards, see Subdomain setup.
Datahash tells you which record type to use and gives you the values. Follow the matching section below and enter the values you were given.
Both record types start the same way in HostGator, so these screenshots cover either one.
Getting to the DNS records panel3 screenshots
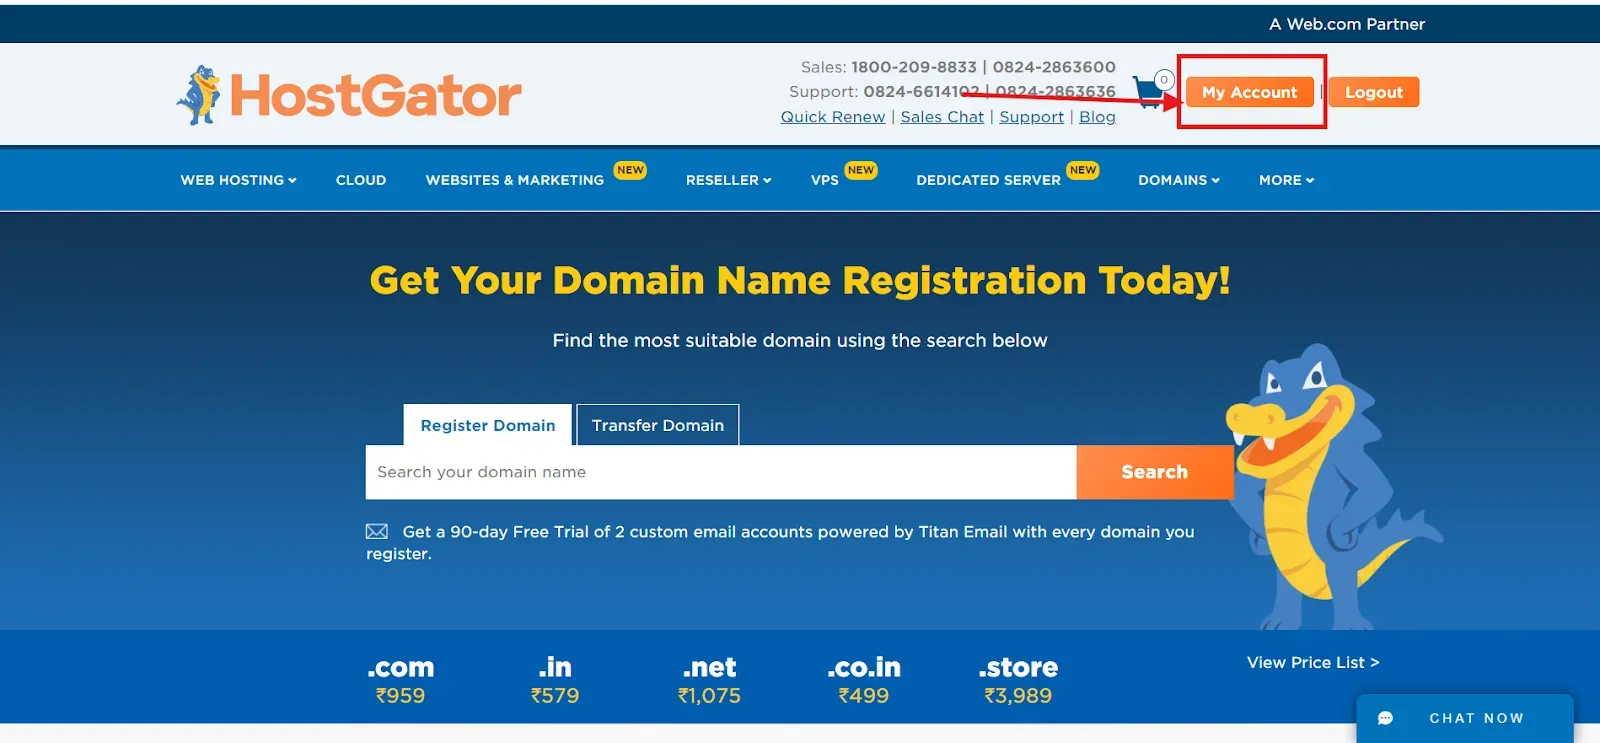
The HostGator home page while signed in, with My Account boxed in red at the top right and a red arrow pointing at it. 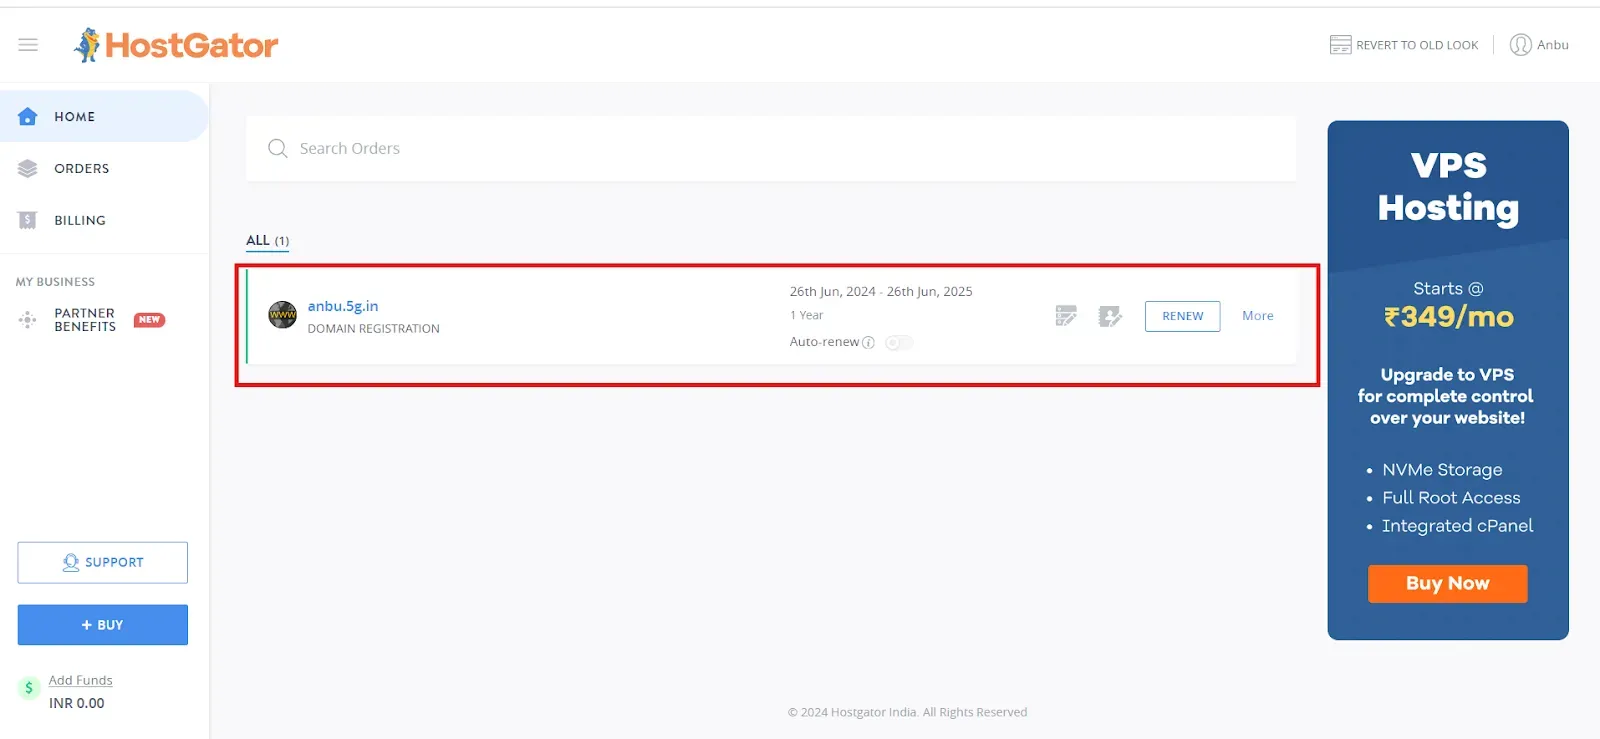
Orders, with the domain registration row boxed in red. 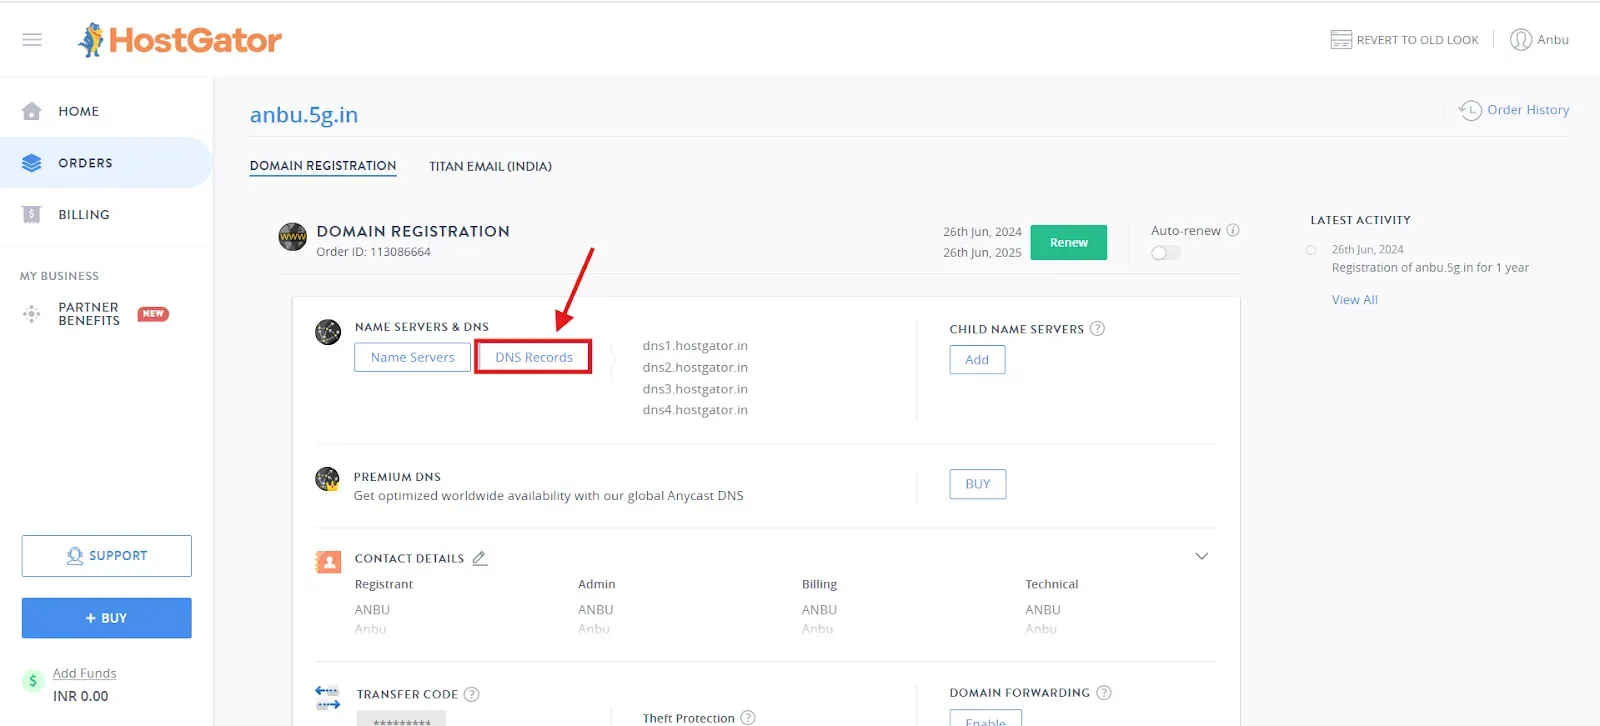
The order details page for the domain, with DNS Records boxed in red under Name Servers & DNS and a red arrow pointing at it, beside the four HostGator nameservers currently in use.
Adding NS records
Section titled “Adding NS records”-
Sign in to HostGator and go to My Account.
-
Click the domain you are configuring.
-
Click DNS records.
-
Choose NS as the record type, enter the record name and one nameserver value, and save.
You will have been given four nameserver values. Repeat the last two steps until all four records exist. A delegation with one of the four missing looks complete in DNS records and does not resolve.
NS record walkthrough1 screenshot
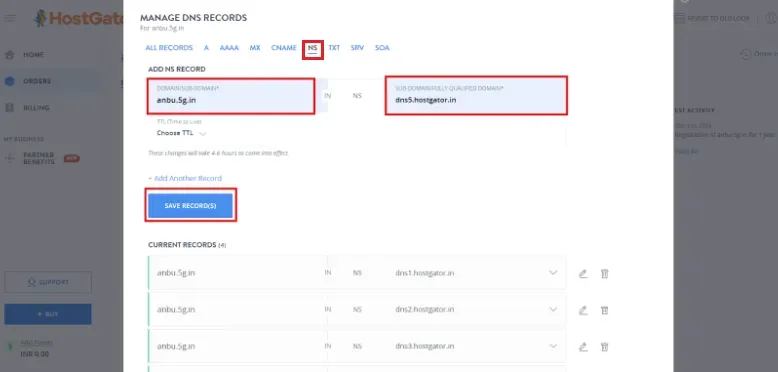
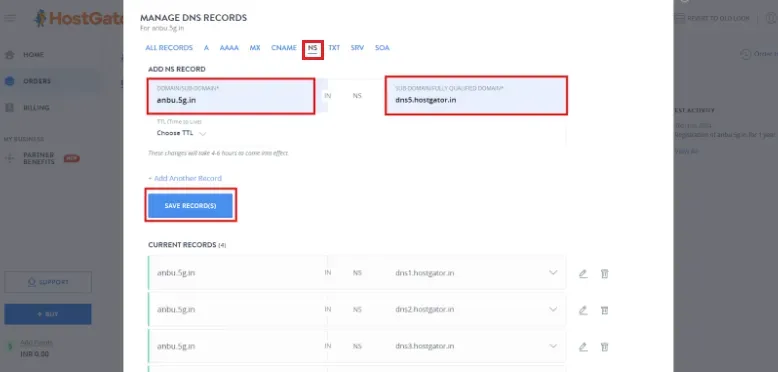
The NS tab of Manage DNS Records boxed in red, with the Add NS Record name and fully qualified domain fields and Save Record(s) boxed too, above the four current NS records.
Adding a CNAME record
Section titled “Adding a CNAME record”-
Sign in to HostGator, go to My Account and click the domain.
-
Click DNS records.
-
Choose CNAME as the record type and paste the value you were given.
-
Submit the record.
CNAME record walkthrough1 screenshot
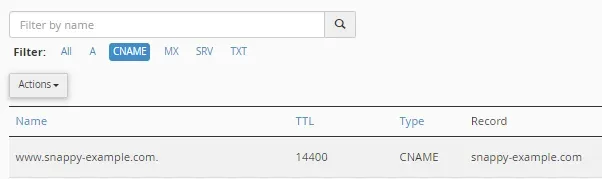
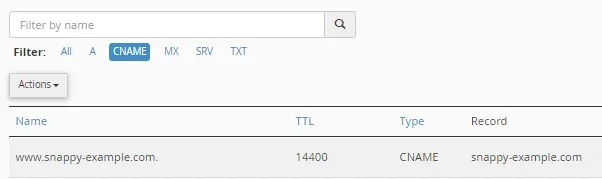
The records list filtered to CNAME, showing one saved CNAME row with its name, a TTL of 14400 and its target under Record.