
Add DNS records at Etisalat
These are the steps for Etisalat. For what the records do and how to check the setup afterwards, see Subdomain setup.
Datahash tells you which record type to use and gives you the values. Follow the matching section below and enter the values you were given.
Adding NS records
Section titled “Adding NS records”-
Sign in to the Etisalat domain dashboard.
-
Search for the domain and click MANAGE.
-
Click Edit under Name Server.
-
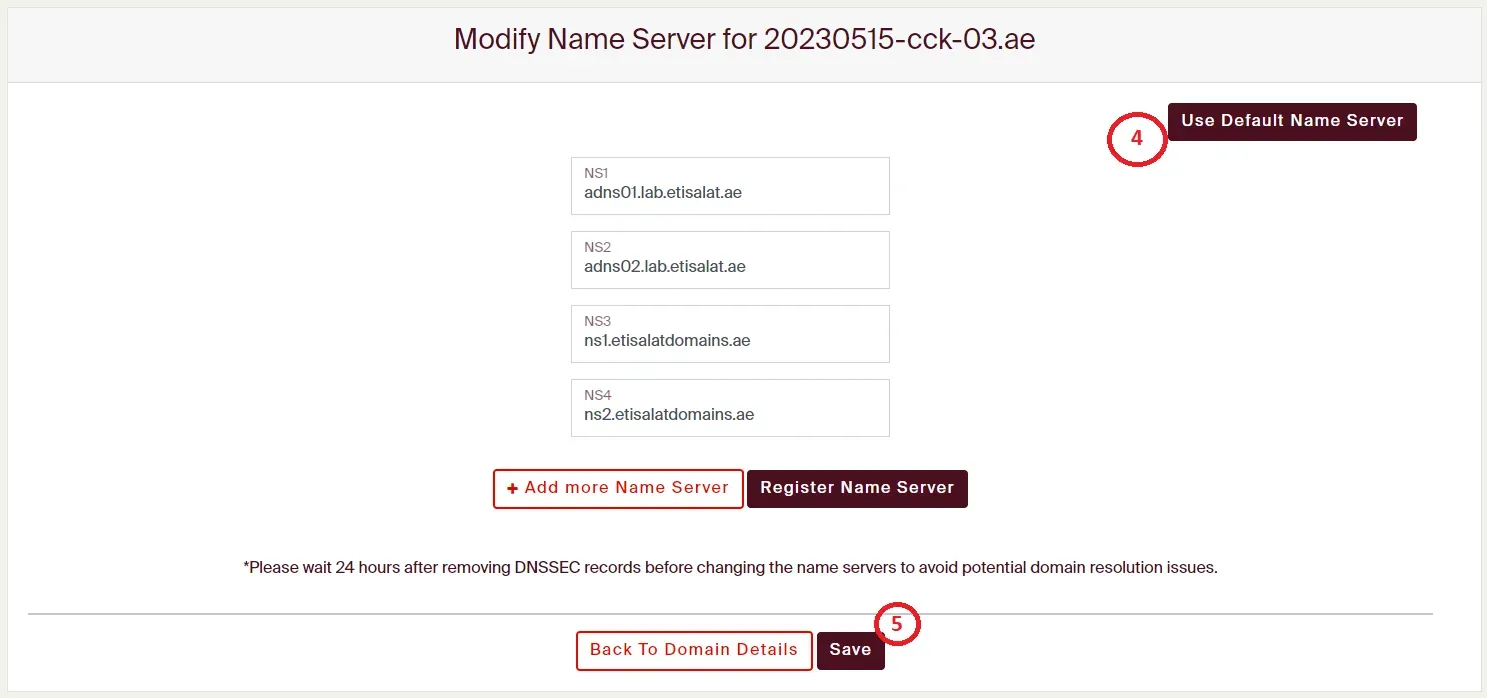
Enter one nameserver value and click Save.
You will have been given four nameserver values. Repeat the last two steps until all four records exist. A delegation with one of the four missing looks complete under Name Server and does not resolve.
NS record walkthrough4 screenshots
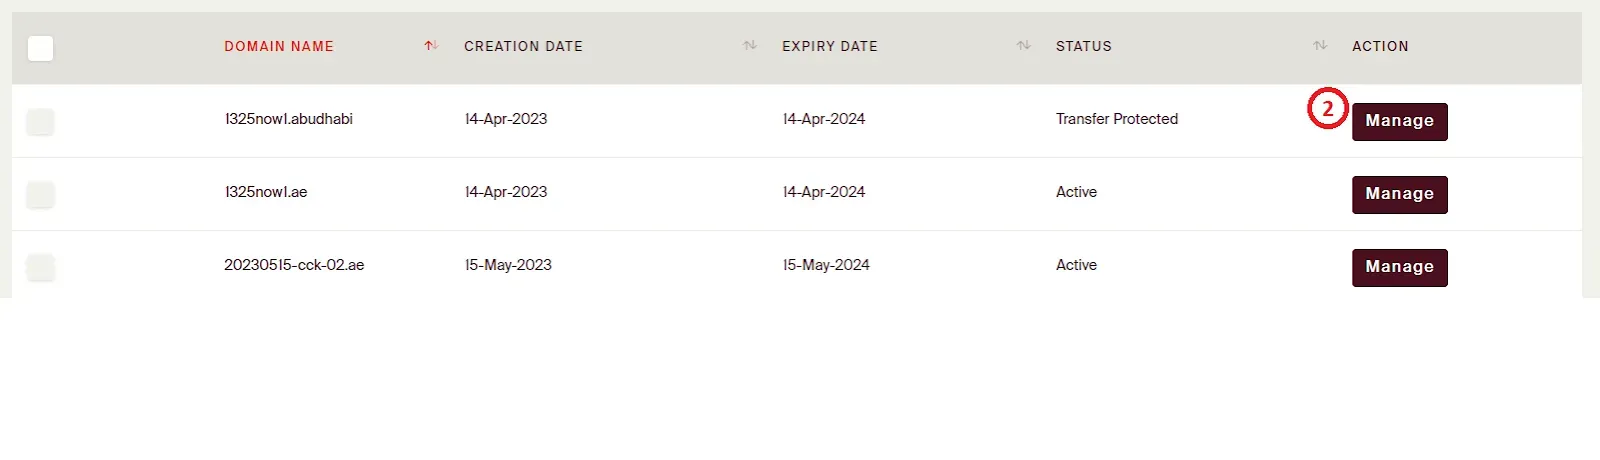
The domain list, with a red 2 beside Manage on the first domain row. 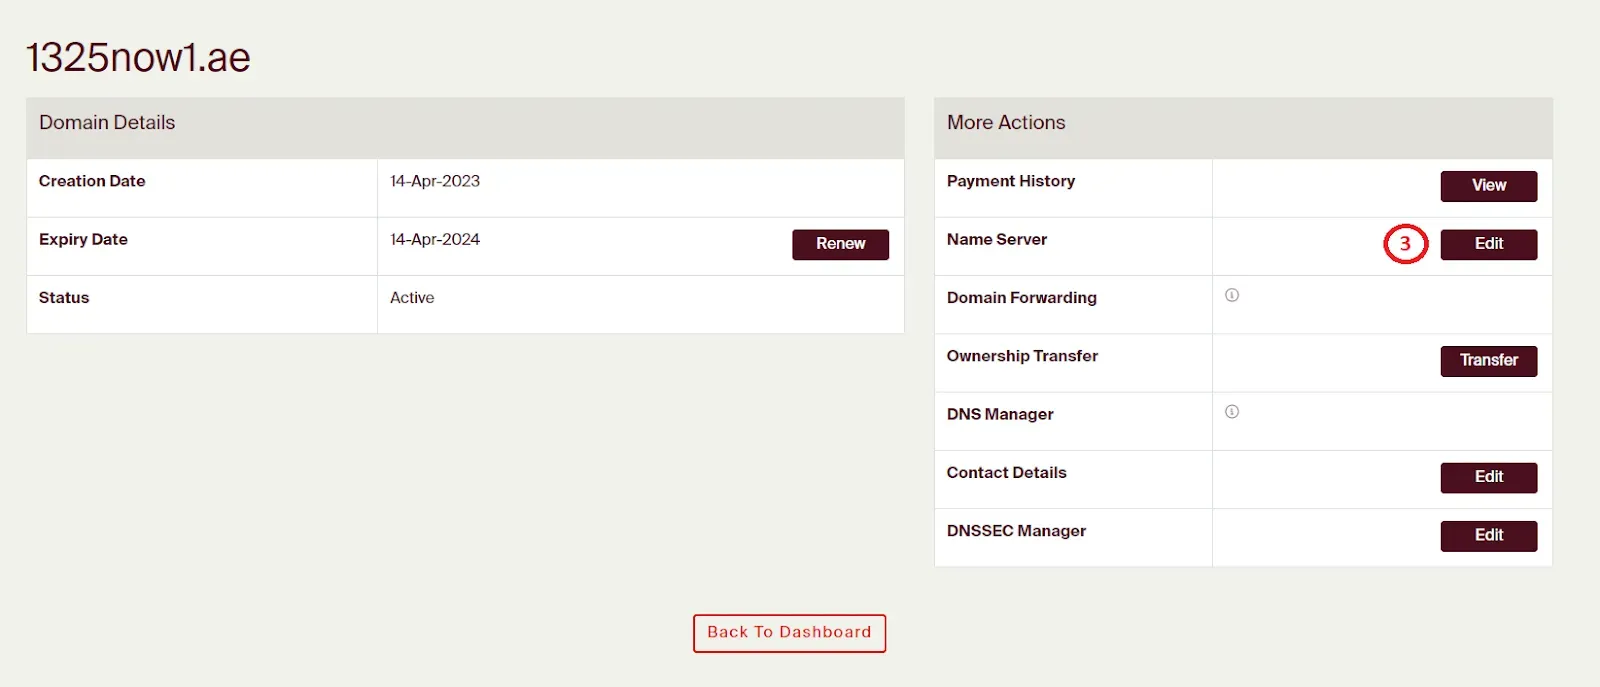
The domain details page, with a red 3 beside Edit on the Name Server row under More Actions, and Back To Domain Details outlined in red at the bottom. 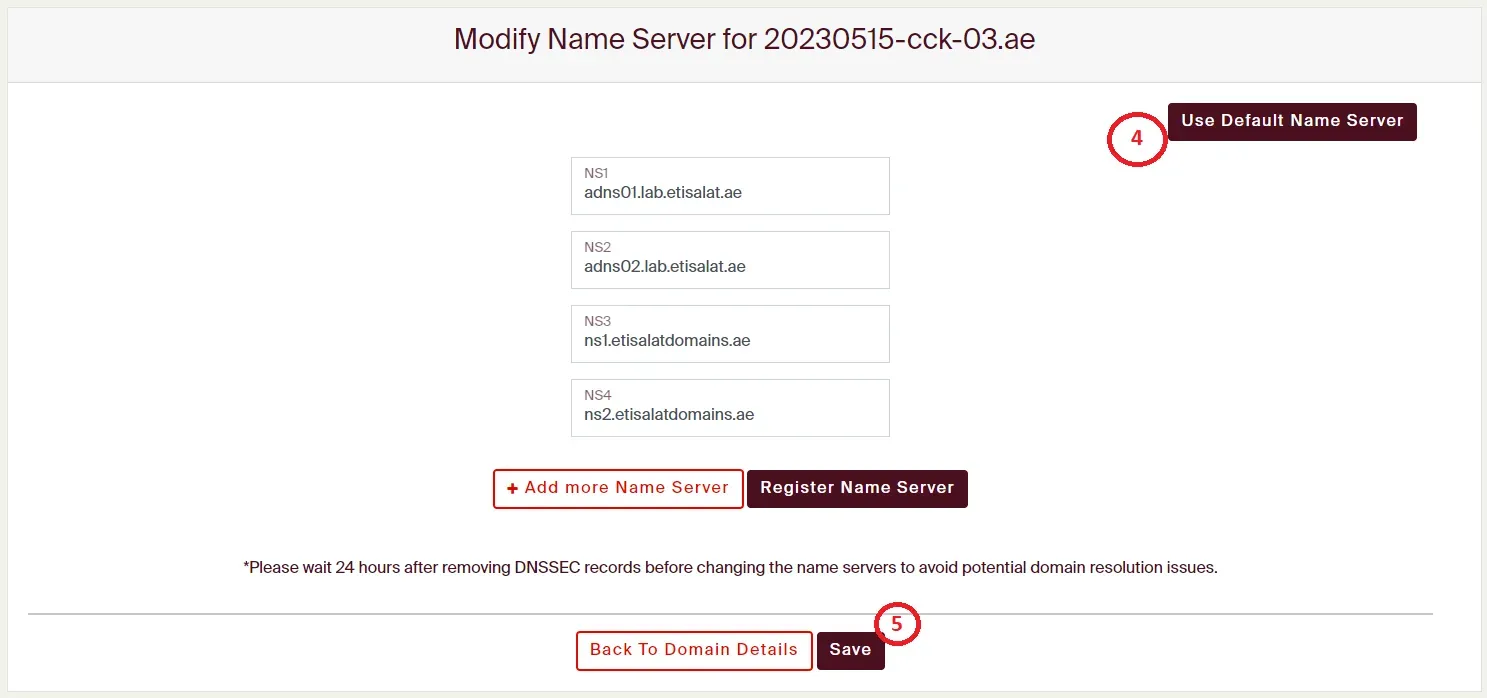
The Modify Name Server page, with the four NS fields prefilled with Etisalat nameservers, a red 4 beside Use Default Name Server and a red 5 beside Save, and + Add more Name Server and Back To Domain Details as the two controls outlined in red. 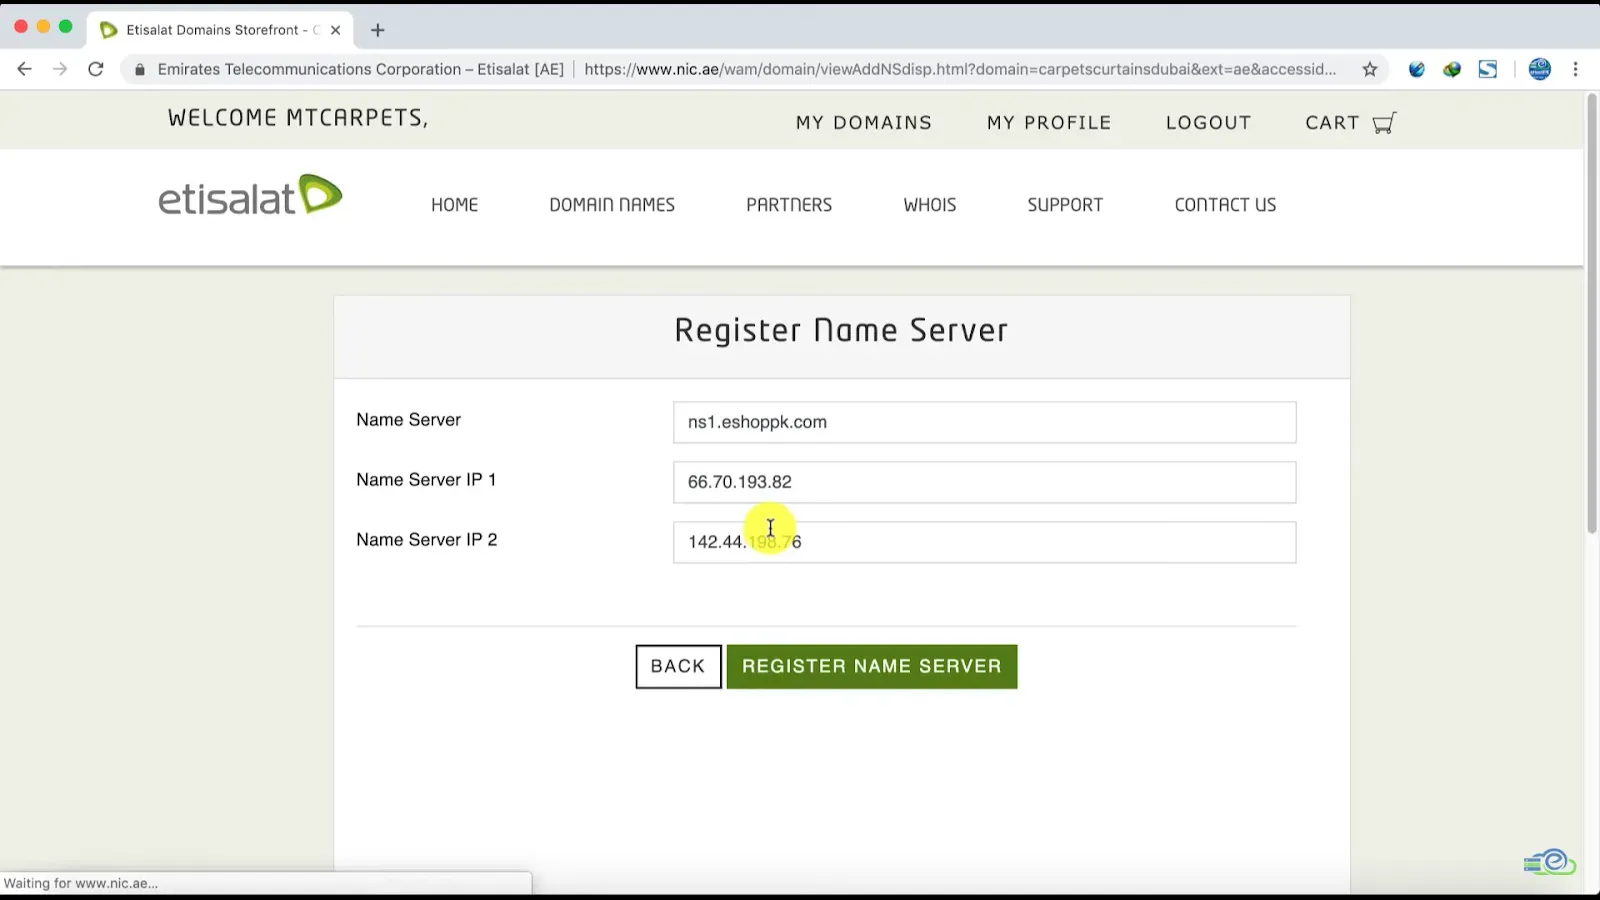
The Register Name Server page at `nic.ae`, a different Etisalat portal signed in to a different account and a different domain, with Name Server and two Name Server IP fields filled in above Register Name Server. This is the glue record flow, which the steps above do not use.
Adding a CNAME record
Section titled “Adding a CNAME record”-
Sign in to the Etisalat domain dashboard and click MANAGE for the domain.
-
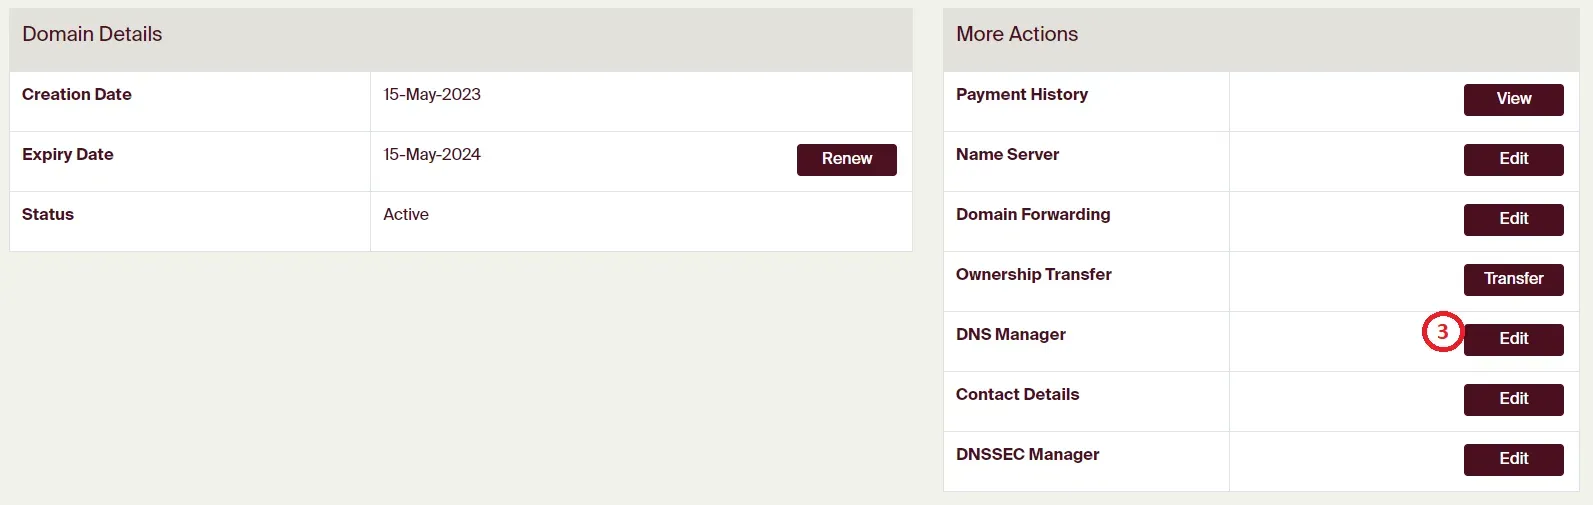
Click Edit under DNS Manager.
-
Click ADD MORE CNAME and paste the value you were given.
CNAME record walkthrough3 screenshots

The domain row on its own, with a red 2 beside Manage. 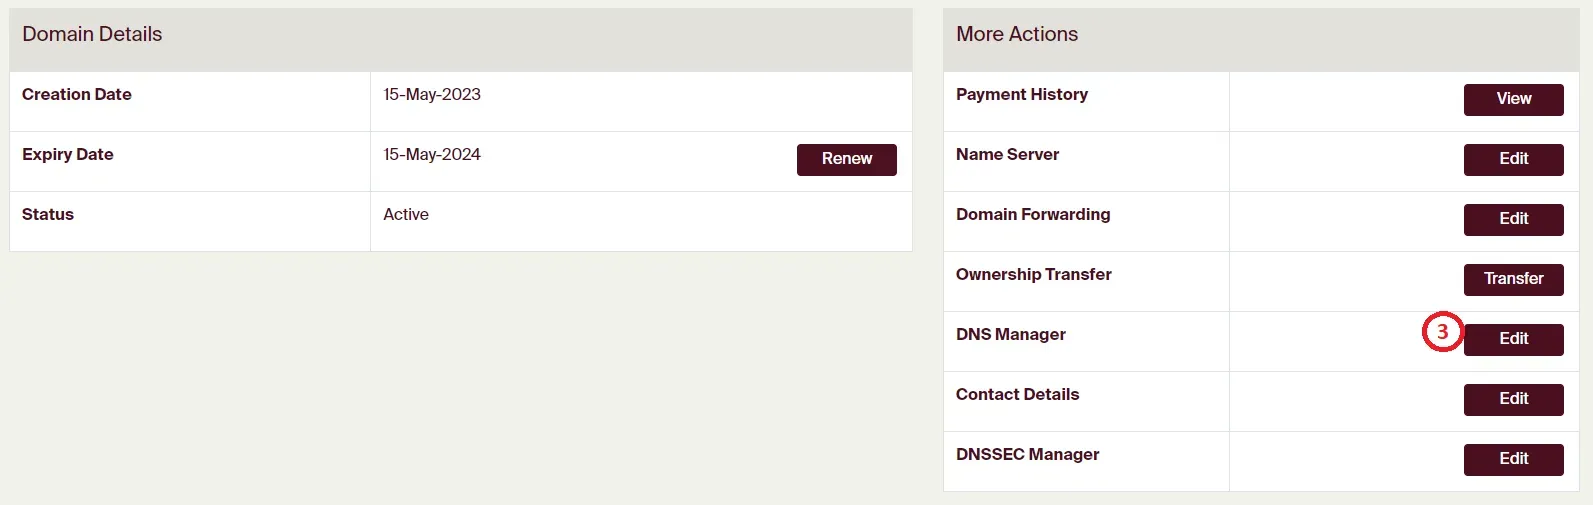
The domain details page, with a red 3 beside Edit on the DNS Manager row under More Actions. 
The CNAME (Aliases) table with one saved alias at a 3600 TTL, and red numbers 4, 5 and 6 on + Add more CNAME, Edit and Delete.