
Authorization:
Before starting the process, ensure that you have a Salesforce account set up, including a defined field to capture the Facebook (Meta) Lead ID in the Leads module. Once done, follow the steps below to integrate Salesforce with Taghash
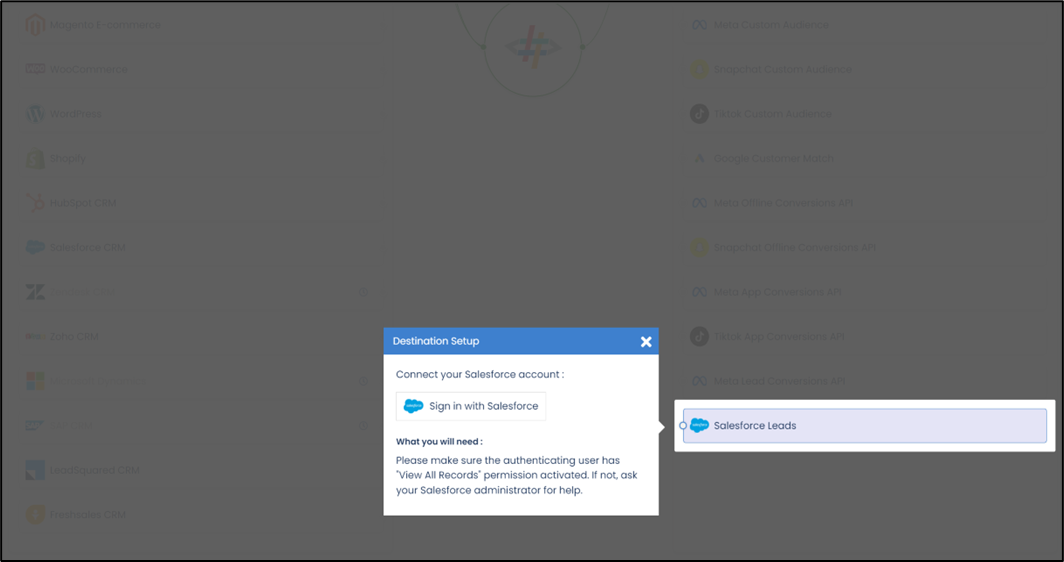
- Choose Salesforce Lead form as your destination connector and click on the “Sign in with Salesforce Single Sign-On” button to authorize the connection.
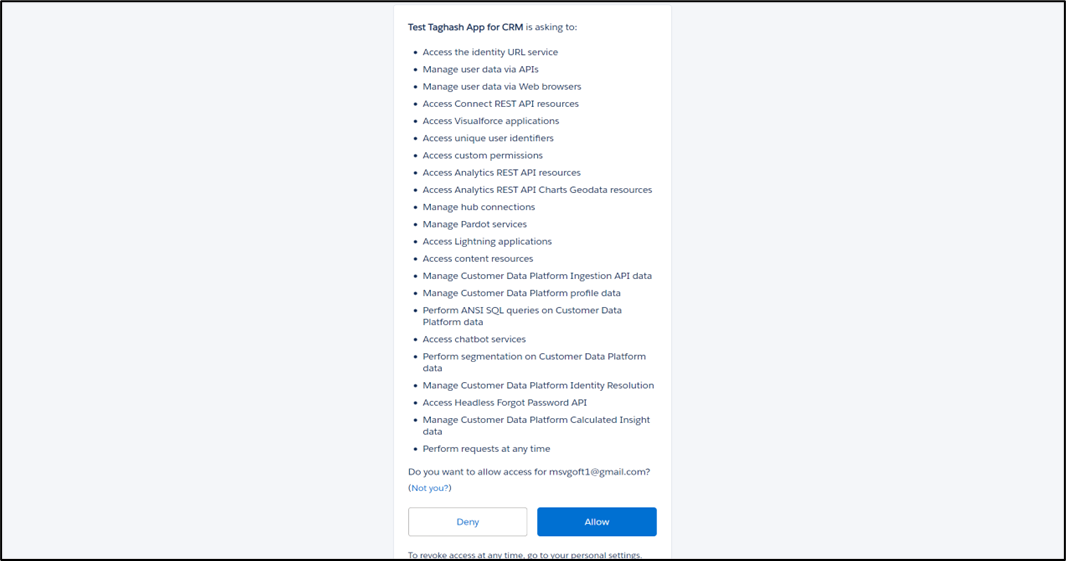
- Login to Salesforce with the account you want to integrate with and provide the necessary permissions to Taghash These permissions are basic and don’t include any data read, modification or PII information permissions.
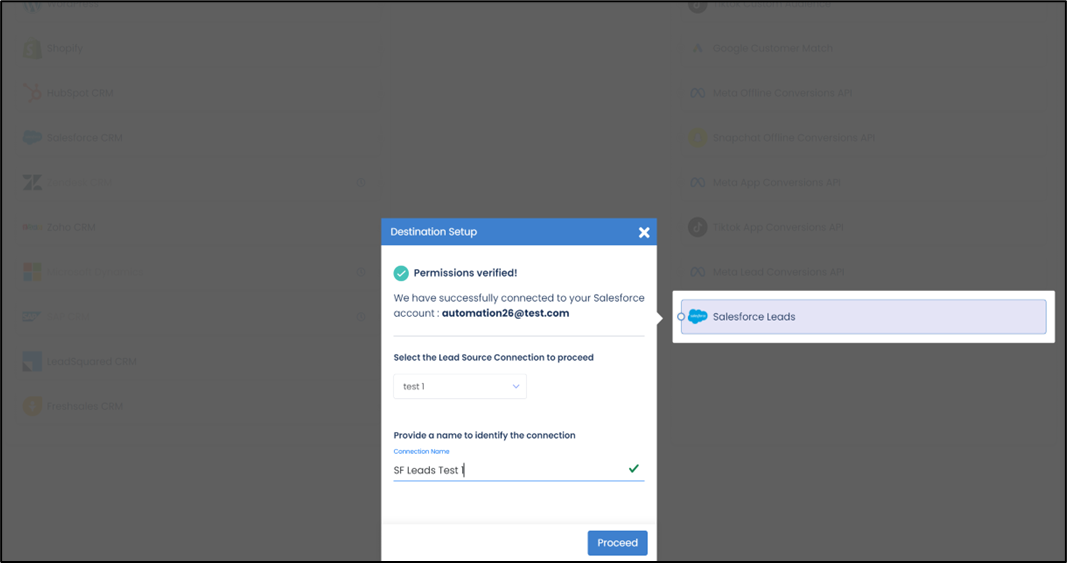
- Select the connection name you want to integrate and provide a name to it. This is the same connection name you have already connected in the Source connector (Meta Lead Form Source).Once selected, provide a name to this connection.
- Field Mapping: is a critical step in the process where you need to map your Meta Lead Form Fields with the respective Salesforce Schema Fields
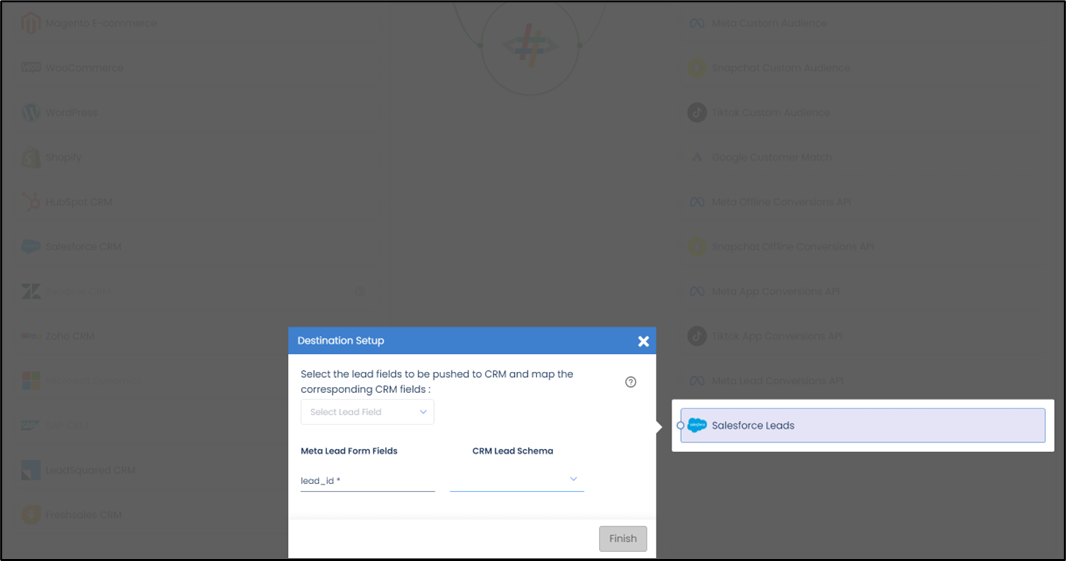
Ensure correct mapping to avoid any issues in the setup. You can map as many fields as required and mandatory mapping is the Meta Lead ID field.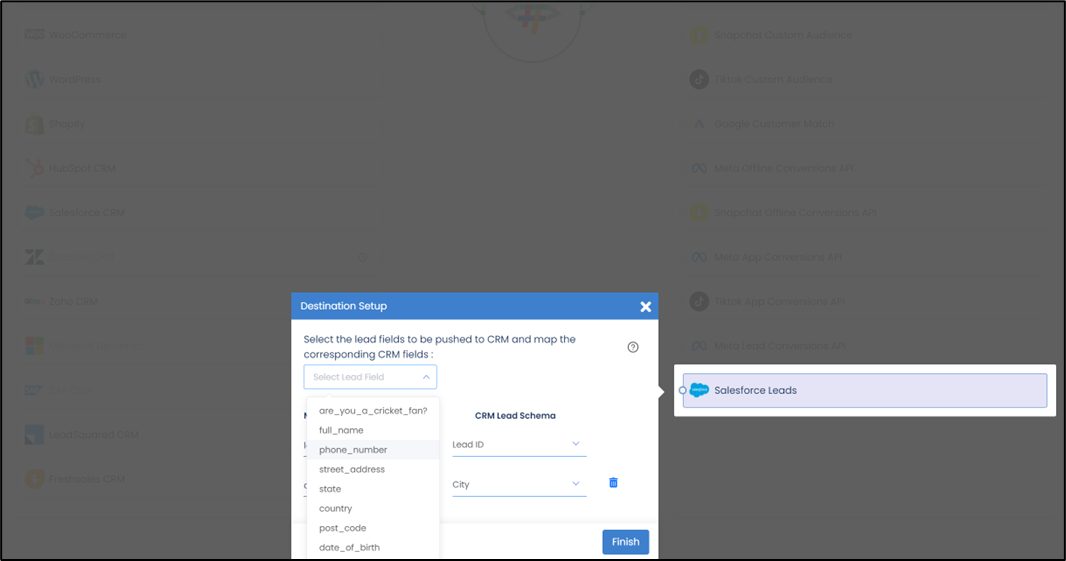
The Meta Lead ID field is the mandatory field which needs to be mapped in order to successfully complete the setup. Please ensure to also map any other mandatory field that is set-up in your CRM.
Once the Salesforce Lead Form Destination Connector setup is complete, you can start sending the data to your CRM.
Proceed to Part 2 to Connect CRM to Meta Conversion Leads to track lead status update events through Conversions API