
Prerequisites
- A LeadSquared account that is set-up to capture leads from Meta Lead Ads (Instant Forms)
- A custom field created in LeadSquared leads detail page that captures Meta Lead ID from Meta Lead Ads (Instant Forms). The Meta Lead ID field in the Leads module of LeadSquared should be either text or number (not decimal) data type.
- User ‘Access Key’ and ‘Secret Key’ to the LeadSquared account which has permissions to access Leads and API (for administrator profile no permission check required).
Minimum two lead life cycle stages/lead status configured in the CRM to be pushed to Conversion Leads
Implementation Steps on Datahash
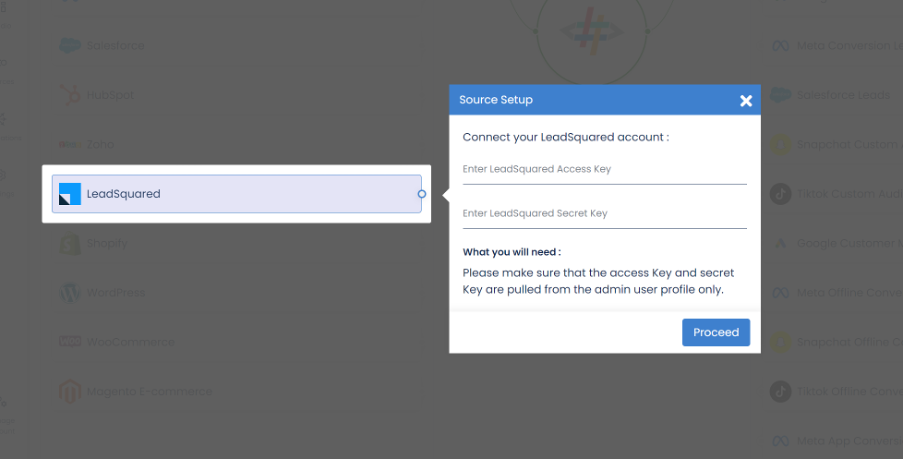
Step 1: Authorization
- Choose LeadSquared under source connector and enter the LeadSquared account “Access Key” and “Secret Key” to authorize the connection.
- Please make sure that necessary permissions are available to this user i.e. access to Leads and API (for administrator profile no permission check required). These permissions are basic and only include required data read permissions, no data modification or PII information permissions.
How to get API Key and Secret Key in Leadsquared
Step a: Login to your Leadsquared account. Click on the user icon available at top right corner and then click on settings.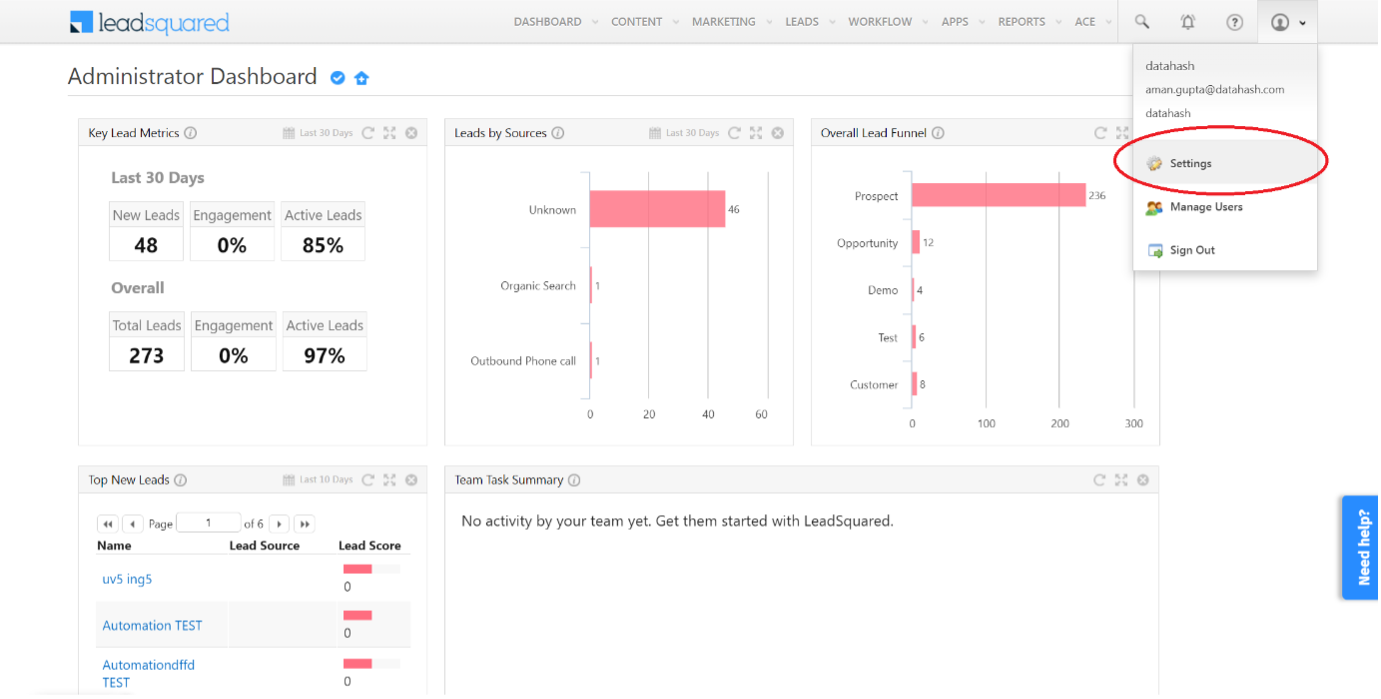
Step b: Now click on API and Webhooks in the left navigation menu.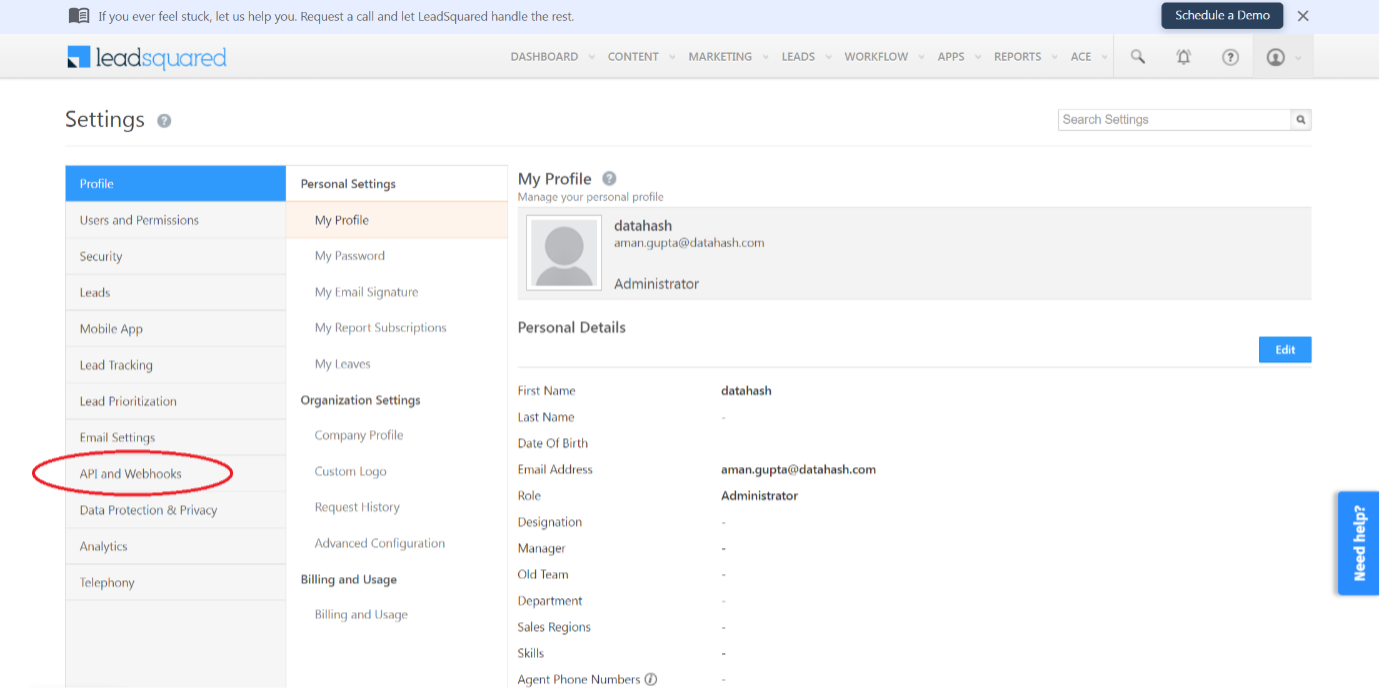
Step c: Click on the Show Secret Key CTA to view your Access Key and Secret key of the account.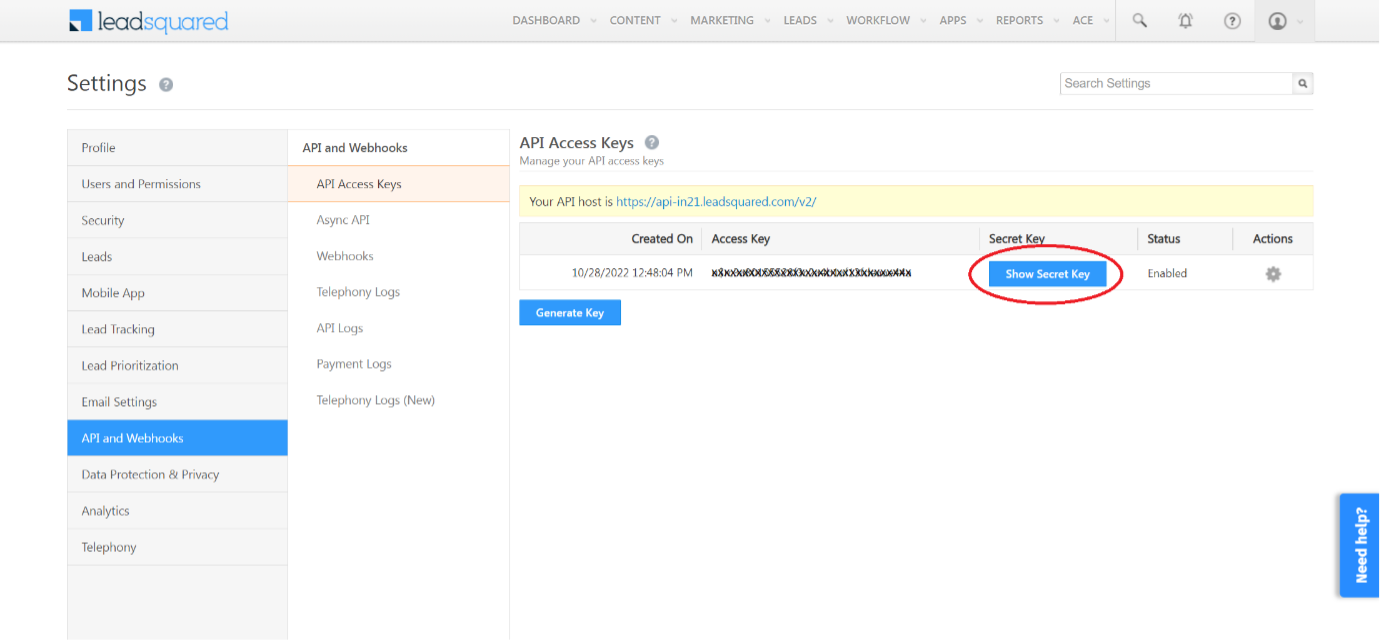
Step d: Copy and Paste the Access Key and Secret Key in the Datahash interface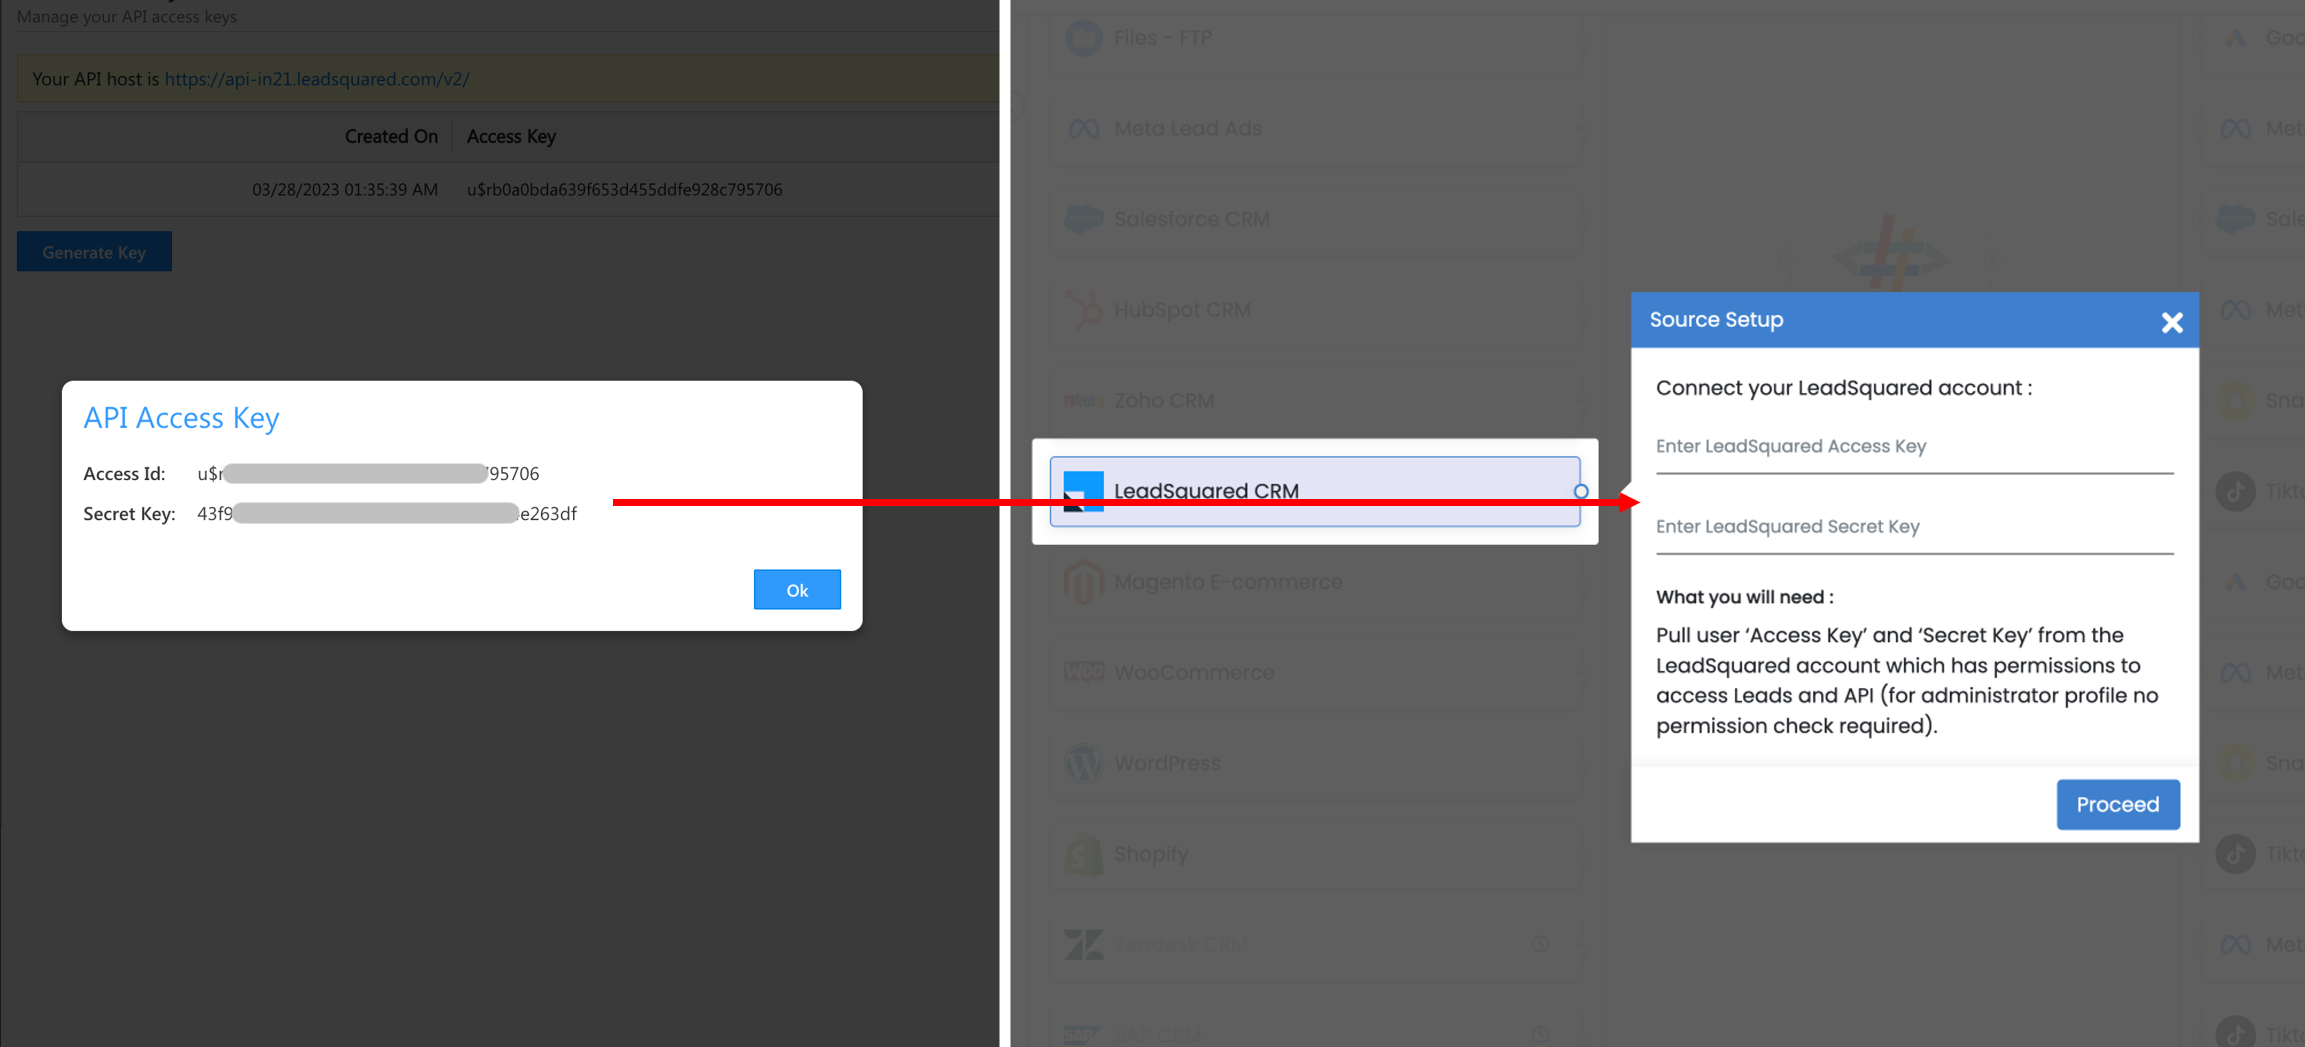
Step 2: Instance Naming
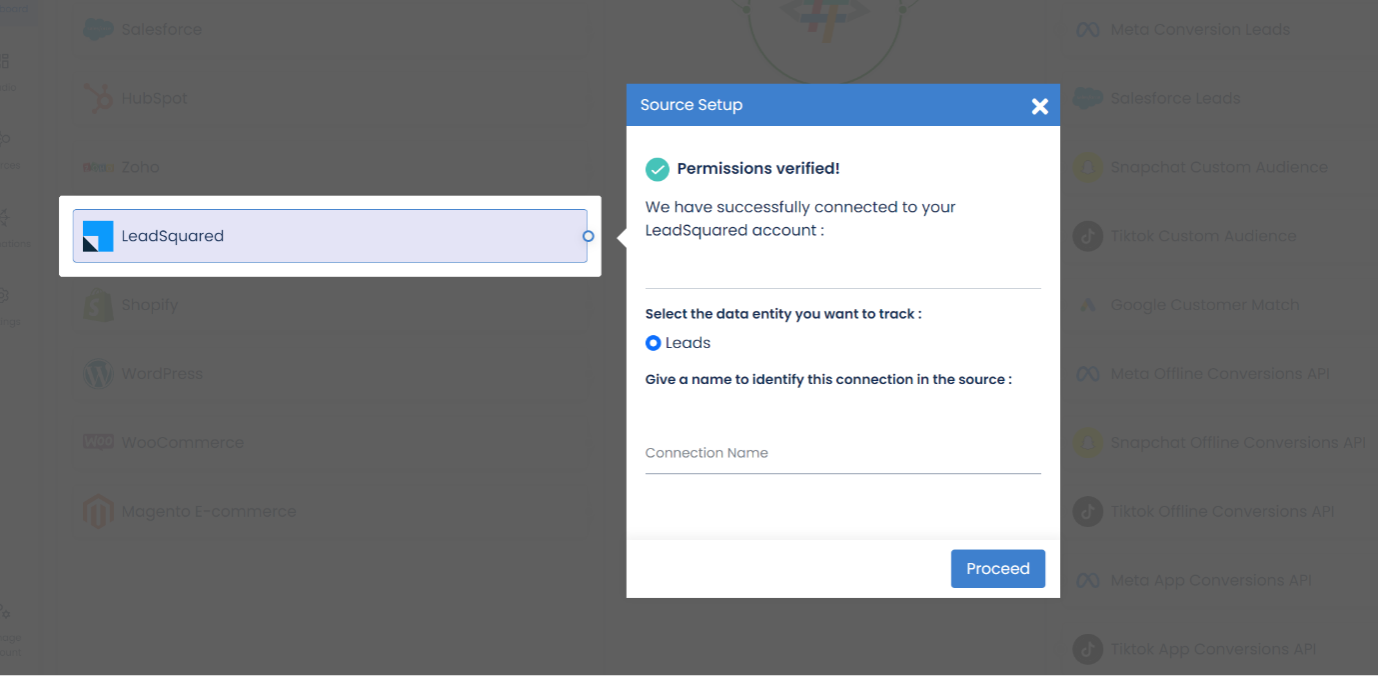
- Once the permissions are verified, give a name to identify this connection in the LeadSquared source connector as you can create multiple instances within the connector. Example, if you want send New Lead to a different destination than Opportunity, then creating multiple instances would help you with that.
Step 3: Field Mapping
Specify the Leadsquared Leads module columns for Lead Source ID, Last Modified Date and Lead Lifecycle Status data points required to fetch lead data to be pushed to Meta Conversion Leads.
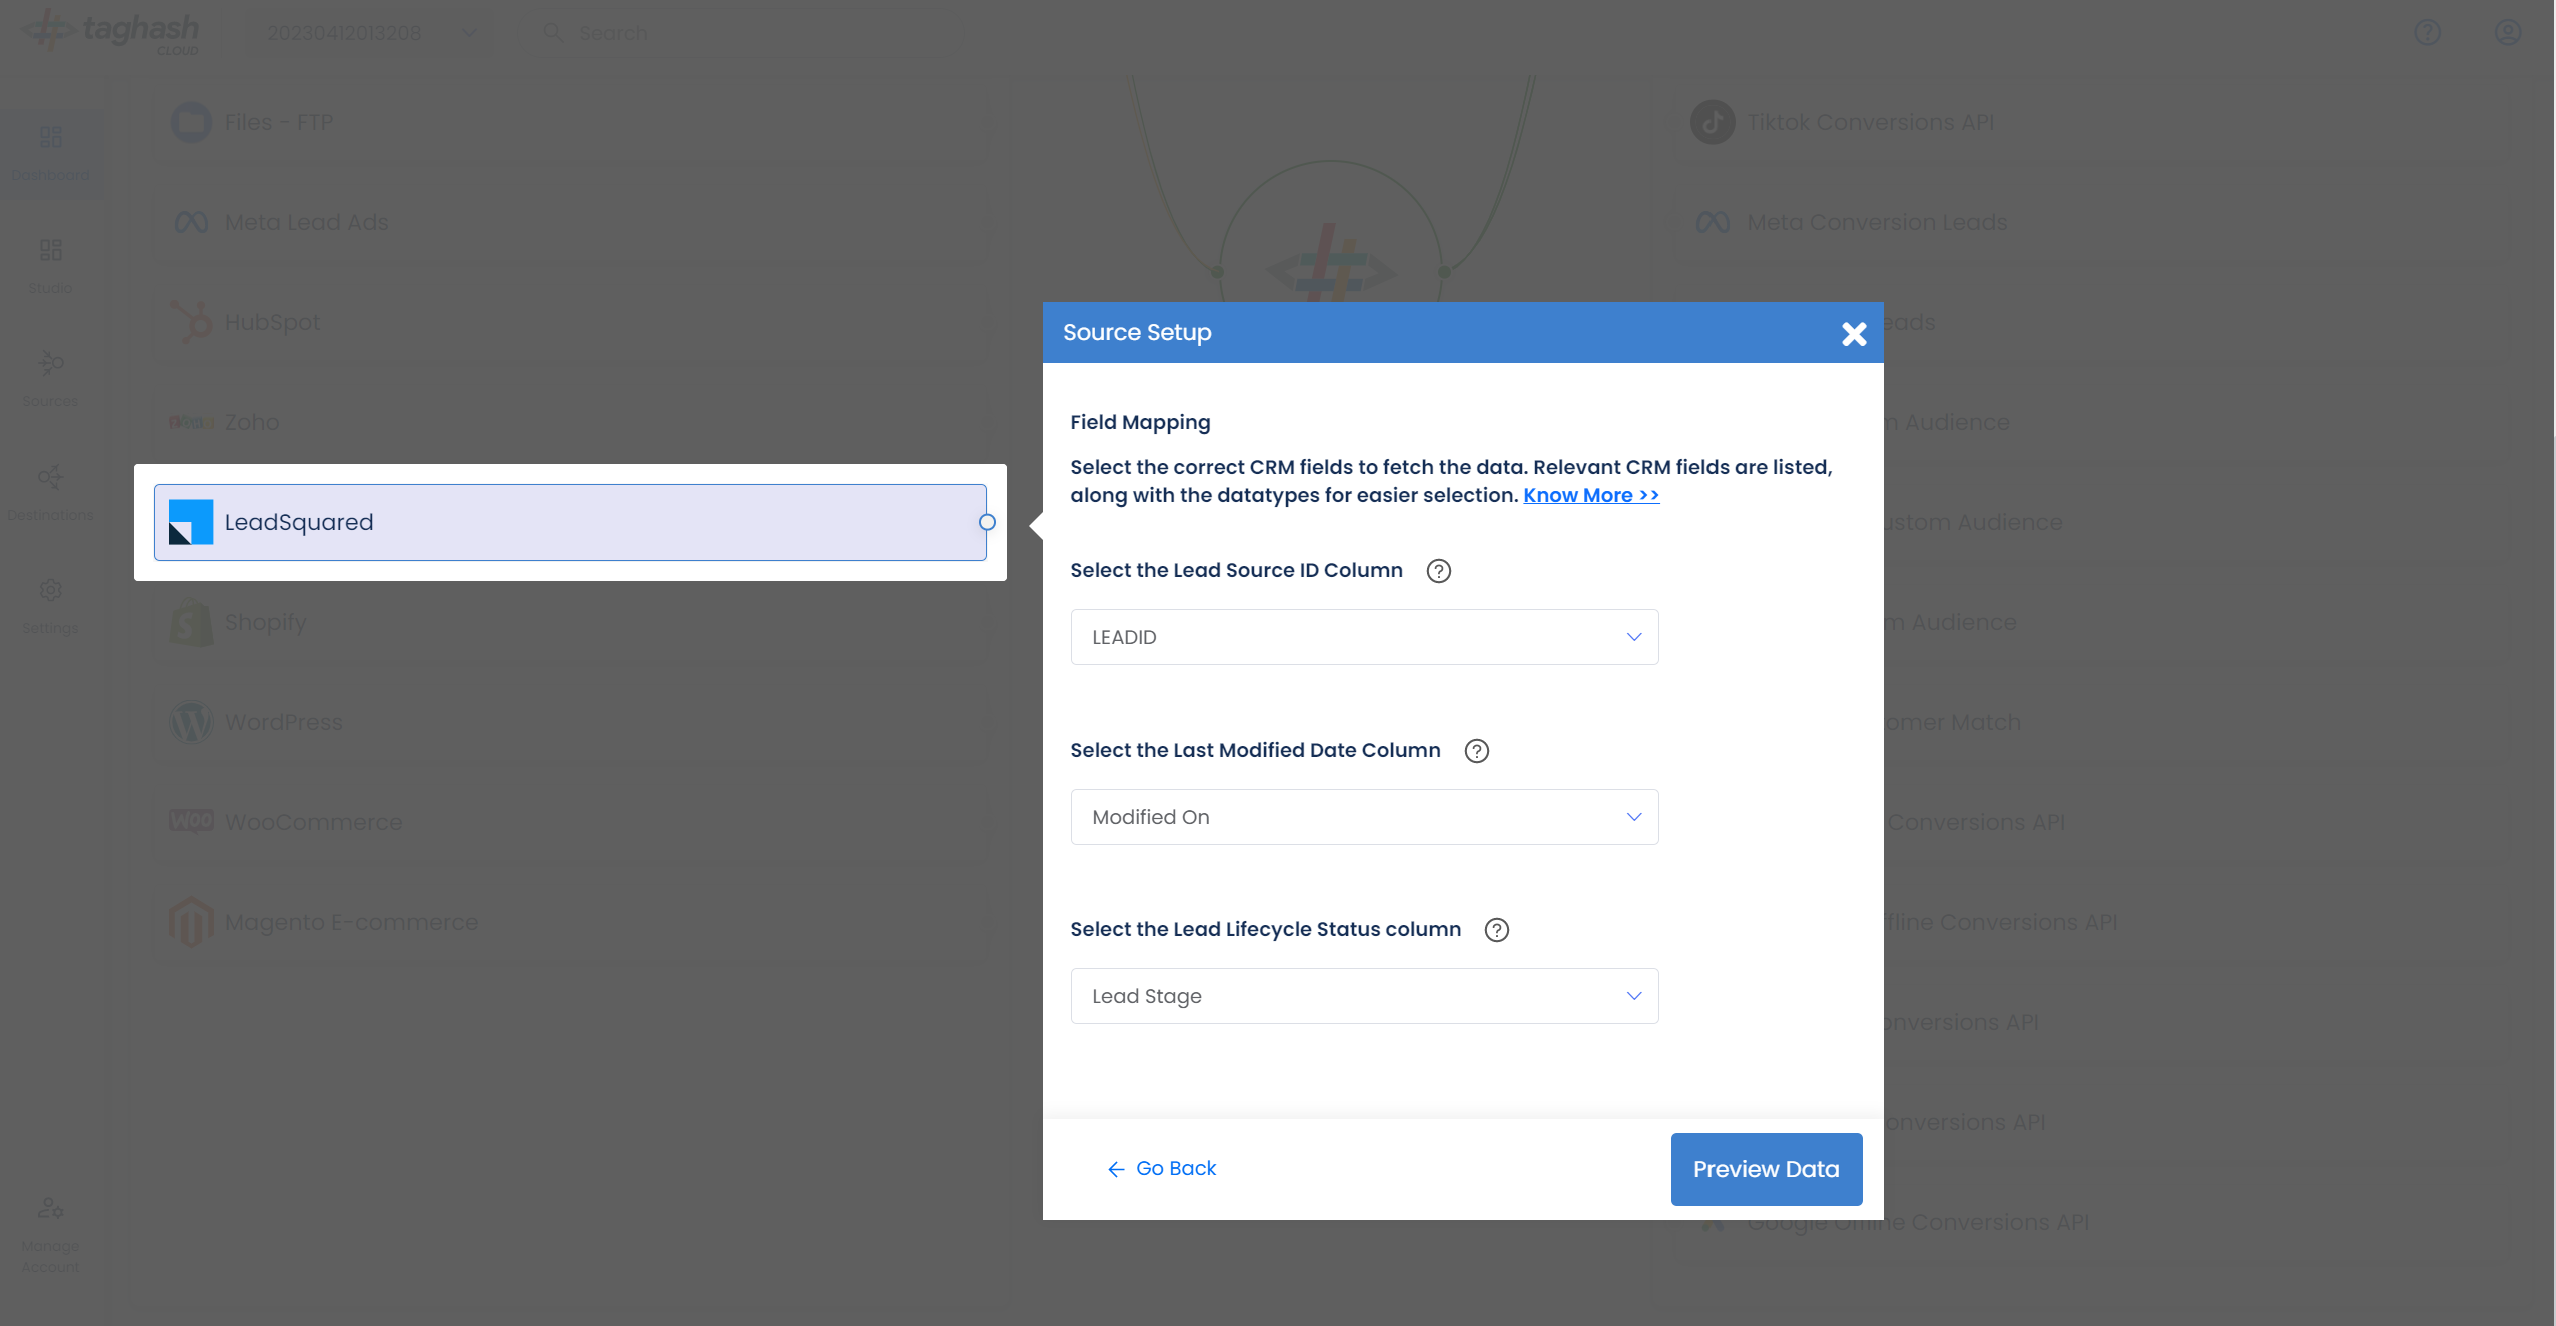
- Lead Source ID: This is the unique identifier generated at the source where the lead was captured. For instance, for Facebook leads, the ID would be “Meta Lead ID”. Please select the CRM column name for capturing this ID.
- Last Modified Date Column: This is the field that indicates the lead’s most recent update time to synchronize the latest updates. Please specify the CRM column name for capturing this update. The default sync frequency is 15 minutes.
- Lead Lifecycle Status Column: Lead lifecycle status refers to the field in the CRM that is used to track the stages that a lead moves through during the lead lifecycle. Updates in these stages are tracked as events and pushed to a destination. Example, If a status of lead changes from “New Lead” to “Opportunity” we can send that as conversion signals in Meta Leads Conversion API for Lead Ads campaign optimisation.
Click on Preview Data to show values of the selected columns for a sample set of leads from your connected LeadSquared account to validate if the field mapping is correct and required data is being fetched.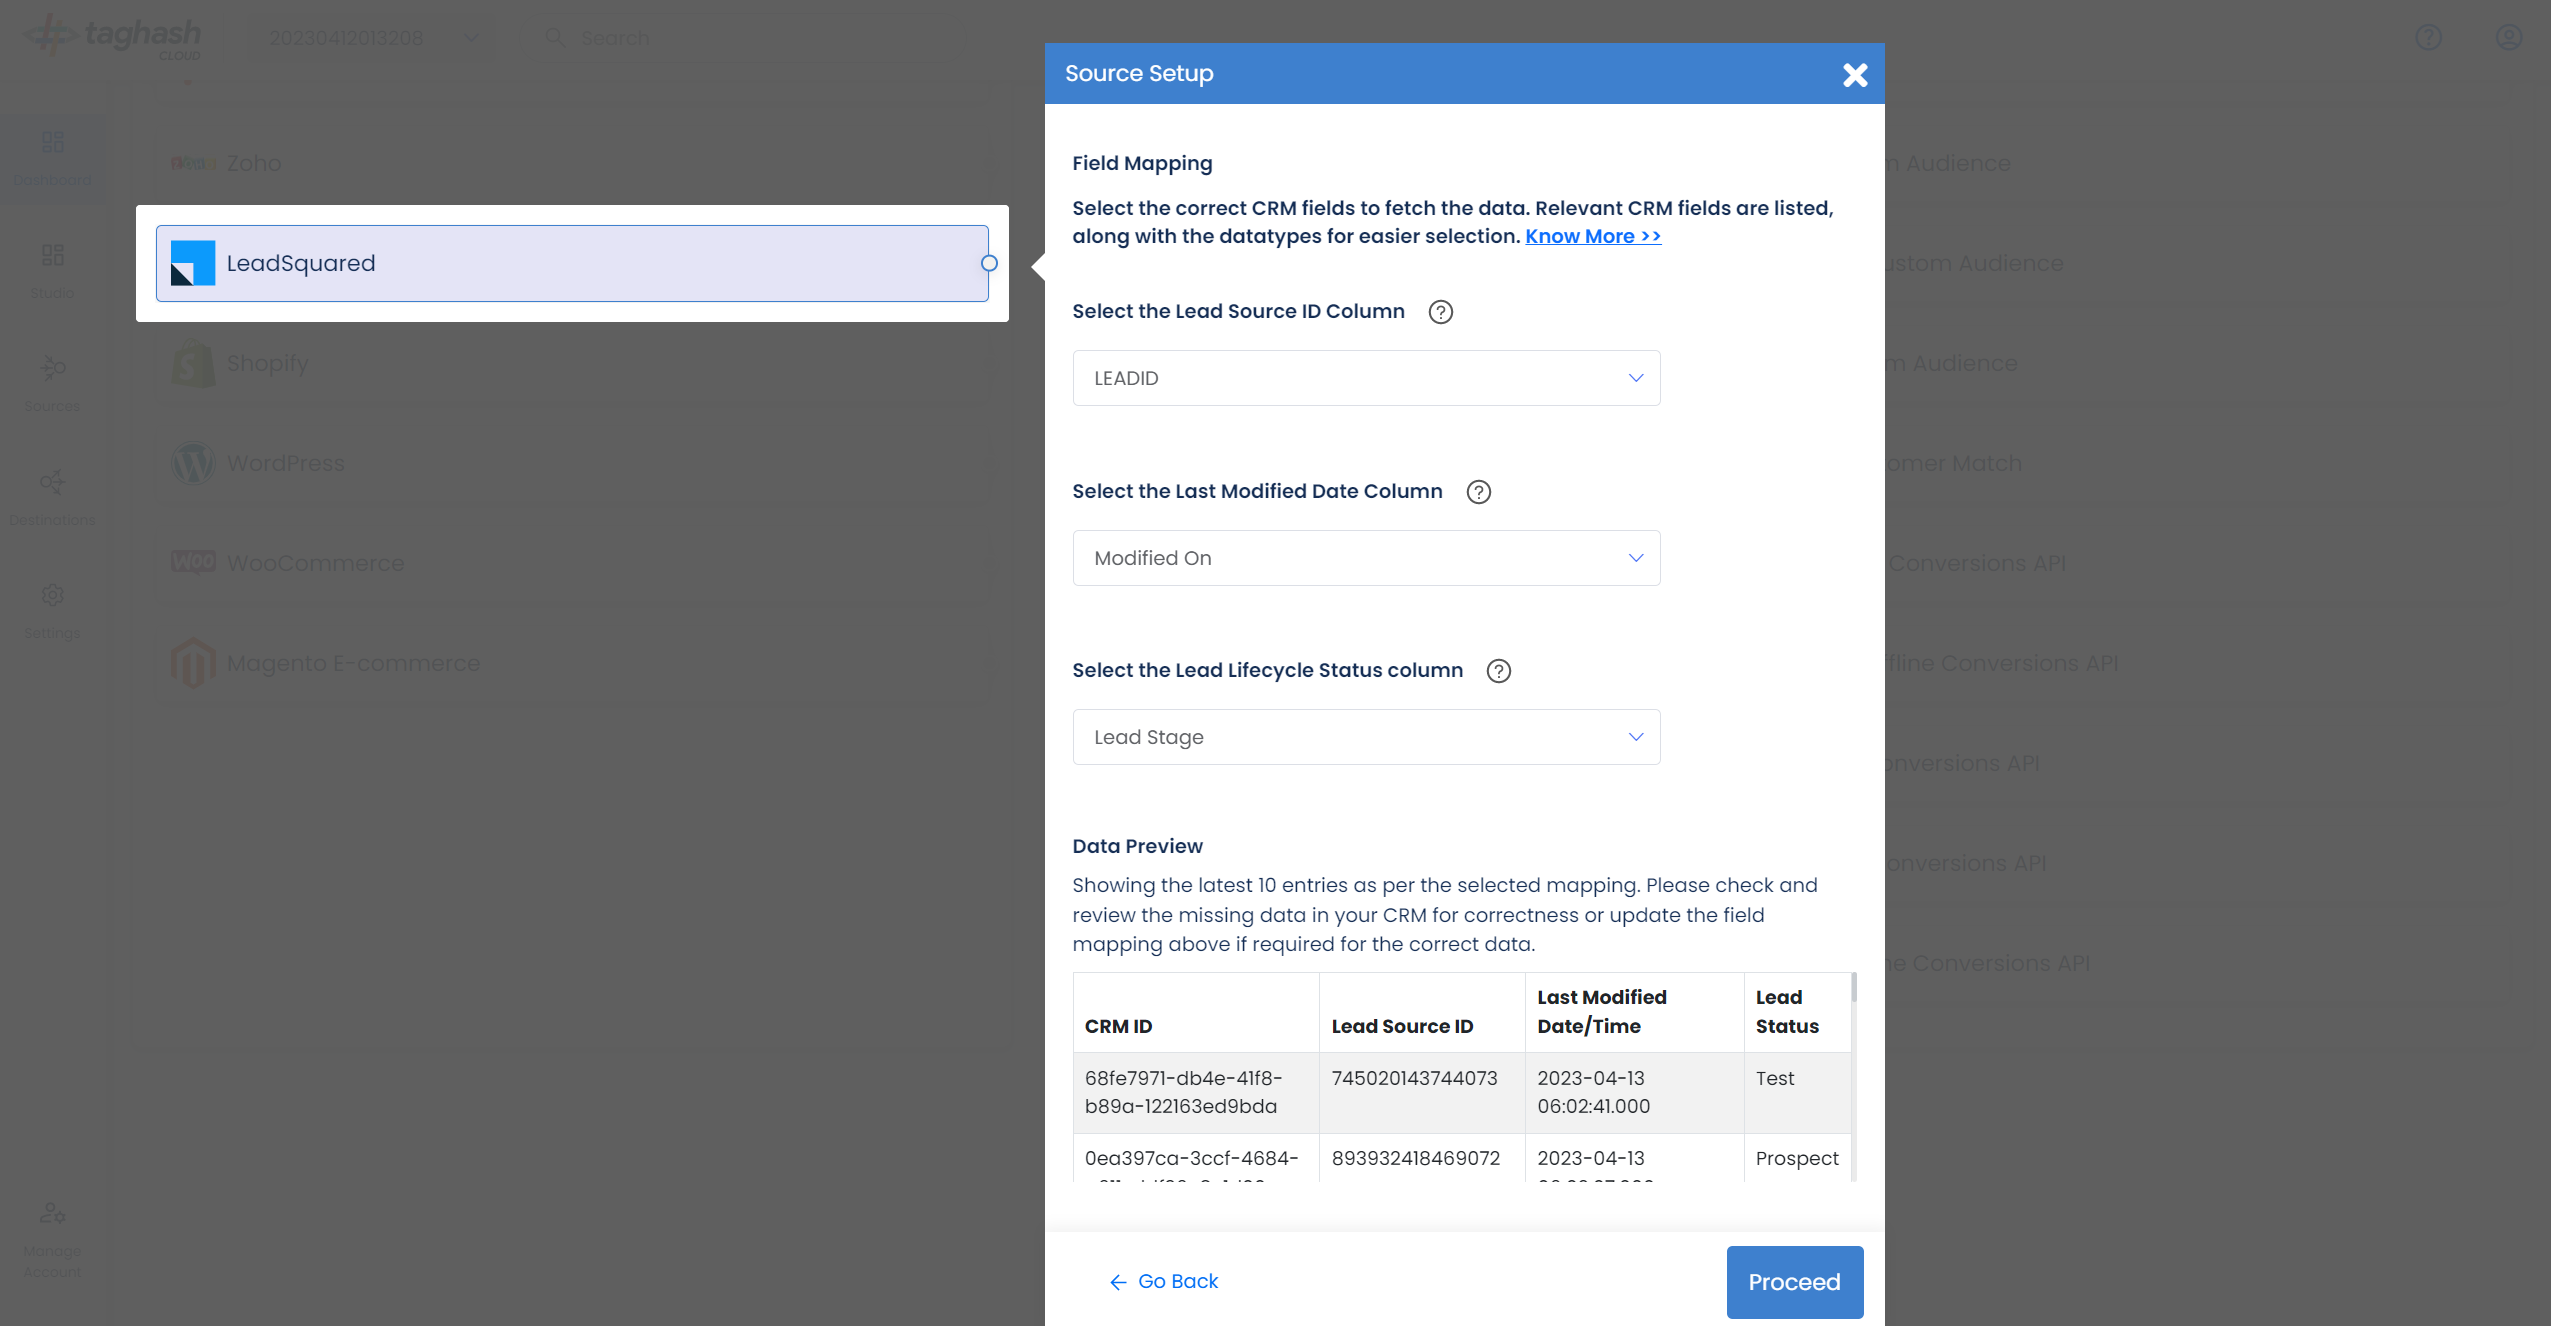
Step 4: Event Mapping
In this step, you’ll need to select the lead stages that you want to send as signals to your desired destination. The lead status event list will be automatically pulled based on the primary event column you selected in the previous step.
On the first screen, you have two ways to do event selection and mapping
Option 1: Tracking default event values
New Lead: This selection helps tracking creation of new lead if the CRM doesn’t assign a default status to the new lead. Uncheck this option if the CRM set-up has a default value for the new lead. The New Lead status typically marks the beginning of your lead lifecycle, such as the default “Open – not contacted” status in Salesforce CRM.
Track all statuses: This includes all the lead statuses currently available in your CRM. By default, they will all be selected. However, if you only want to track certain statuses, you can uncheck ‘Track all’ option and choose the ones you need to track for Conversion Leads Optimisation. Kindly note ‘Track all’ option will also start tracking all the new status that you will be creating in the future.
For better optimization, it’s recommended to track at least two events. To optimize your campaigns effectively, it’s important to track the New Lead event, which is added by default if you’re not already capturing it. You can update it to match your lead statuses.
Option 2: Tracking custom event values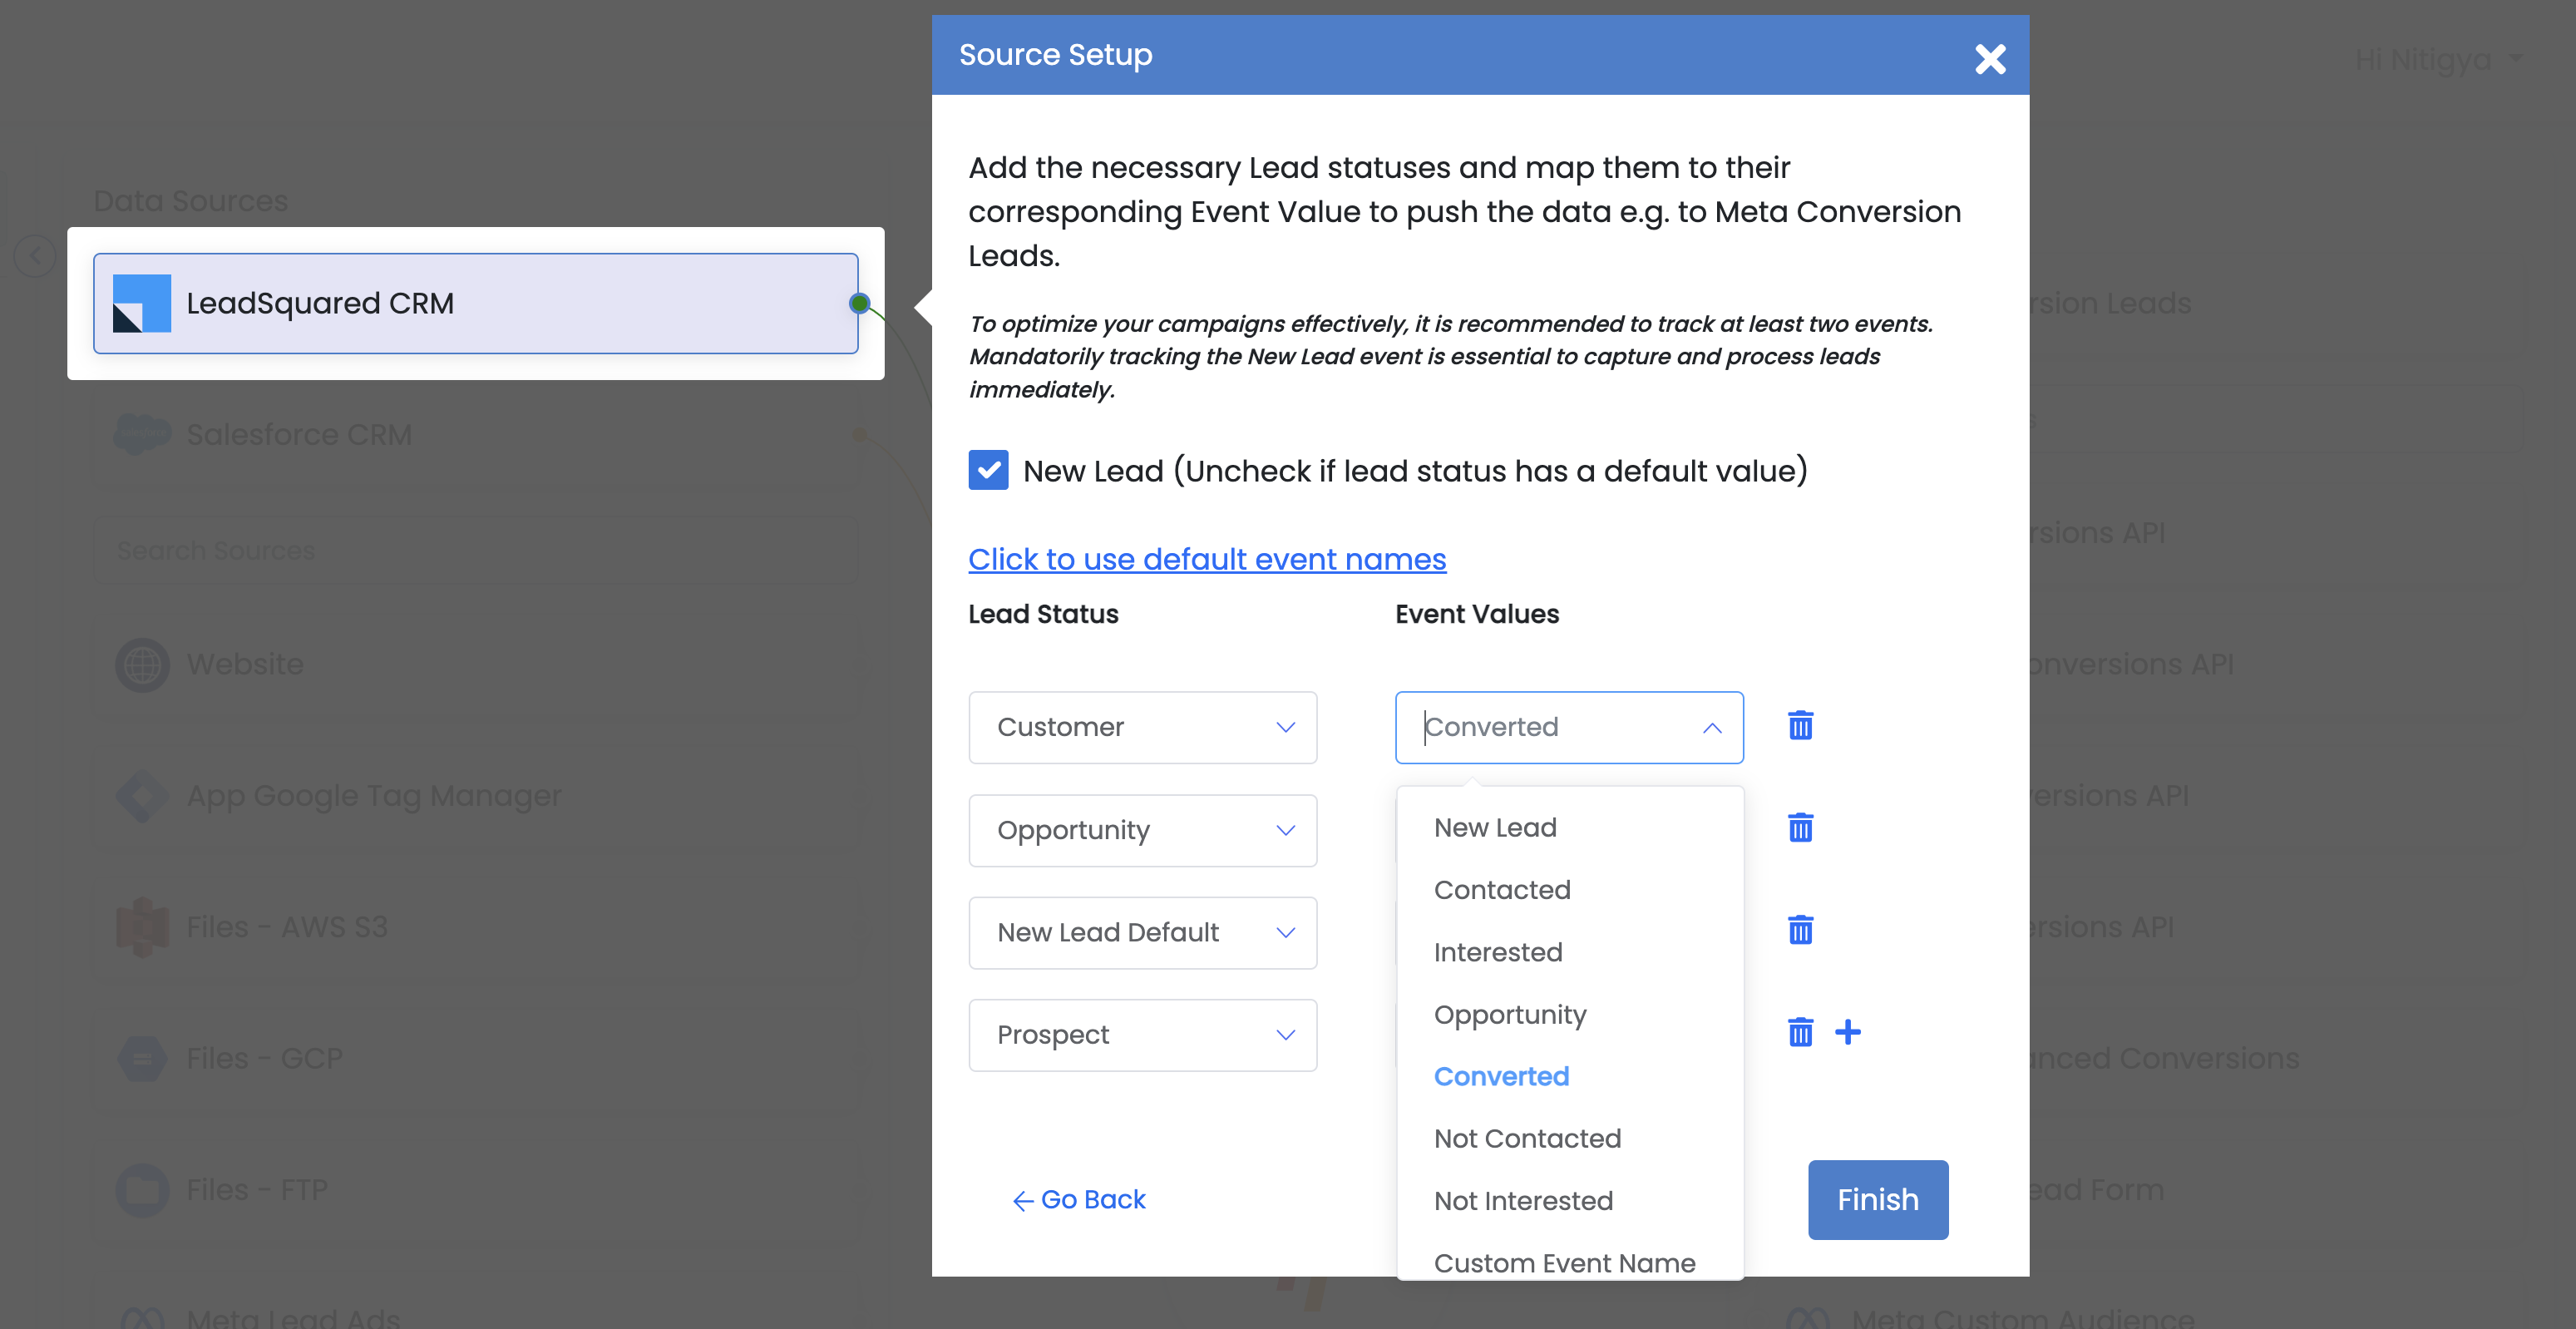
If you want to use custom event values to be pushed to Meta Conversion Leads, create custom event mappings. Simply click on the “Click here to use custom event mappings” CTA on the field mapping screen. You’ll see two sets of rows: the left side corresponds to your CRM status values, while the right side lists standardized event values for ease of mapping.
Again, the left side Lead Status list will be pulled based on the primary event column you selected earlier. Once you’ve chosen your left side row values, you’ll need to map them to the appropriate Datahash values on the right side. This will help us streamline your values for different marketing channels. If you need to add a custom event value which is not in the standard list, simply use the ‘custom event name’ option in the drop-down menu to define your own event value.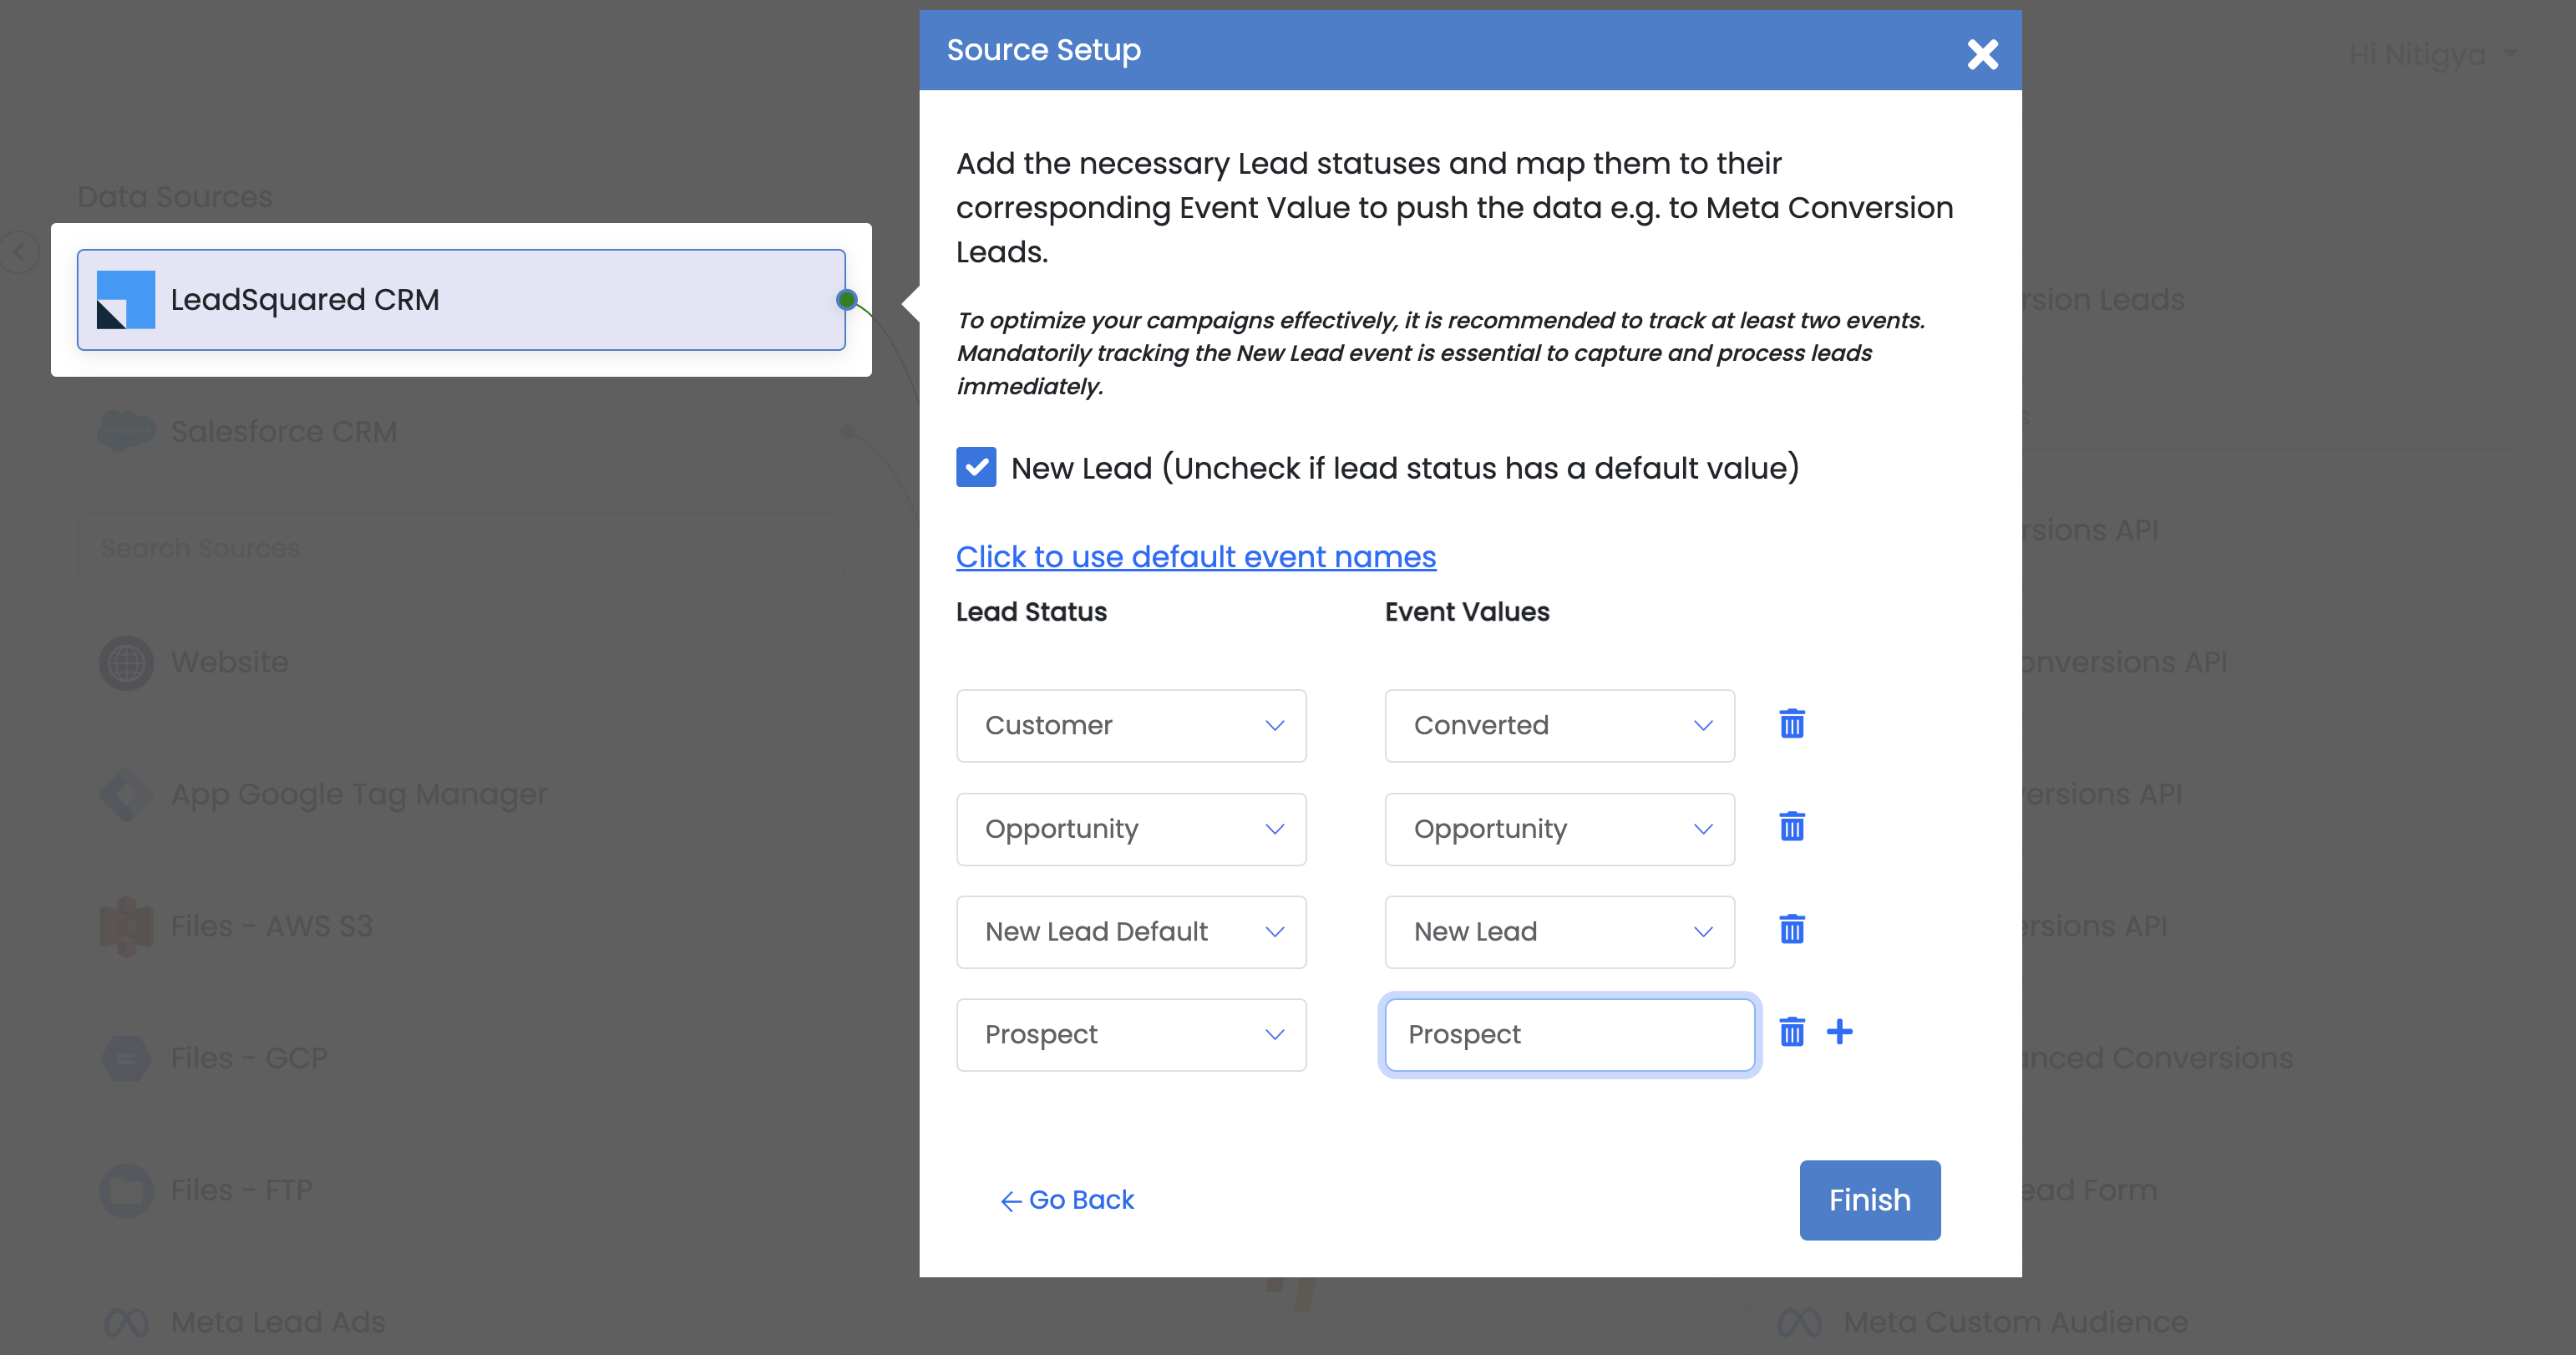
Click Finish to successfully setup your LeadSquared CRM Source Connector.
Proceed to Step 2 to set-up Meta Conversion Leads as data destination to capture lead status update events through Conversion Leads