
Video Walkthrough:
Prerequisites:
- Access to a LeadSquared CRM account with permissions for the CRM module that you intend to integrate
- User ‘Access Key’ and ‘Secret Key’ to the LeadSquared account which has permissions to access Leads and API (for administrator profile no permission check required).
Getting Started:
- Log in to your Datahash account on https://studio.datahash.com/login
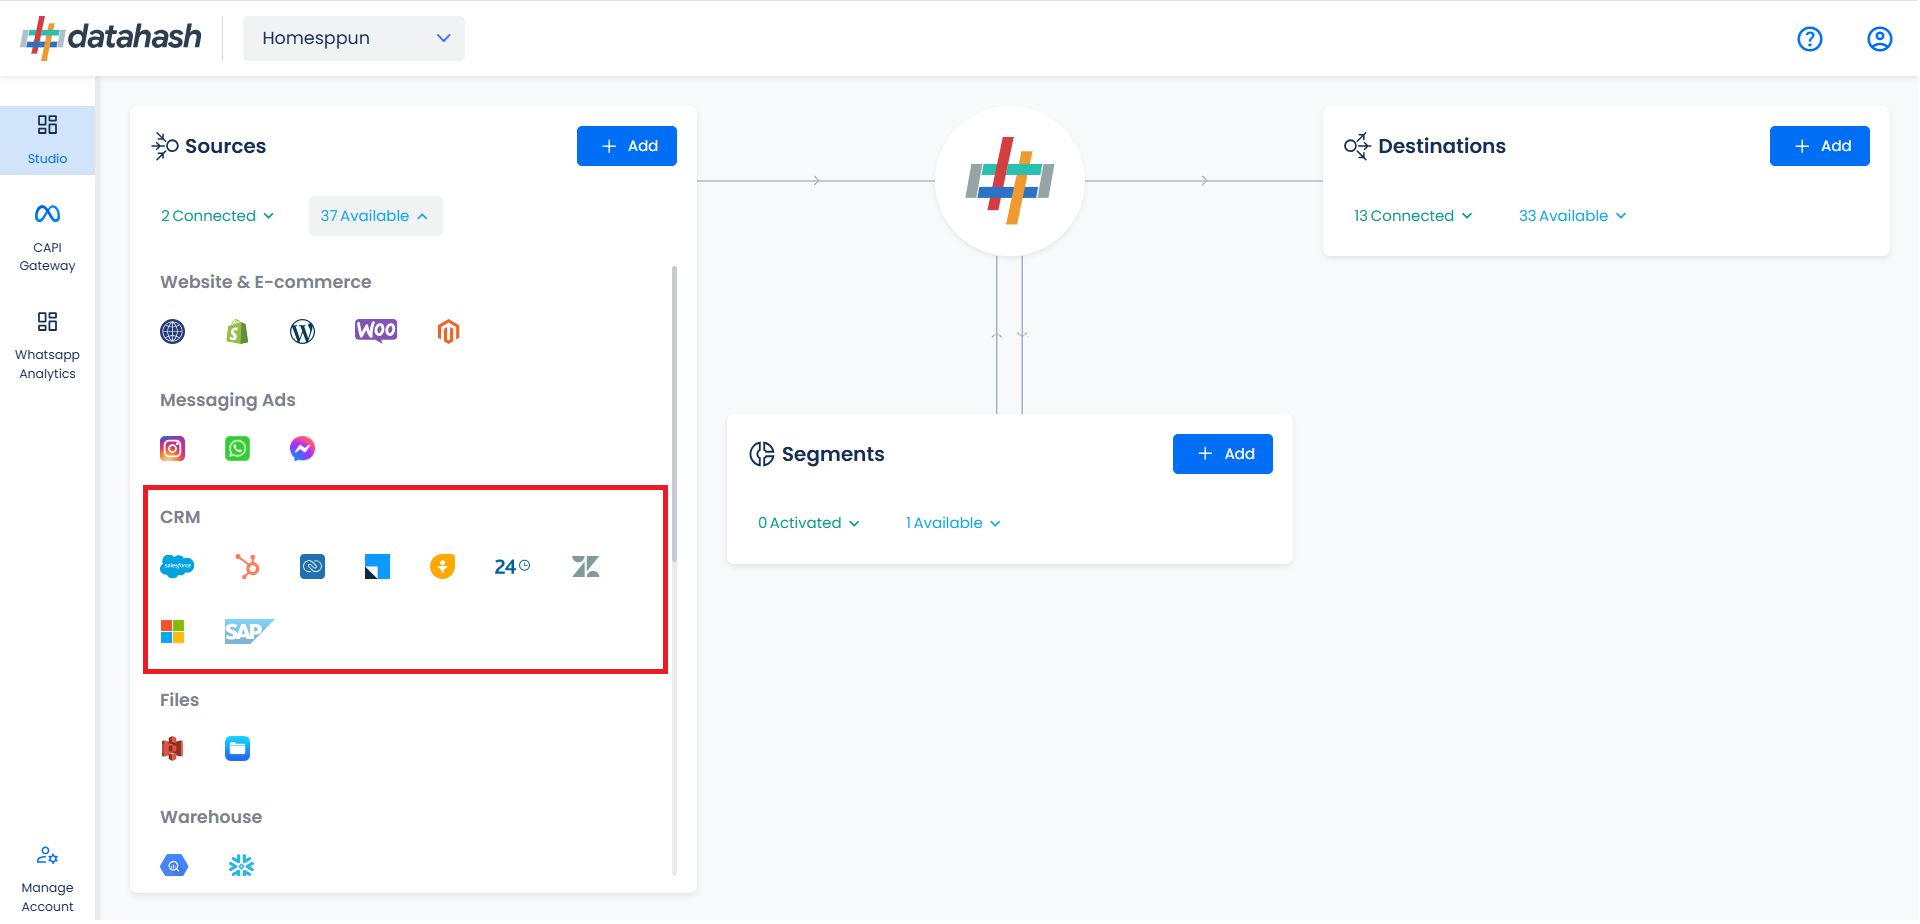
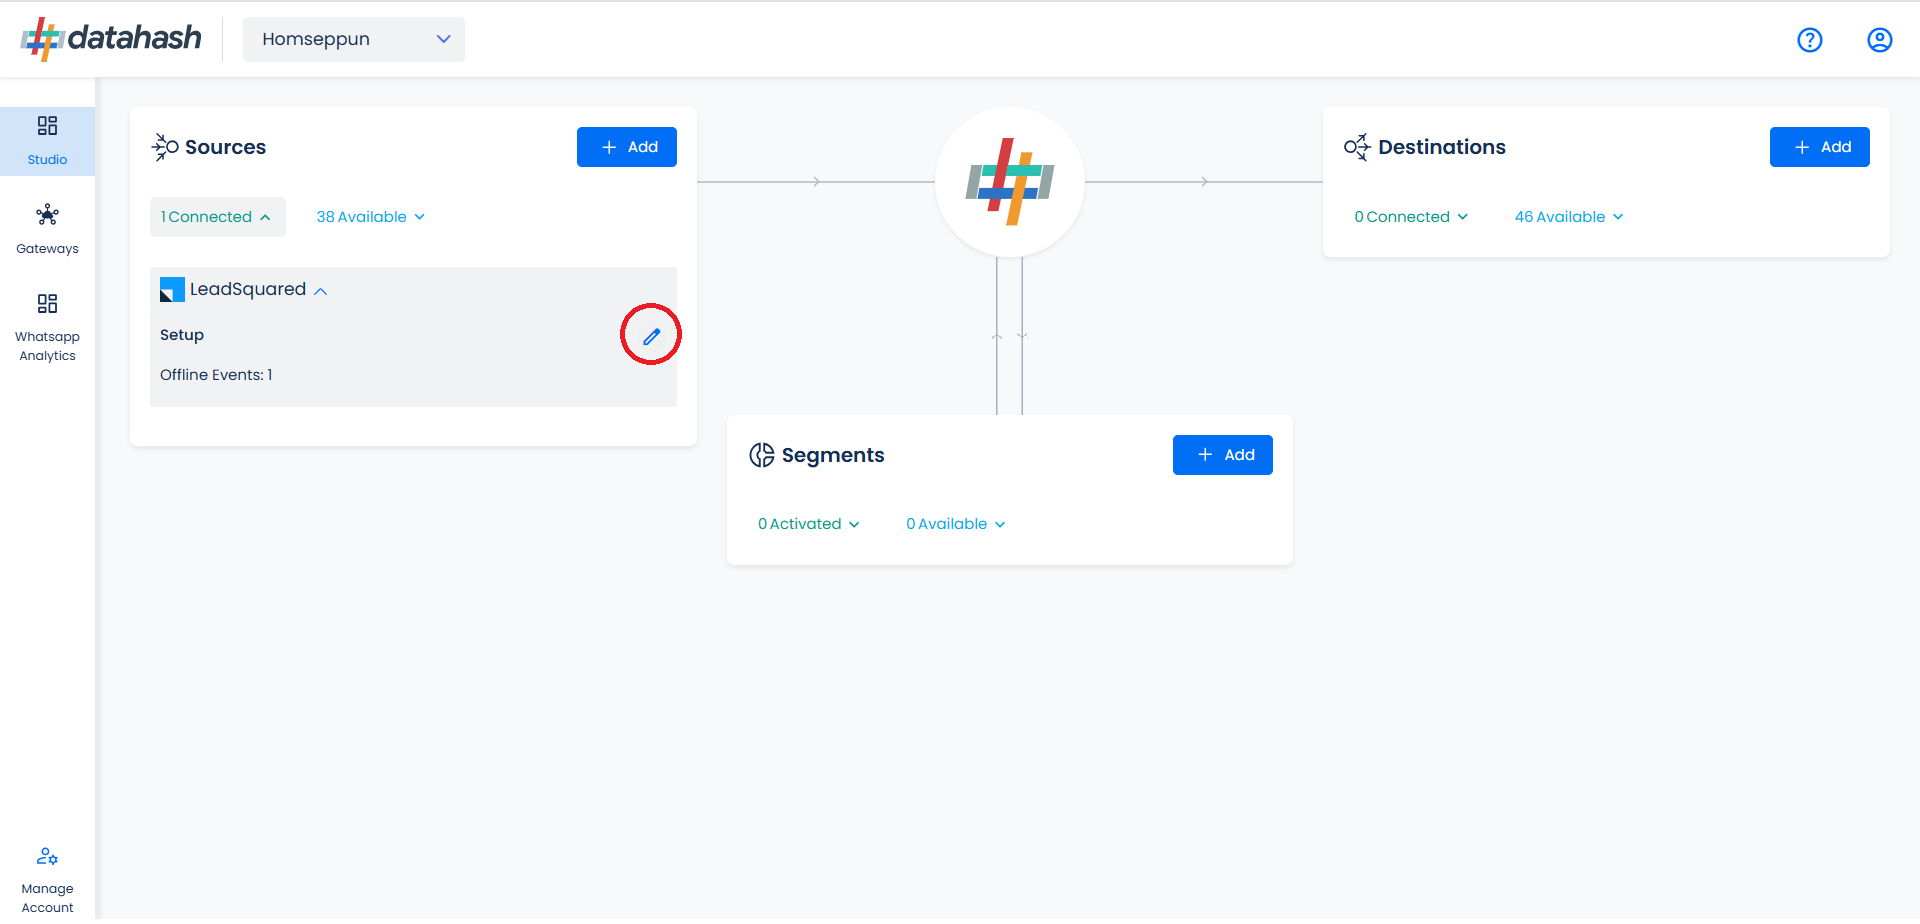
- Navigate to the CRM category under the Sources list in the left section.
- Click on the “LeadSquared CRM” connector tile.
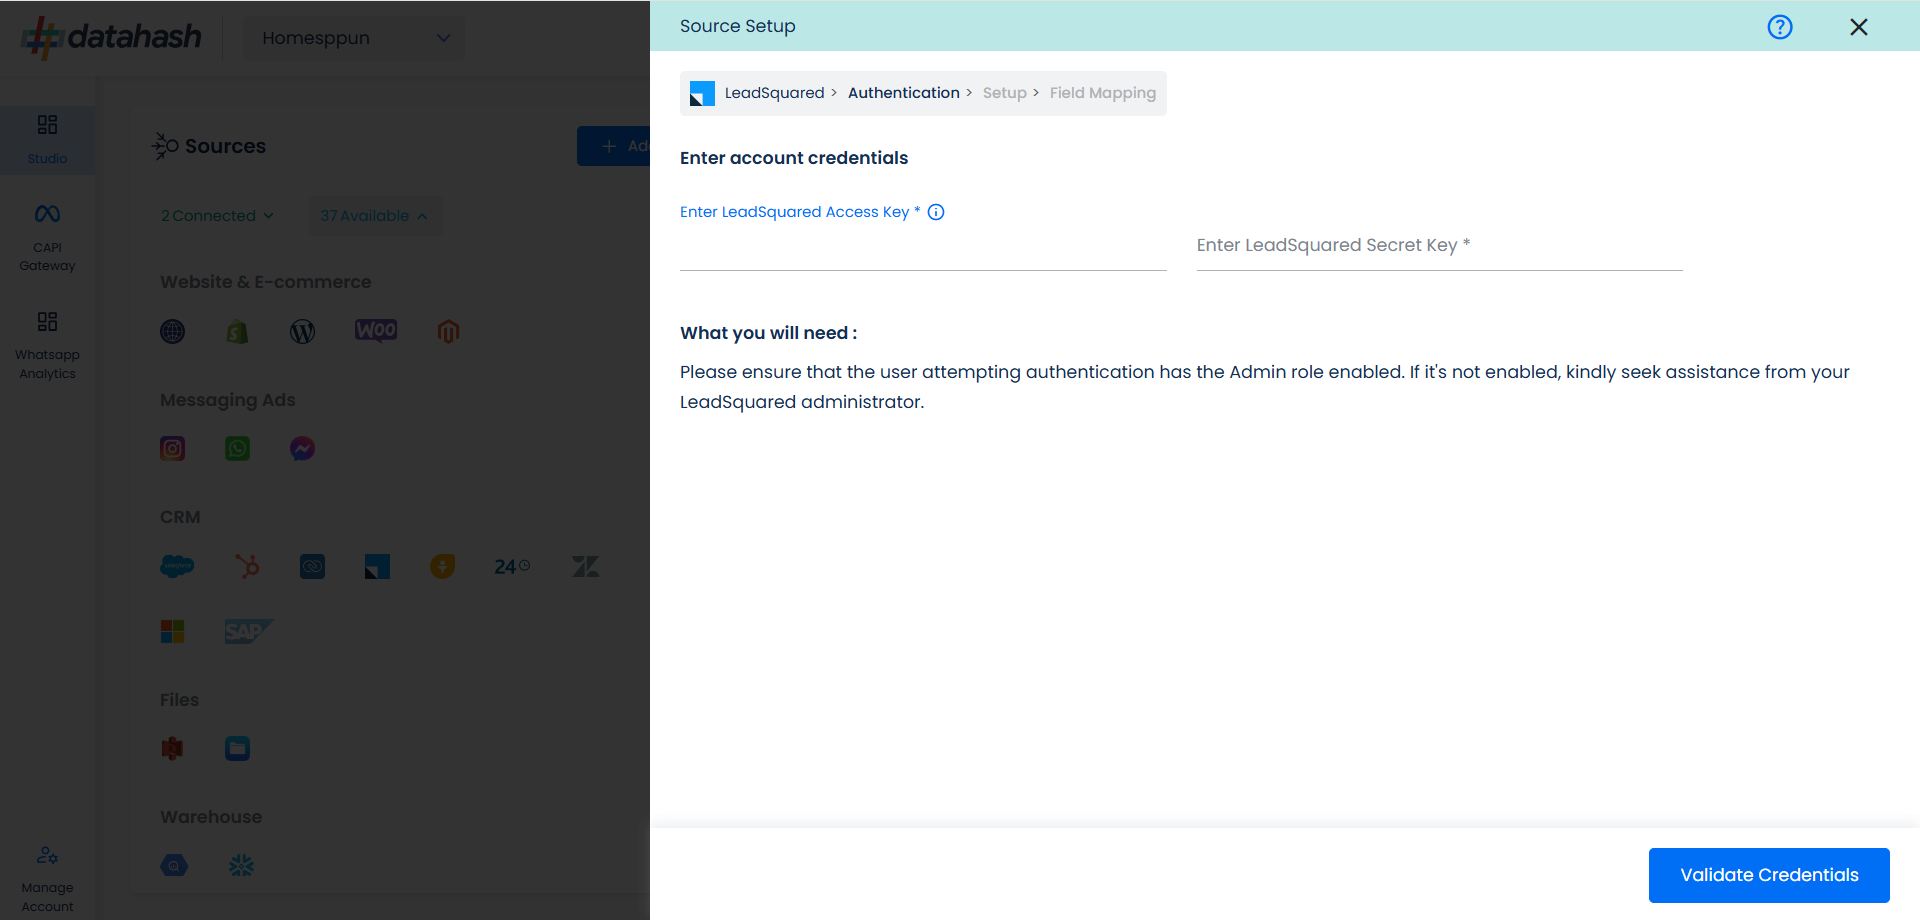
- In order to connect to your LeadSquared CRM account. You will require the LeadSquared access key & secret key.
Getting the LeadSquared access & secret key
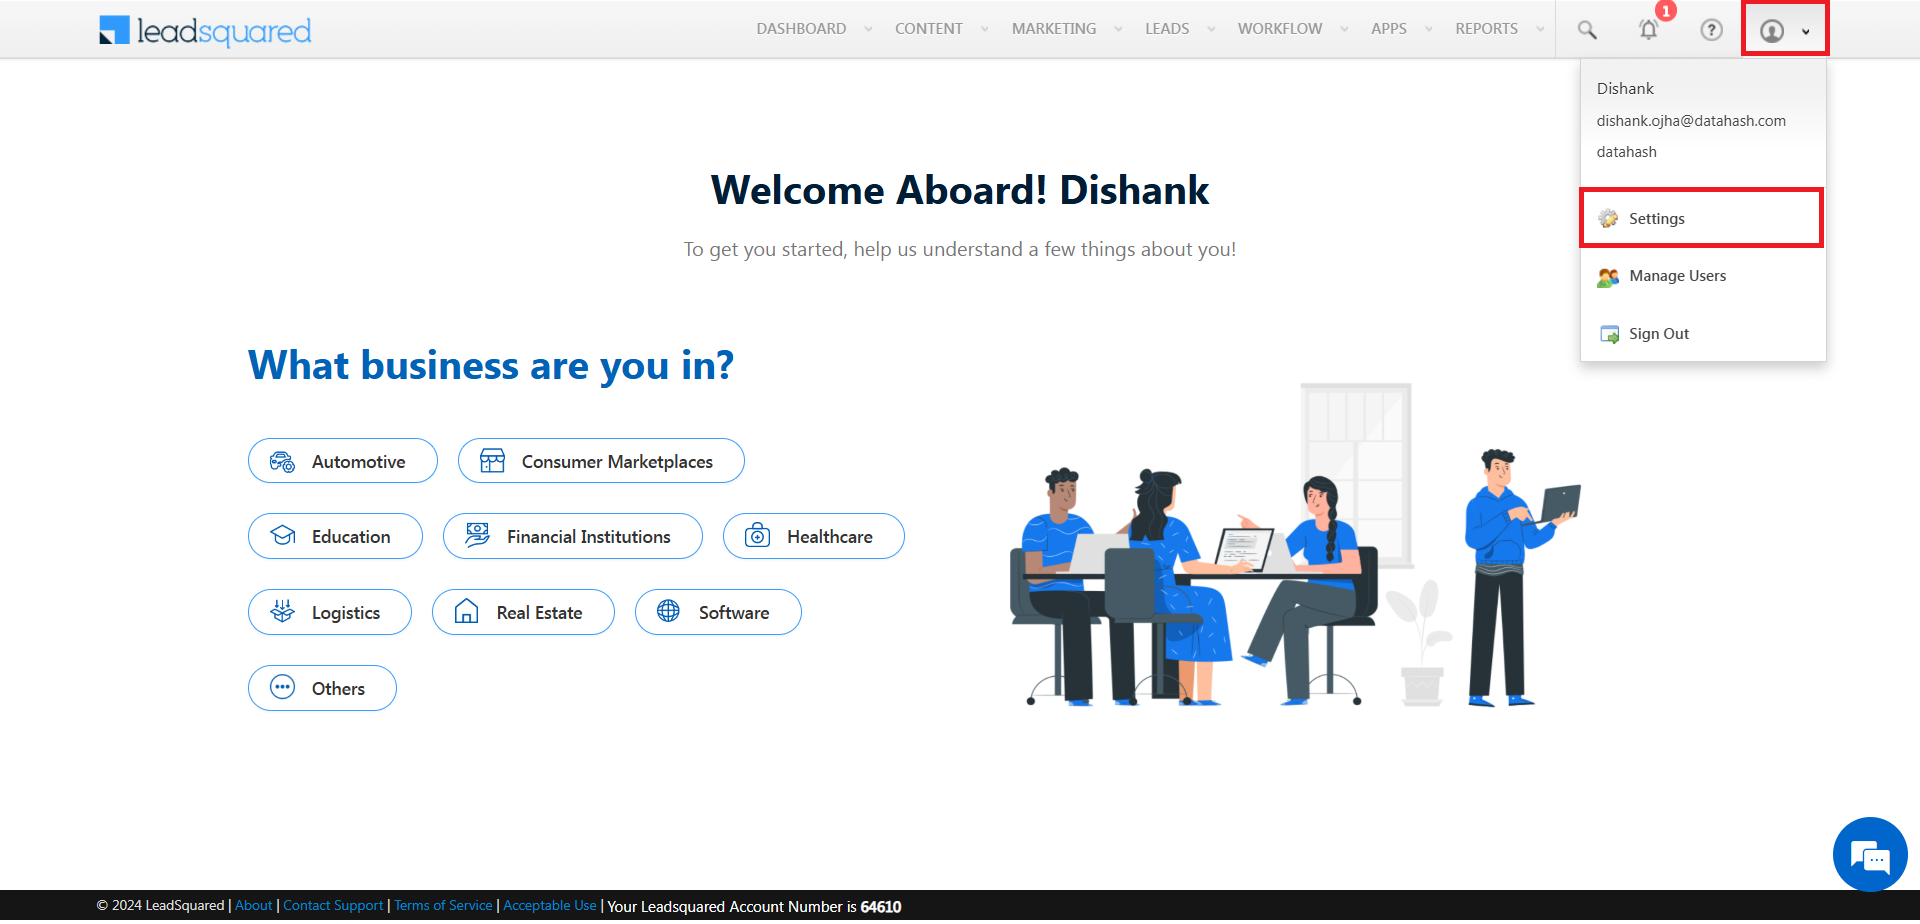
- Go to LeadSquared CRM & login to your account.
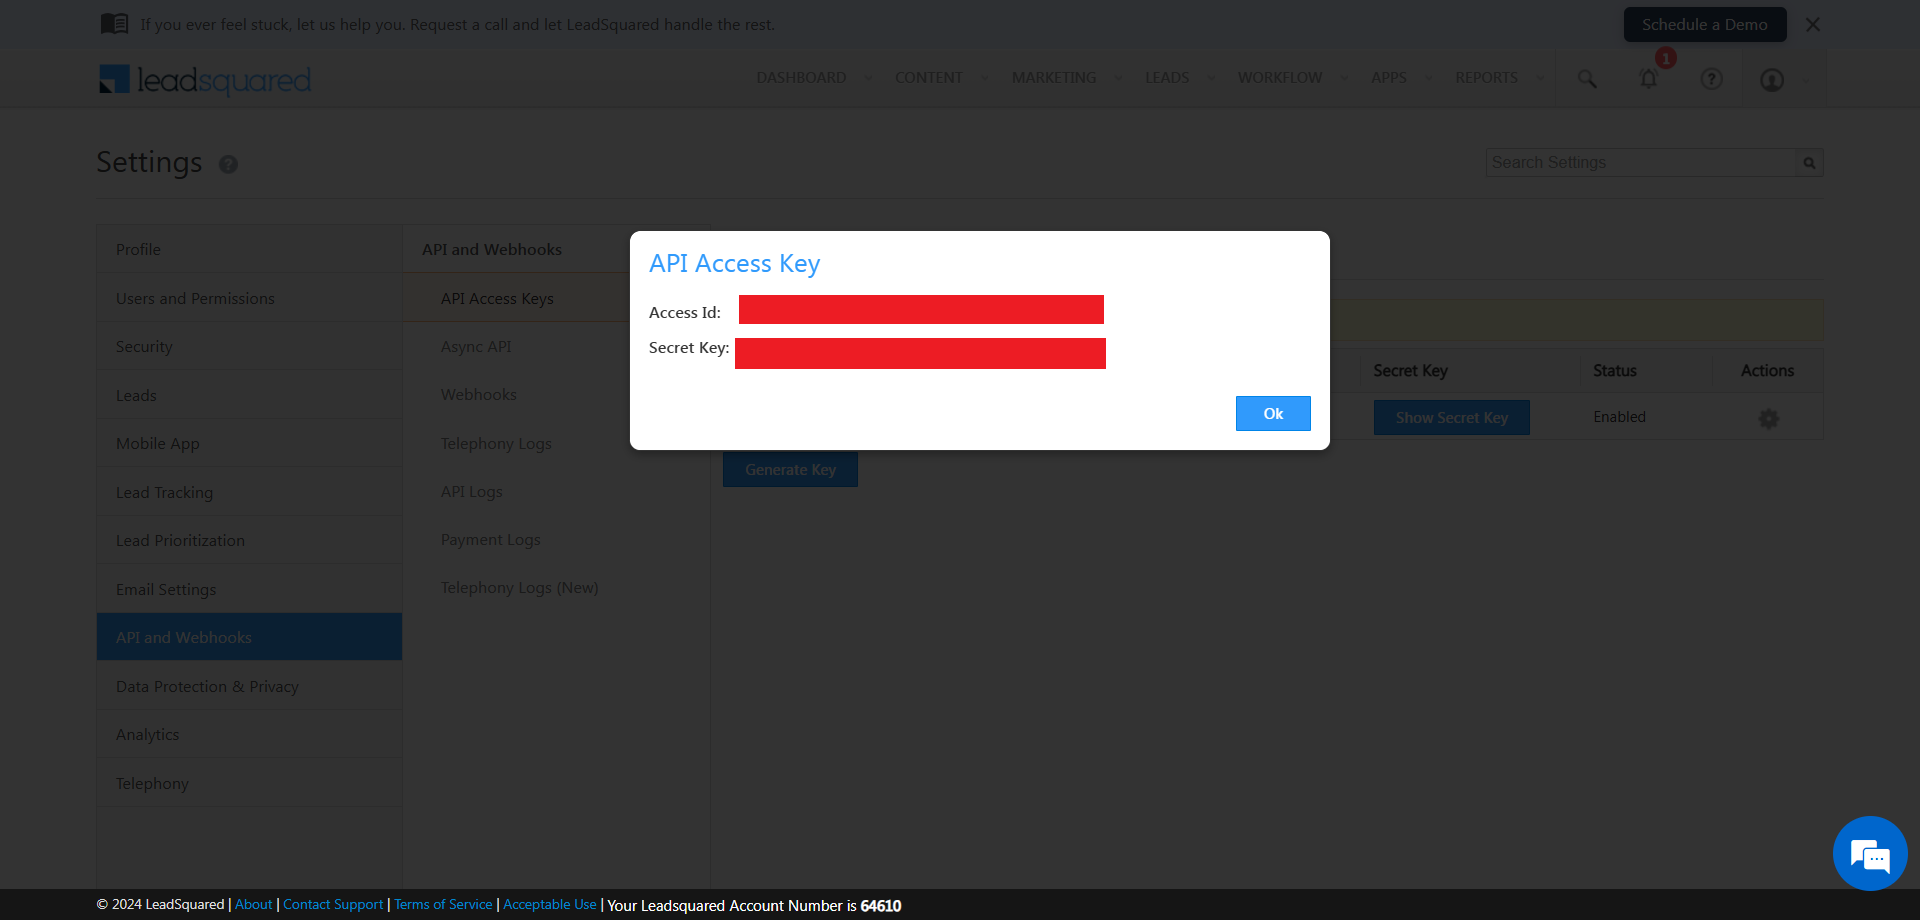
- Navigate to the top right corner and look for profiles. Under your profile, click on settings.
- In the left section, navigate to API and webhooks and then click on to API Access keys. Once done, click on Show Secret Key.
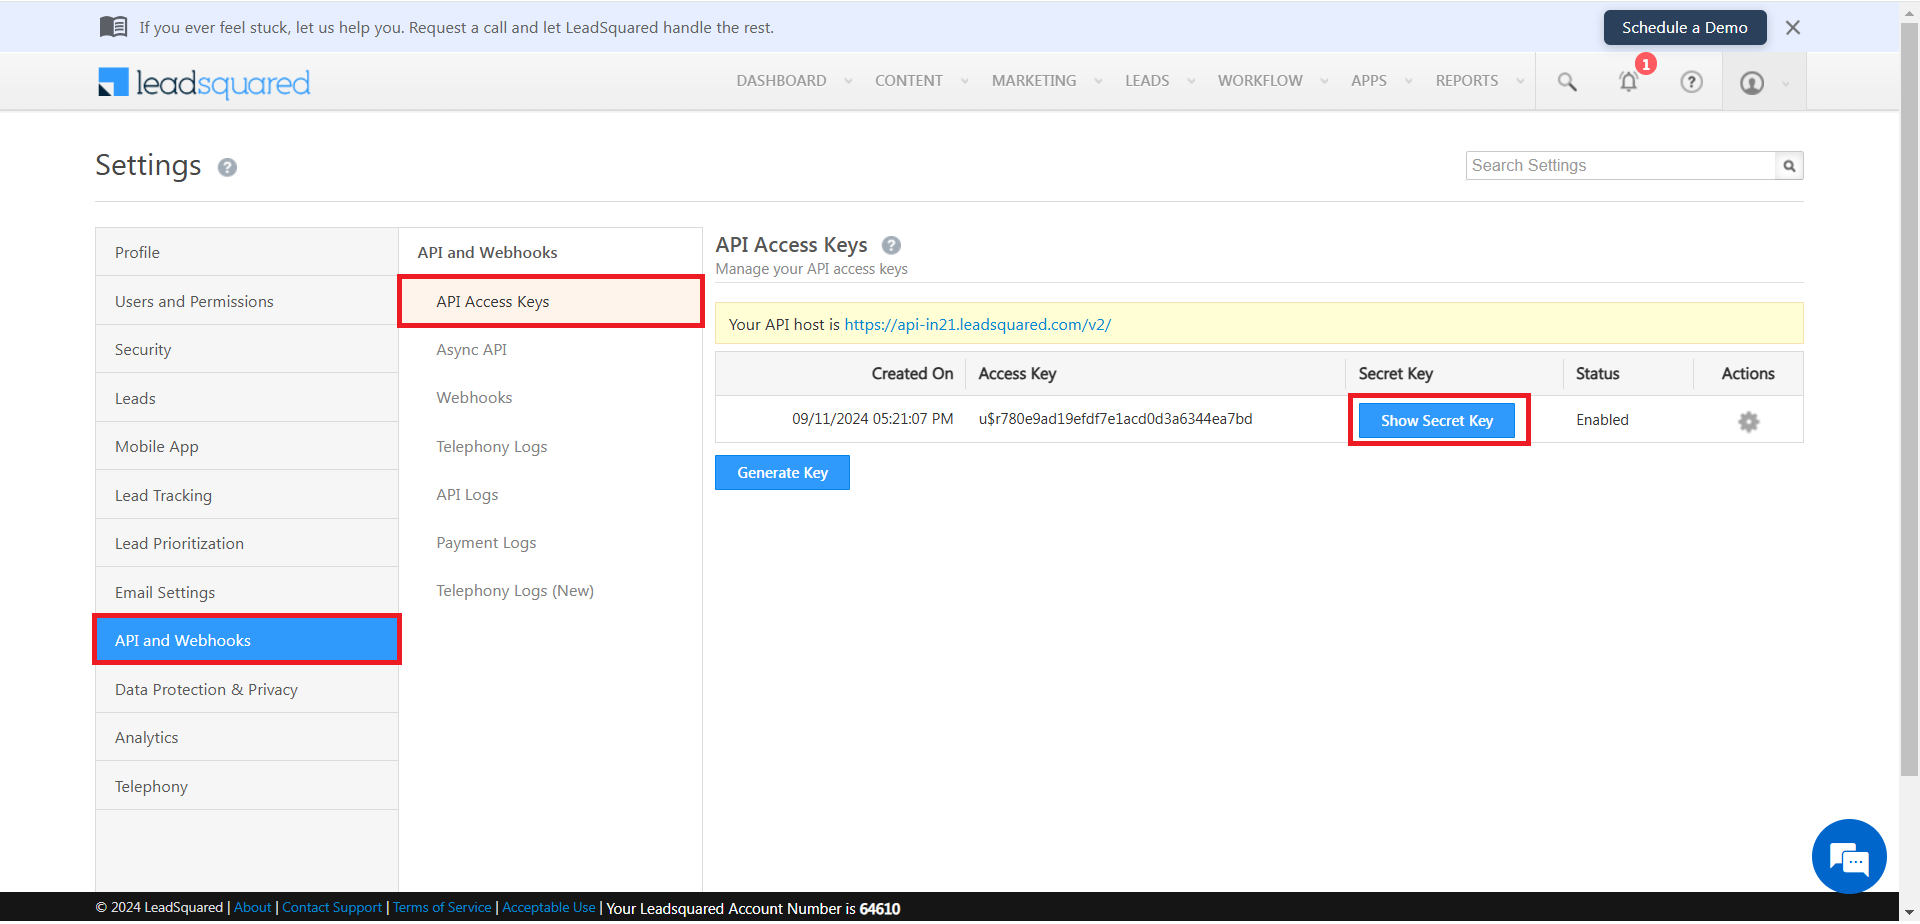
- Copy the access key & secret key from here.
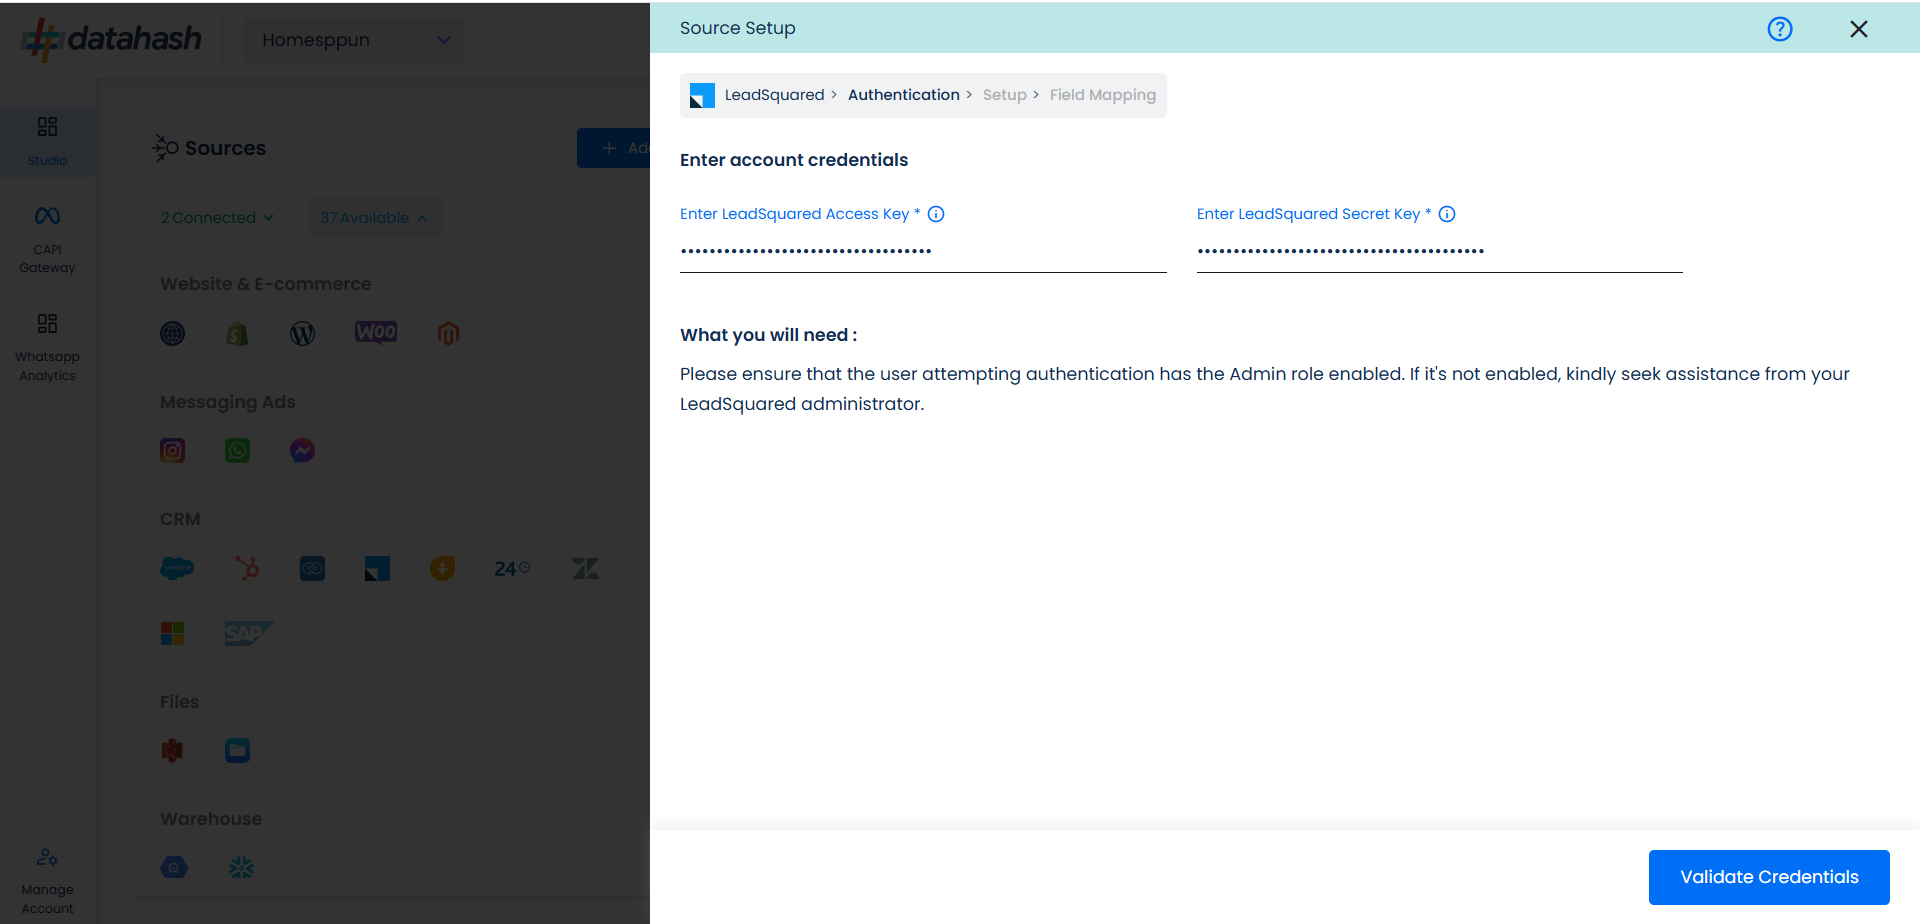
- Paste the access key & secret key in Datahash studio. Once done, click on Validate Credentials.
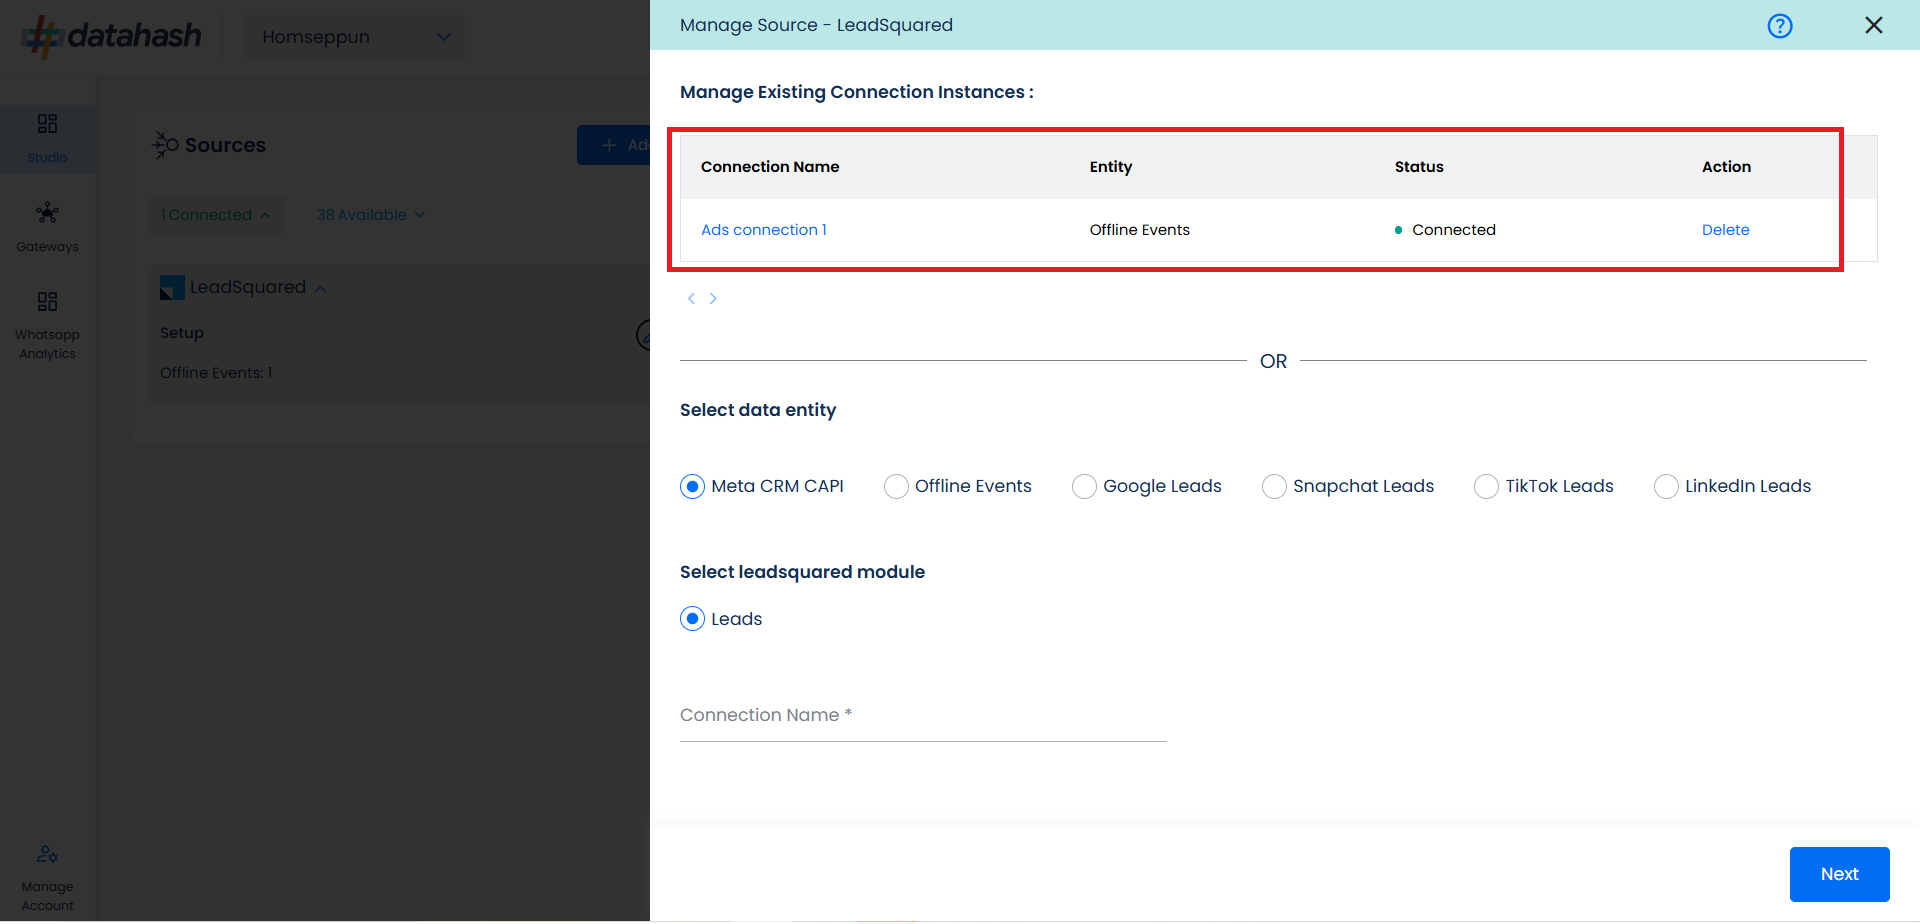
- Choose the data entity as Offline Events.
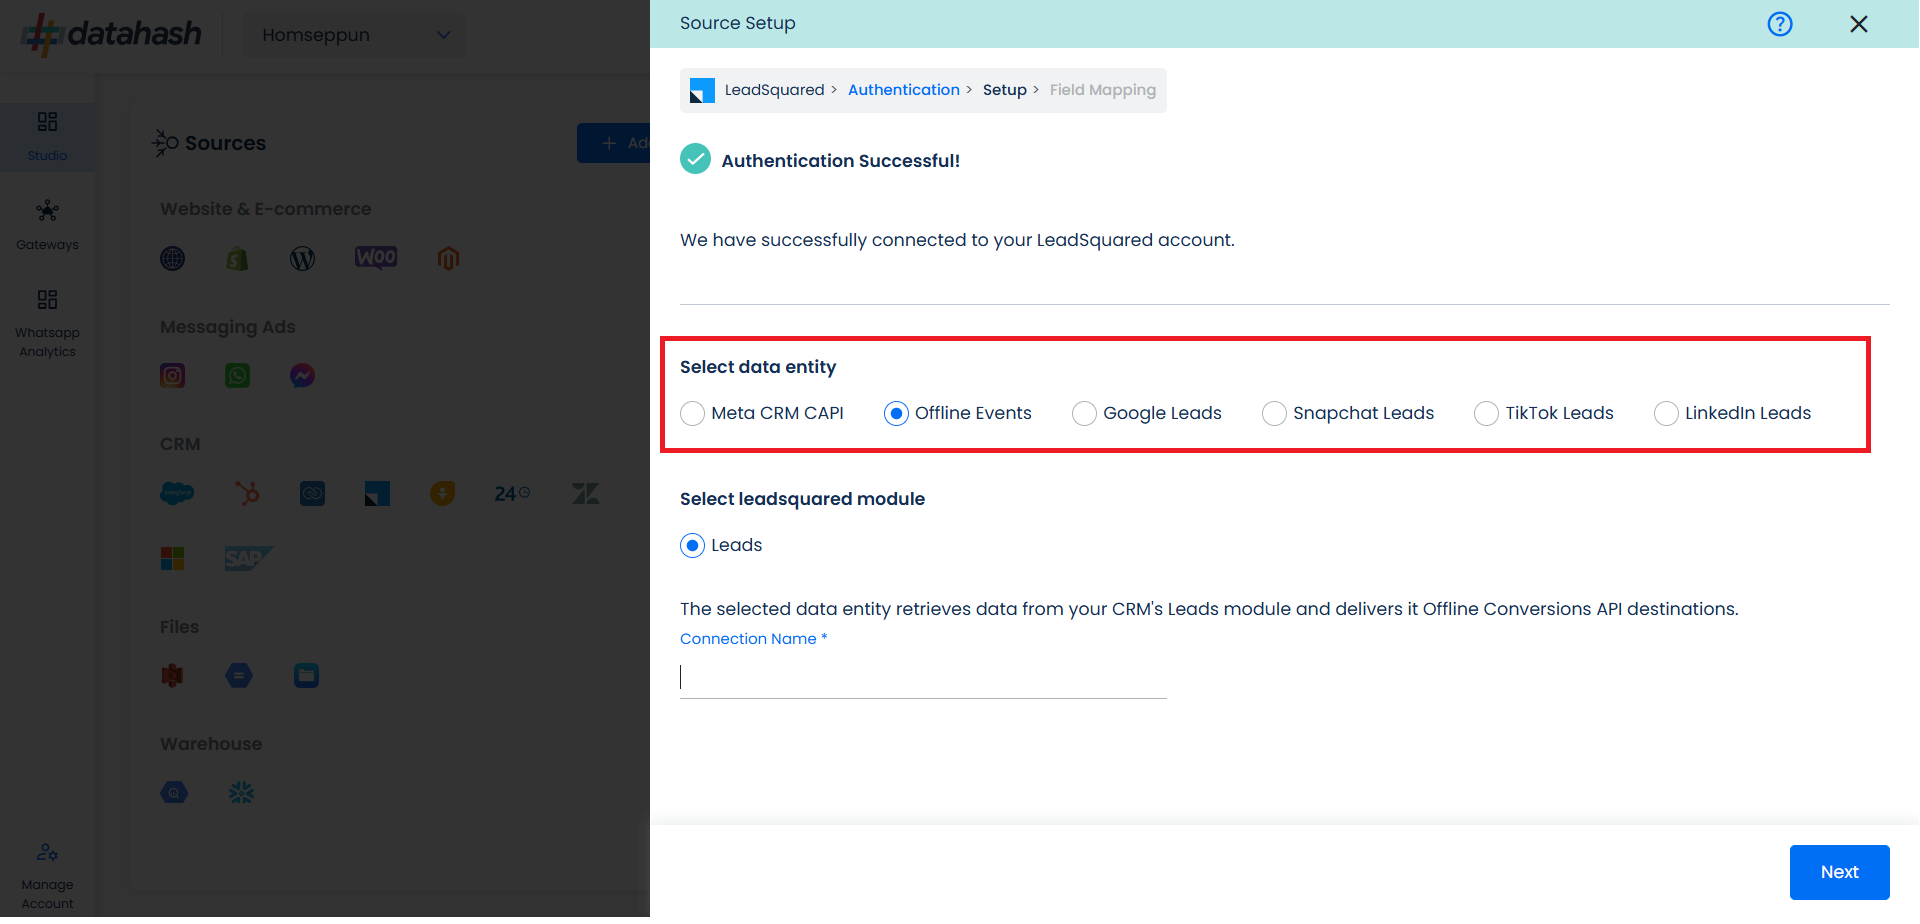
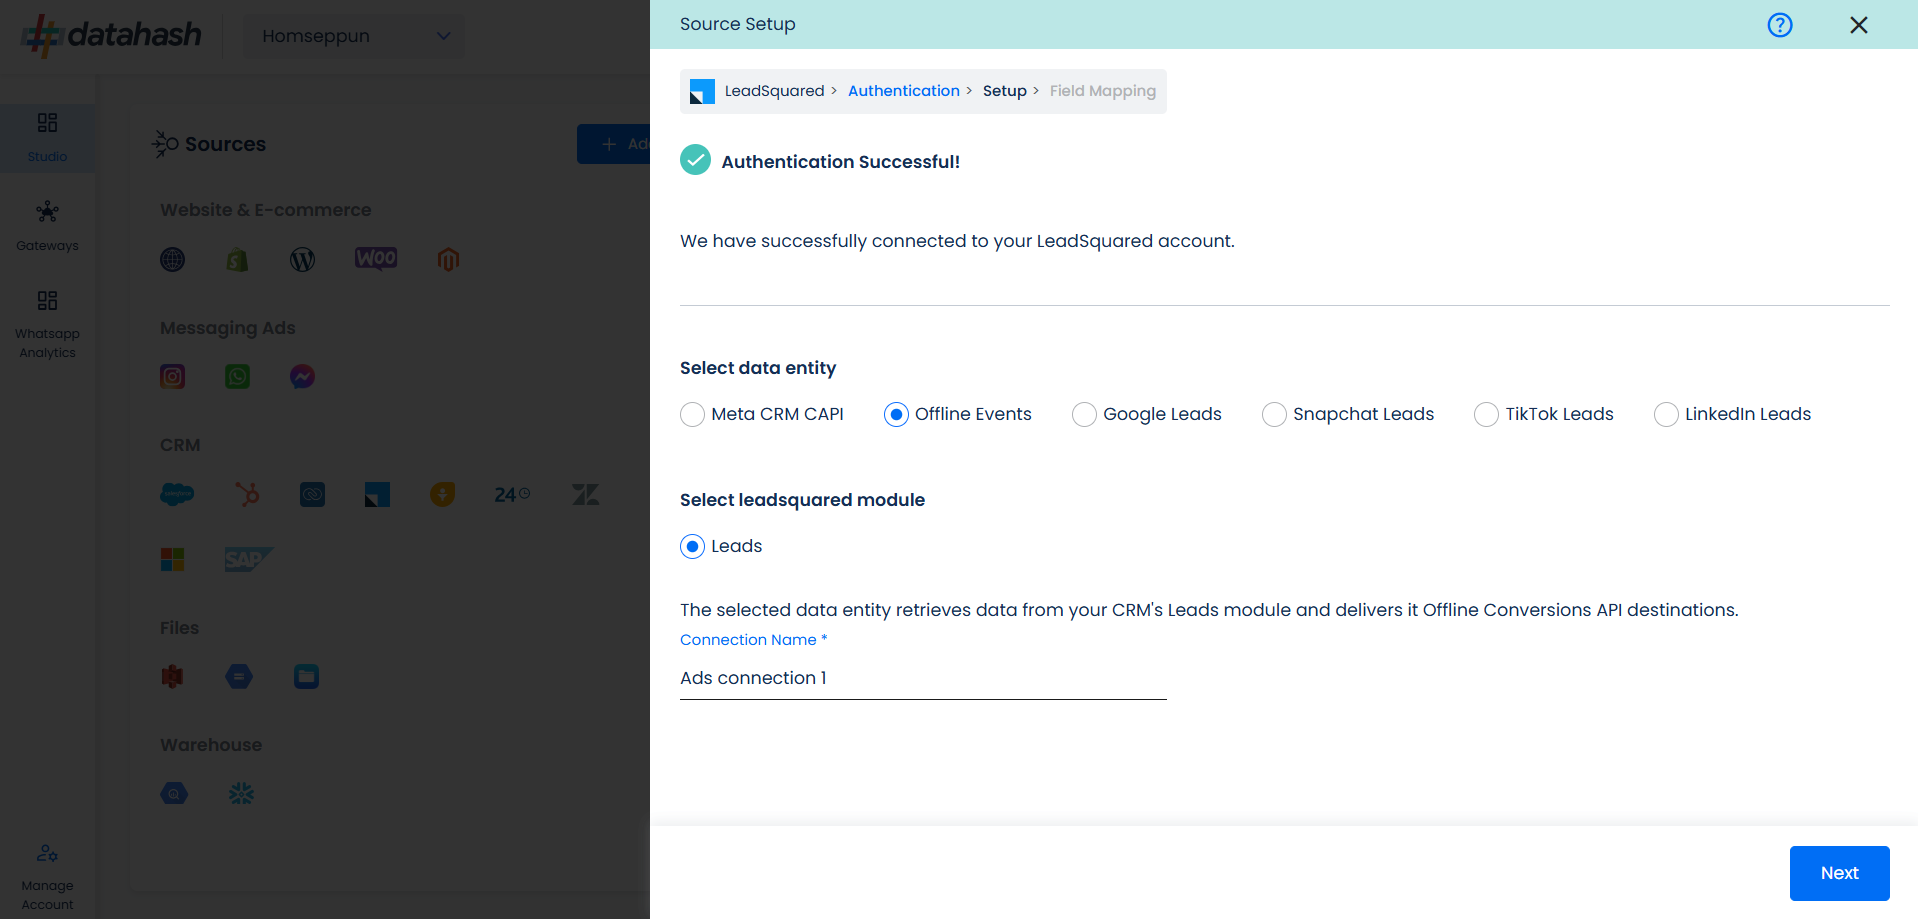
- Select the LeadSquared module from which you want to track the lead status updates into the Offline Conversions API and provide a name to the connection.
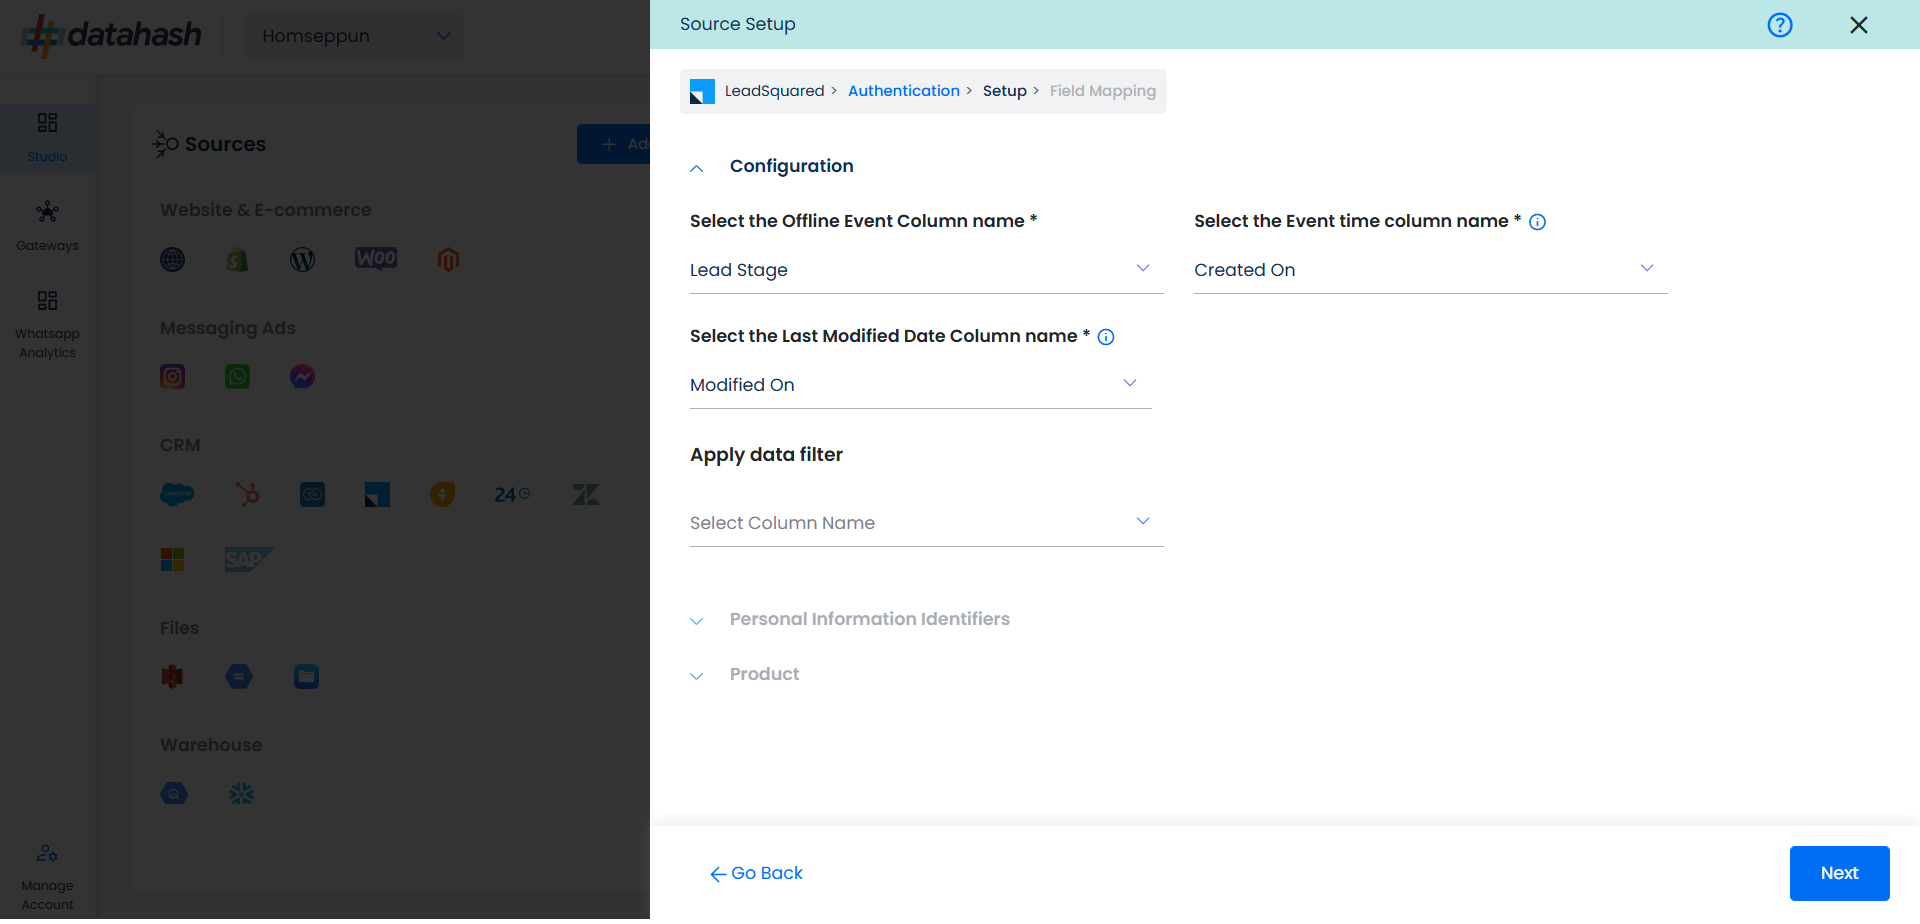
- Next step is to map the CRM fields with the data points required for Offline Events integration.
- Configuration: Select the following column name:
- Offline Event: This field indicates the identifier for the offline event in the CRM.
- Event time: This is the field that indicates the time at which the lead is captured
- Last Modified Date: This is the field that indicates the lead’s most recent update time to synchronize the latest updates. The default sync frequency is daily.
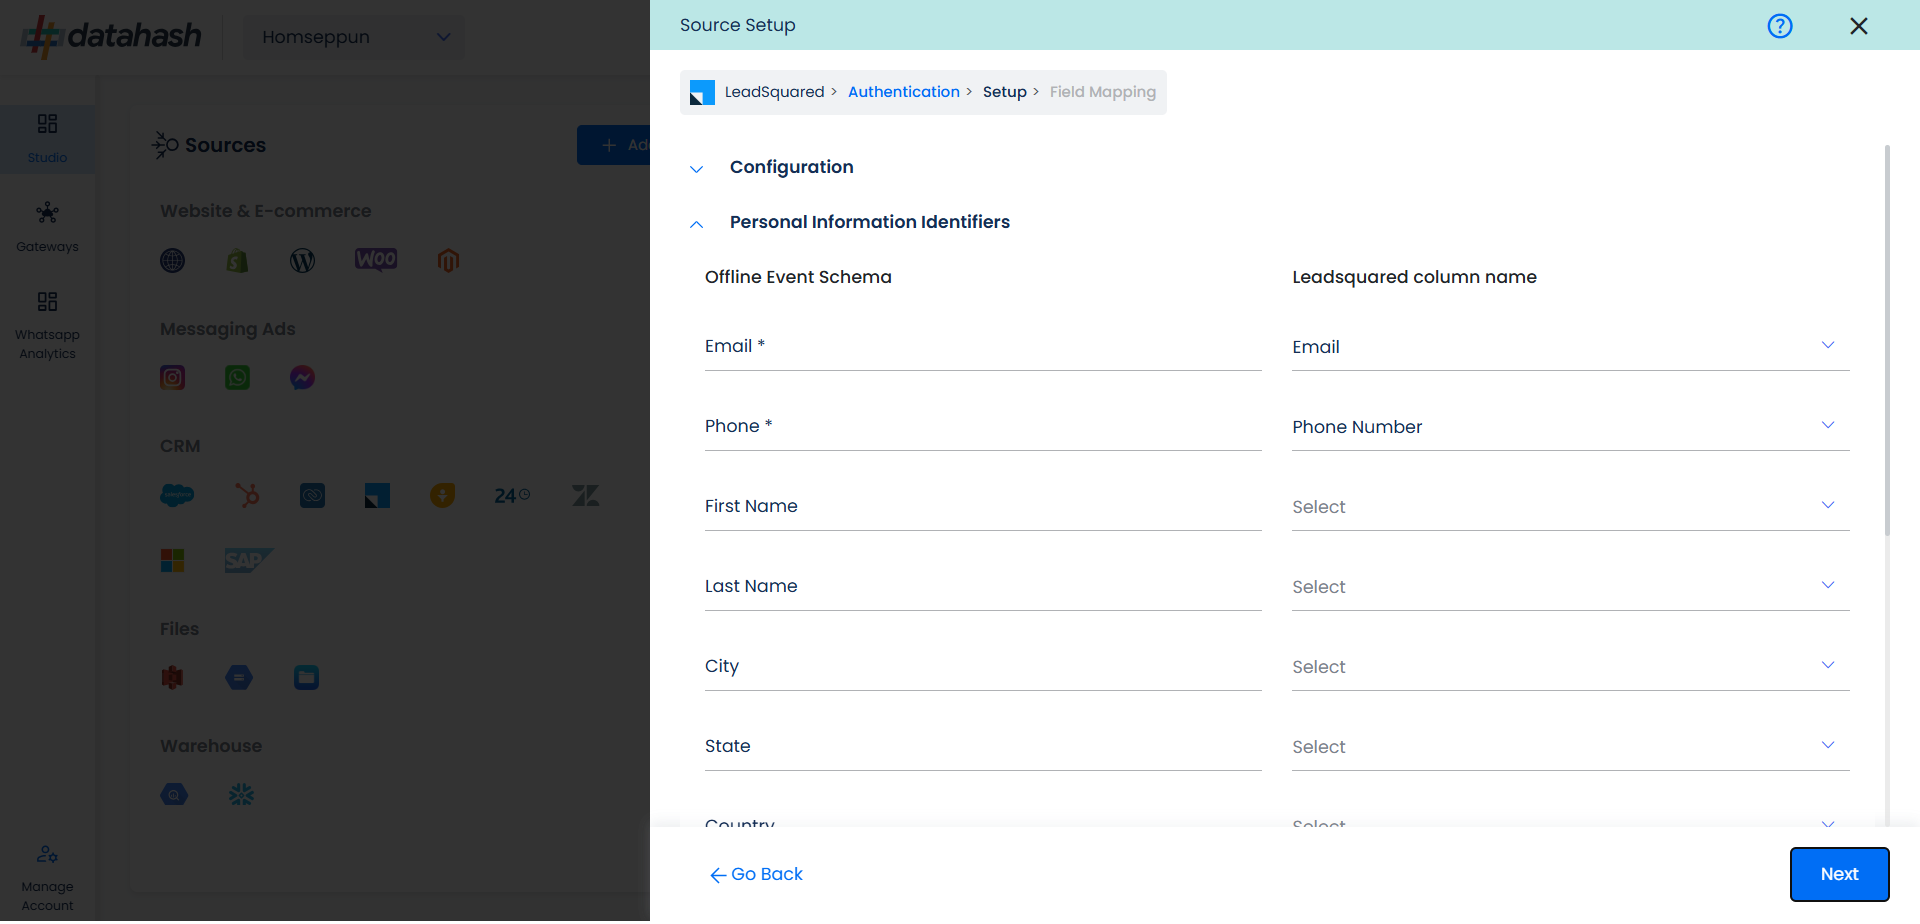
- Personal Information: Now you need to map the offline schema to LeadSquared column name. Here, the details of the User are asked.
- Product: In similar way as done above we need to map the offline events schema of the product to LeadSquared.
- Once done, click on “Test Connection” to proceed.

- Once done, you can view the latest leads data available in your CRM as per the mapping provided above.
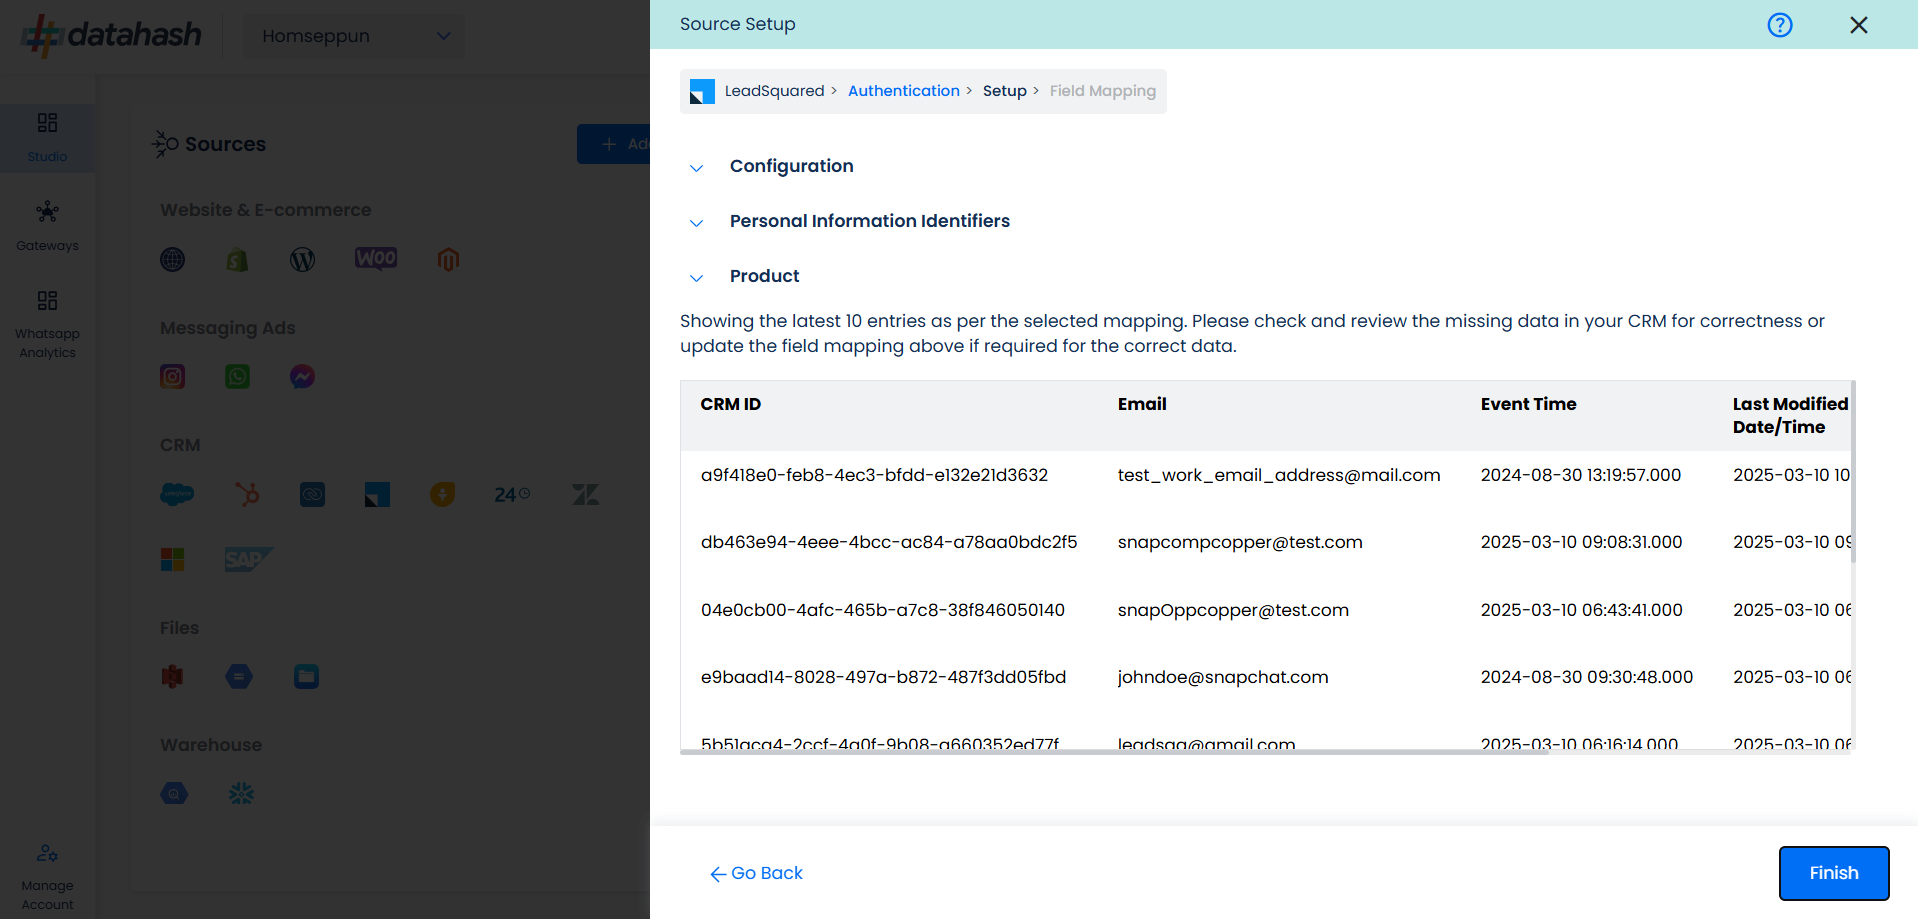
- You can check for errors if any are shown in the table data itself.
- Click Finish to complete the setup.
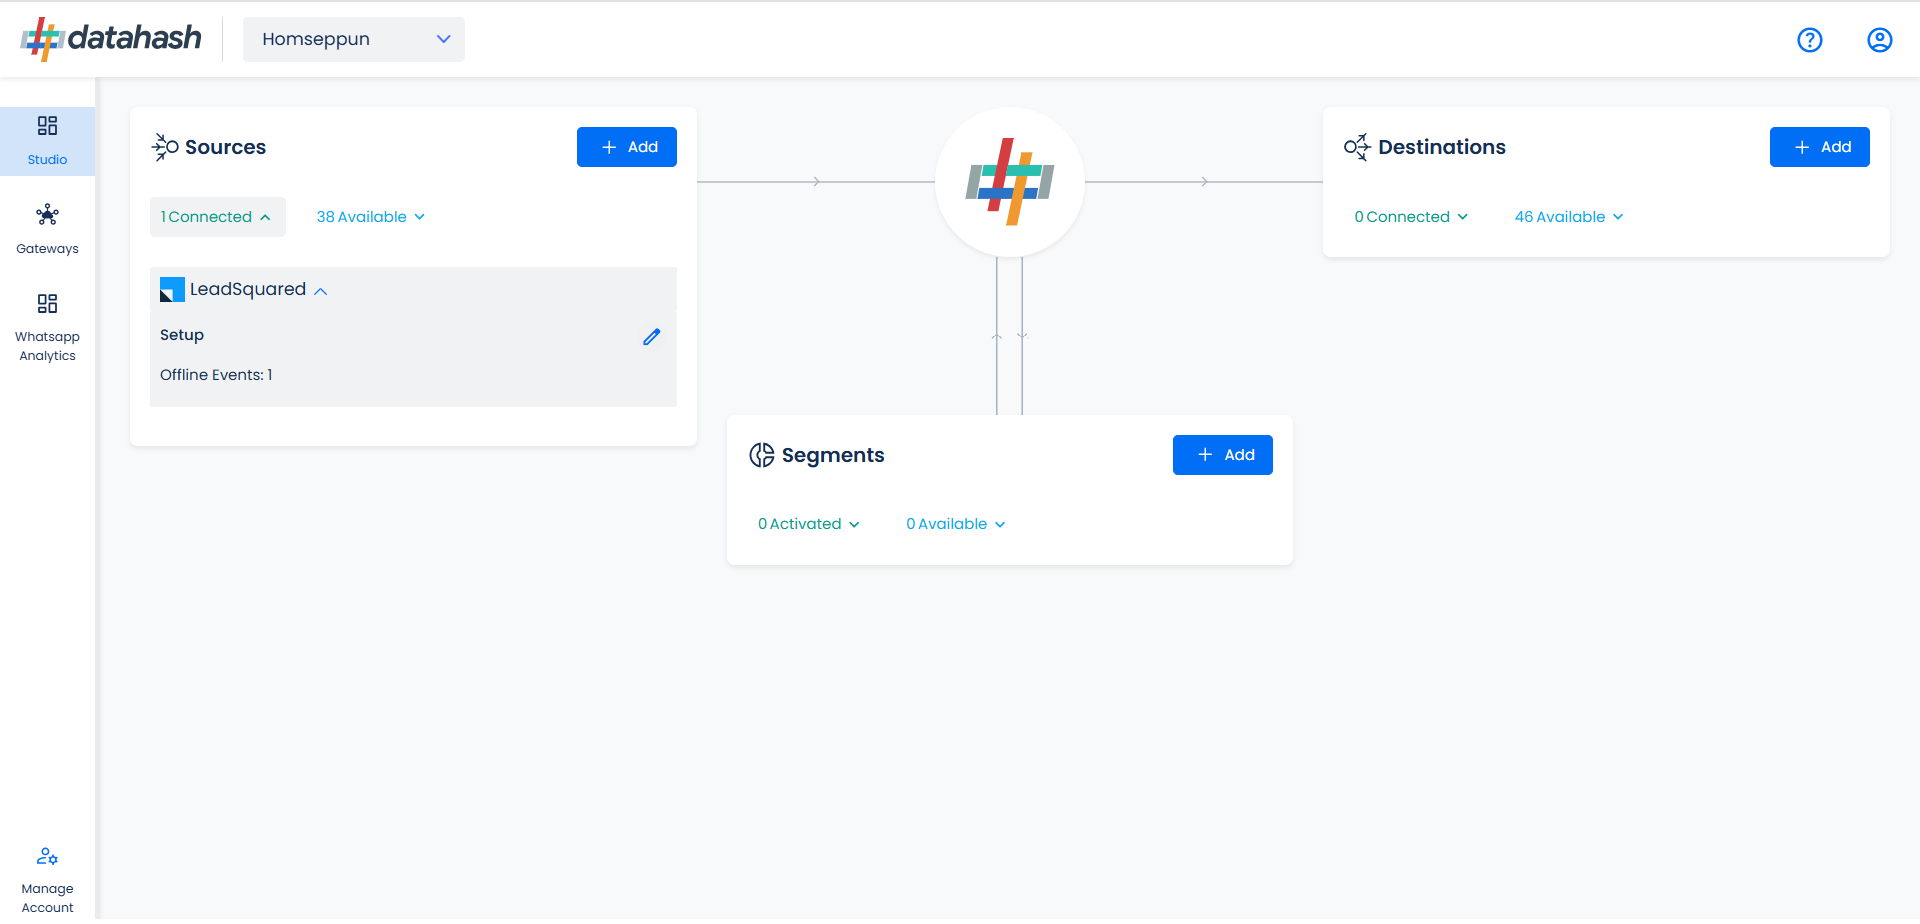
- You can access the set-up again by clicking on the edit button in the LeadSquared CRM connector widget
- The set-up configurations can be edited if required, from the Manage connections section.
- The source setup is completed, now the destination is to be set up. For that, refer to the documentation below:
- Set up Meta Offline Conversions API data destination