Overview:
The Datahash Conversion API Shopify App streamlines first-party data integration directly from your Shopify store, simplifying conversion tracking and ensuring compliance with GDPR and CCPA regulations. This app enables marketers to efficiently transmit data to various advertising platforms without the complexities of Google Tag Manager (GTM).
Pre-Requisites:
Before you start the integration, ensure you have the following:
- An active Shopify store subscription.
- Administrative access to your Shopify store.
- A registered domain with DNS management capabilities.
- An active Datahash account.
Implementation steps:
Step 1: Log in to Datahash
- Go to the Datahash Login page.
- Enter your credentials and log in.
2. Set Up Your Subdomain
Step 2: Set Up Your Subdomain
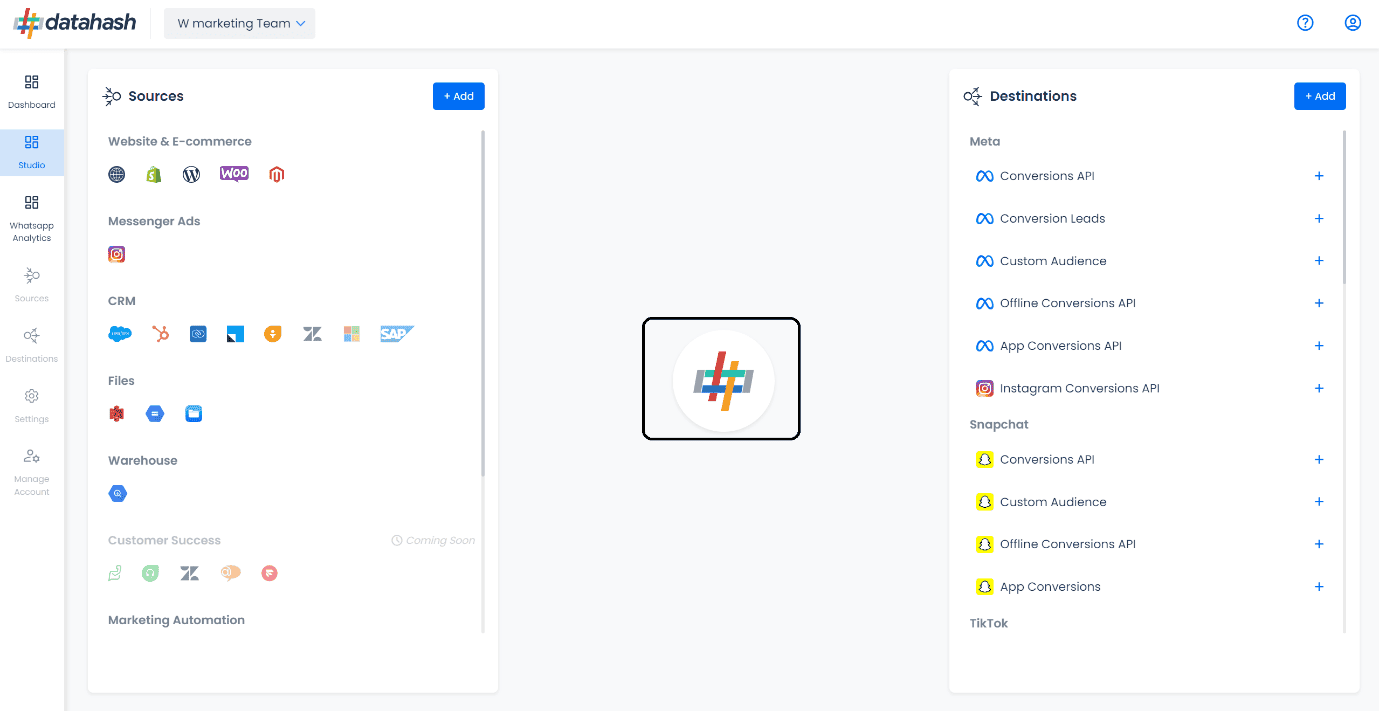
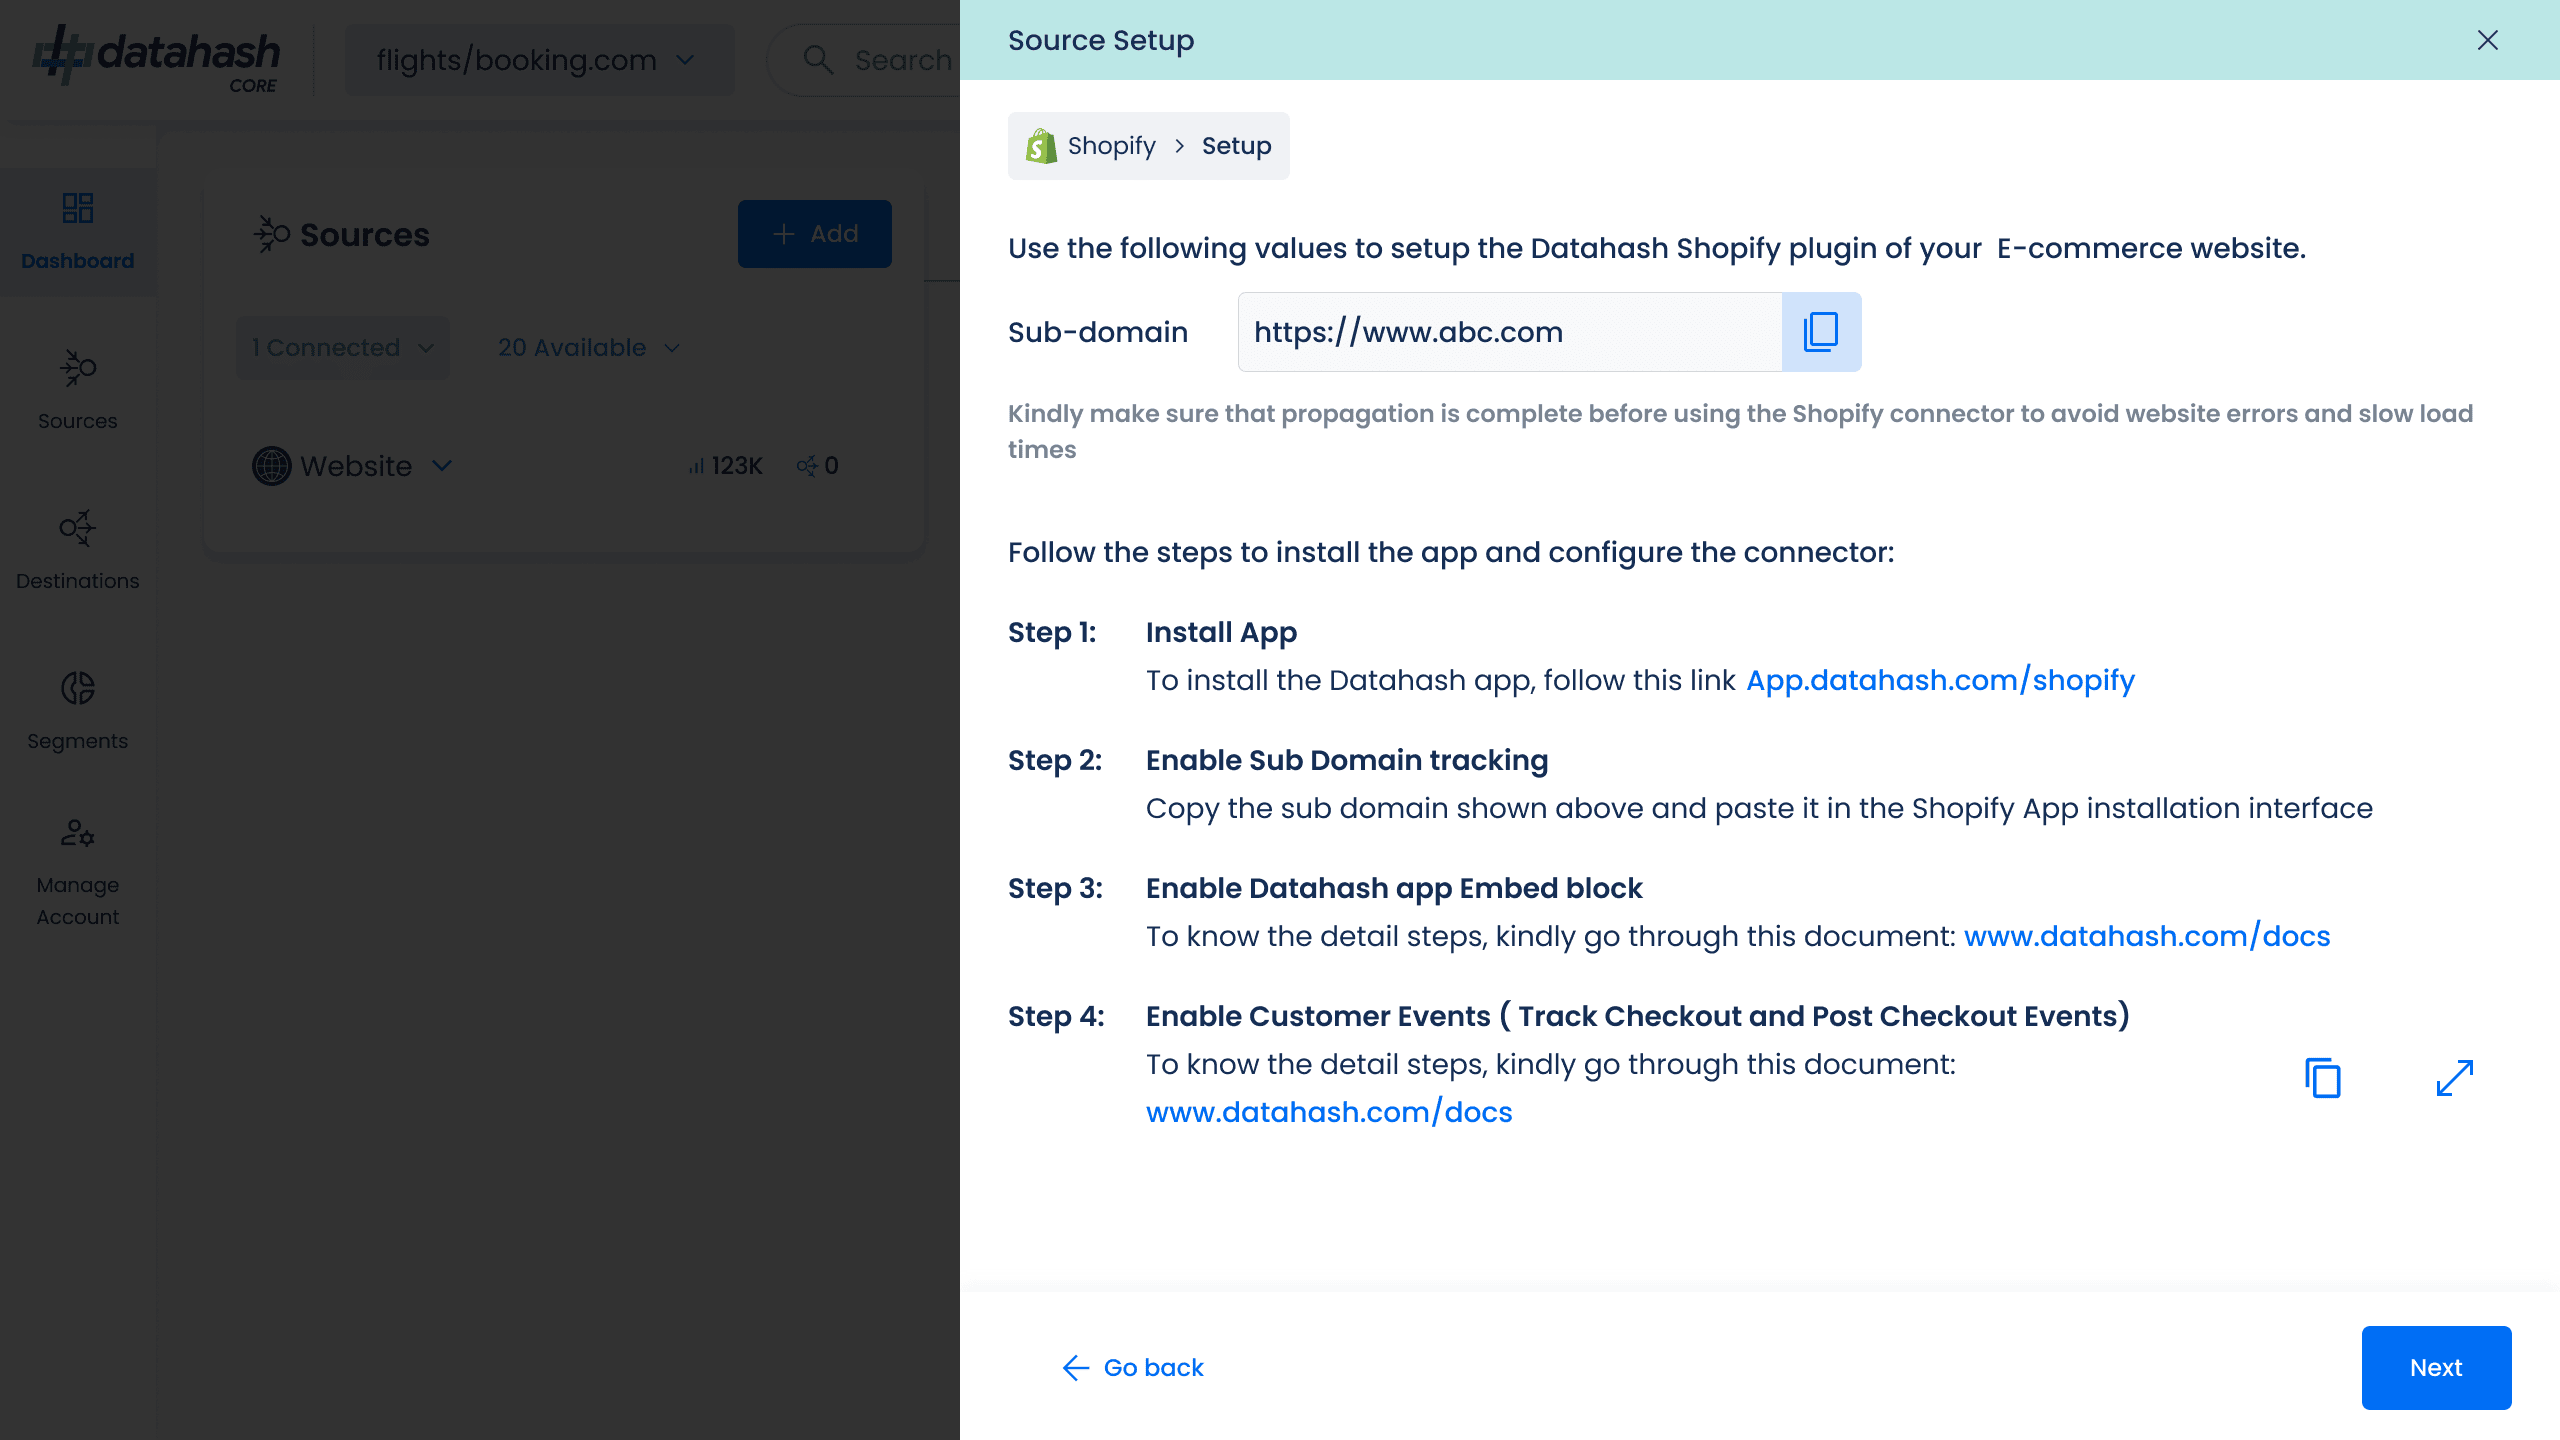
- In Datahash Studio, navigate to Website & E-commerce under the Sources list.
- Click the Shopify connector tile.
- Before setting up the Shopify connector, subdomain configuration is mandatory.
- On the Subdomain screen, enter your desired subdomain (e.g., tracking.yourstore.com) — this is crucial for enabling server-to-server first-party tracking.
- Datahash will generate DNS records for your subdomain.
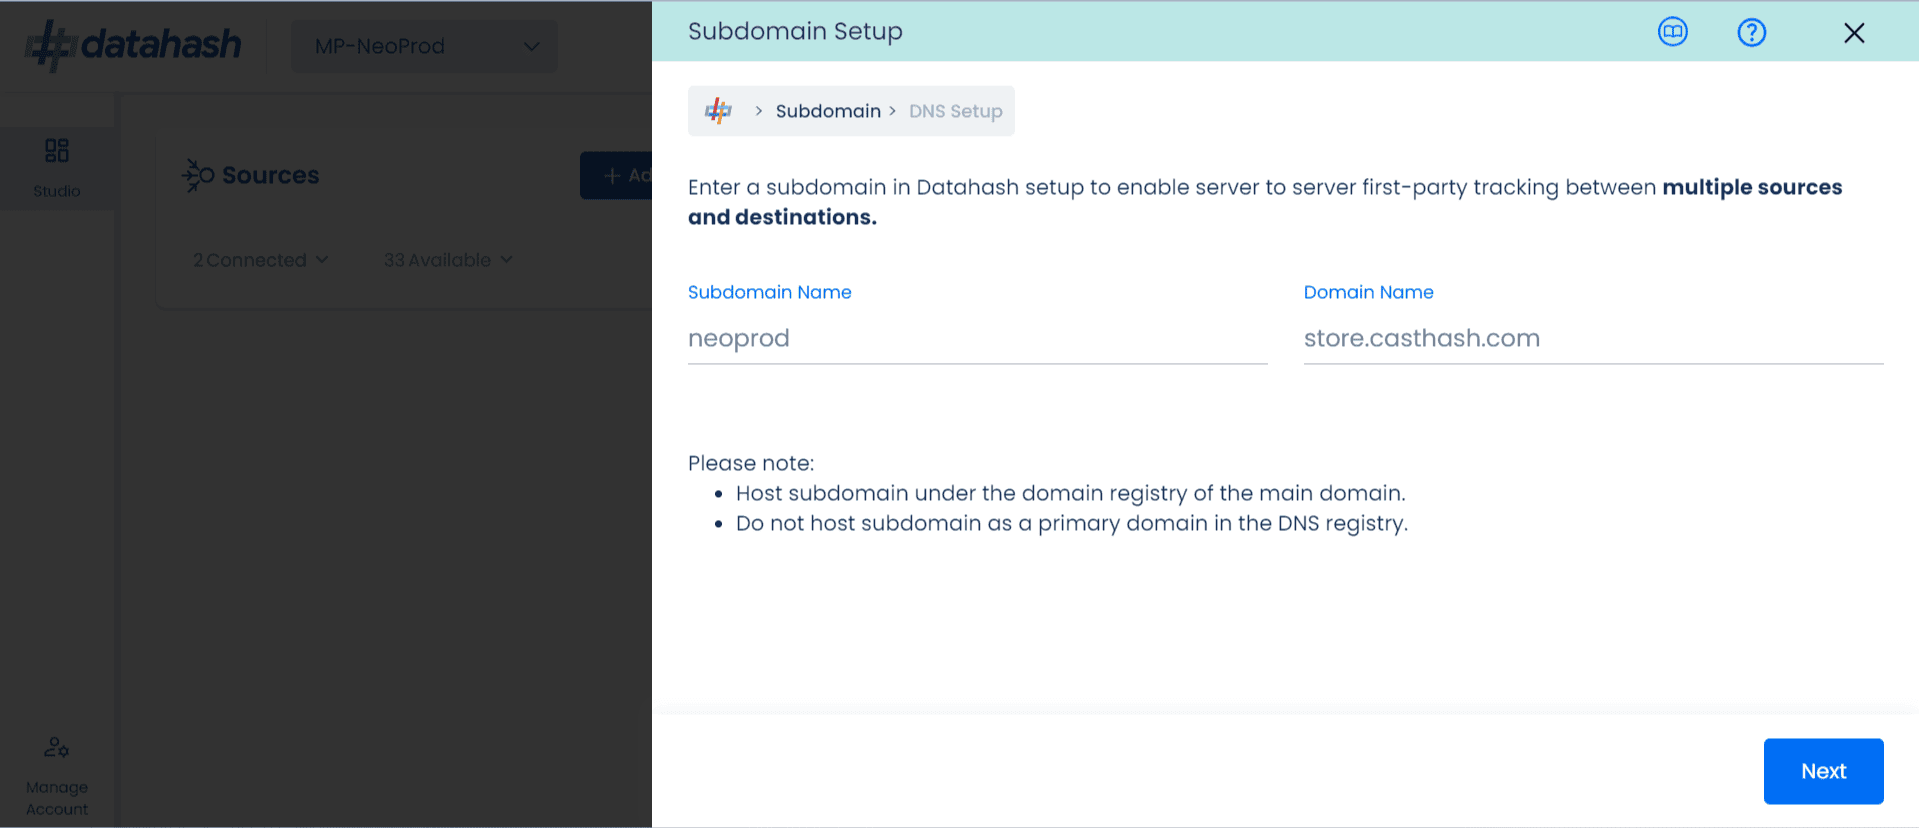
- Map these records in your domain service provider (e.g., GoDaddy, Cloudflare).
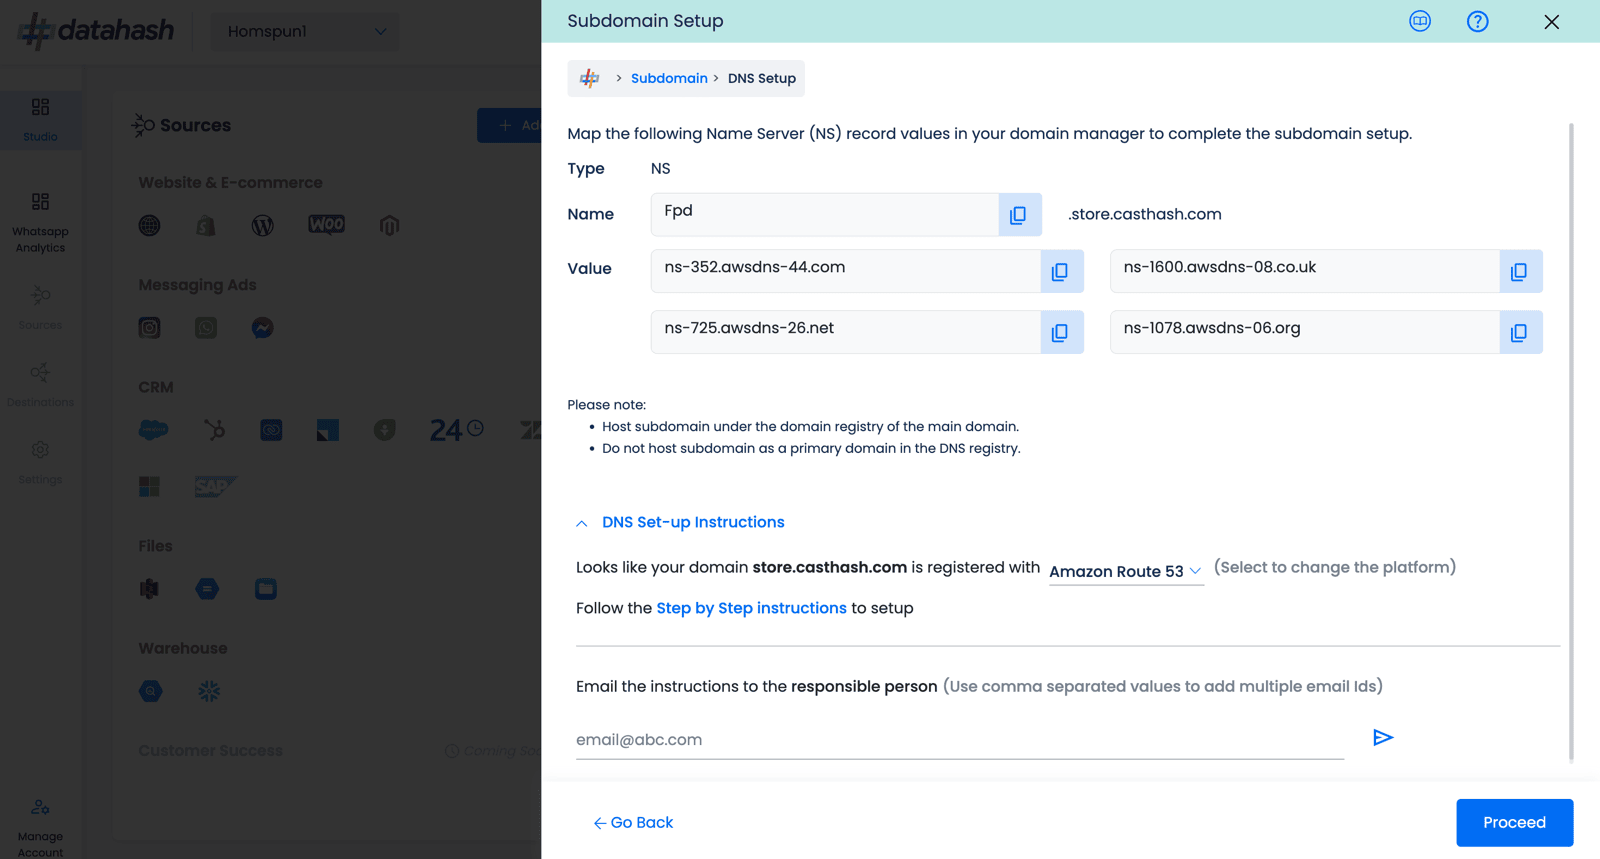
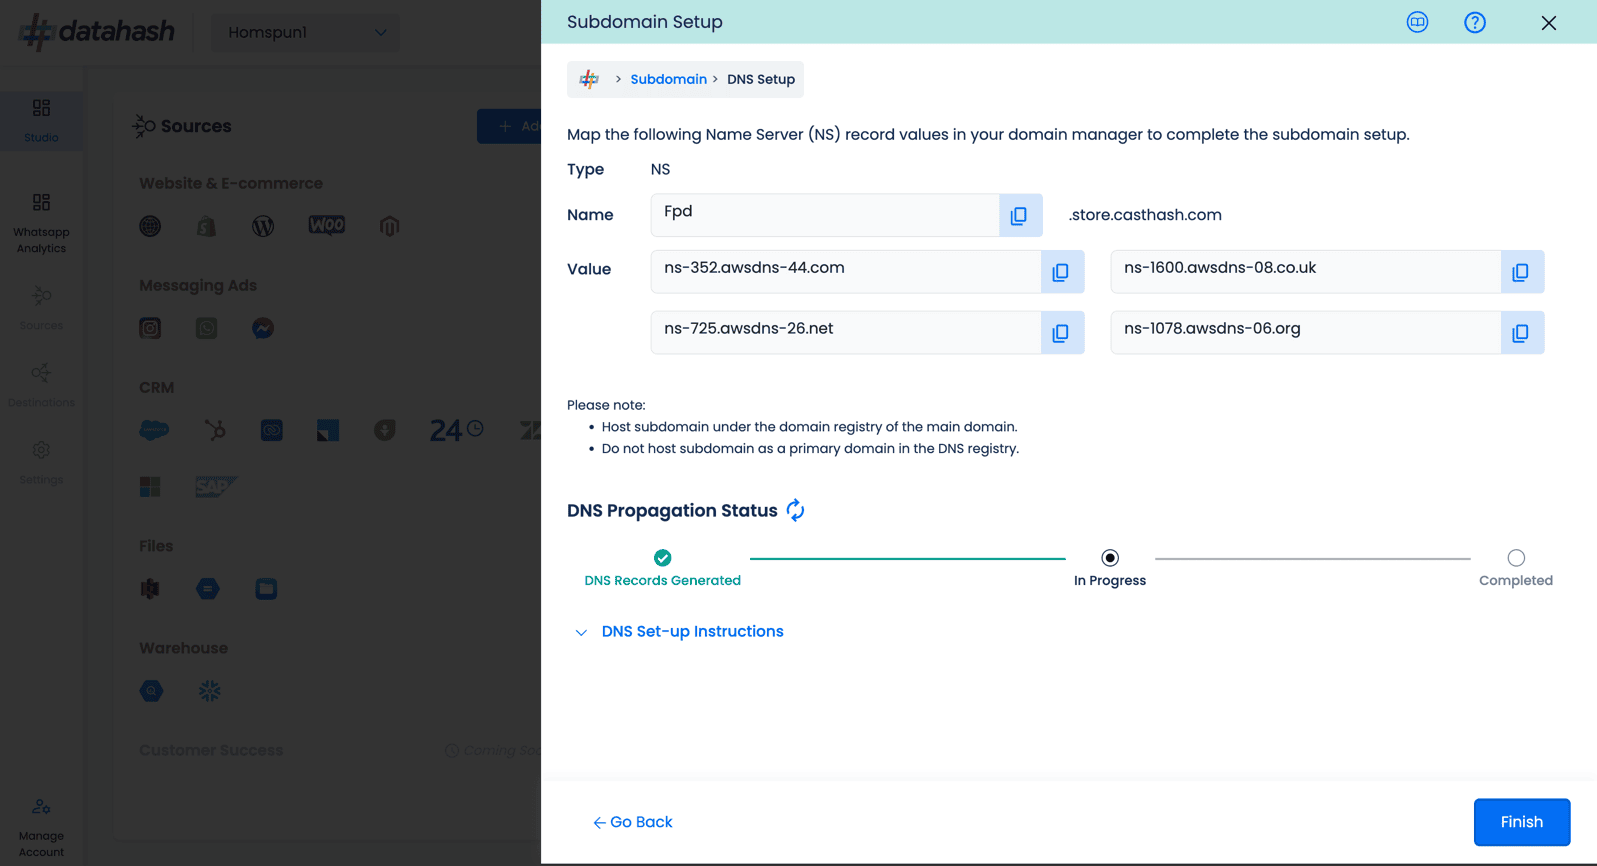
Important:
- The subdomain must be hosted under the main domain’s registry.
- Do not host the subdomain as a primary domain.
Step 3: Install the Datahash App
- Click here to install the Datahash App from the Shopify App Store.
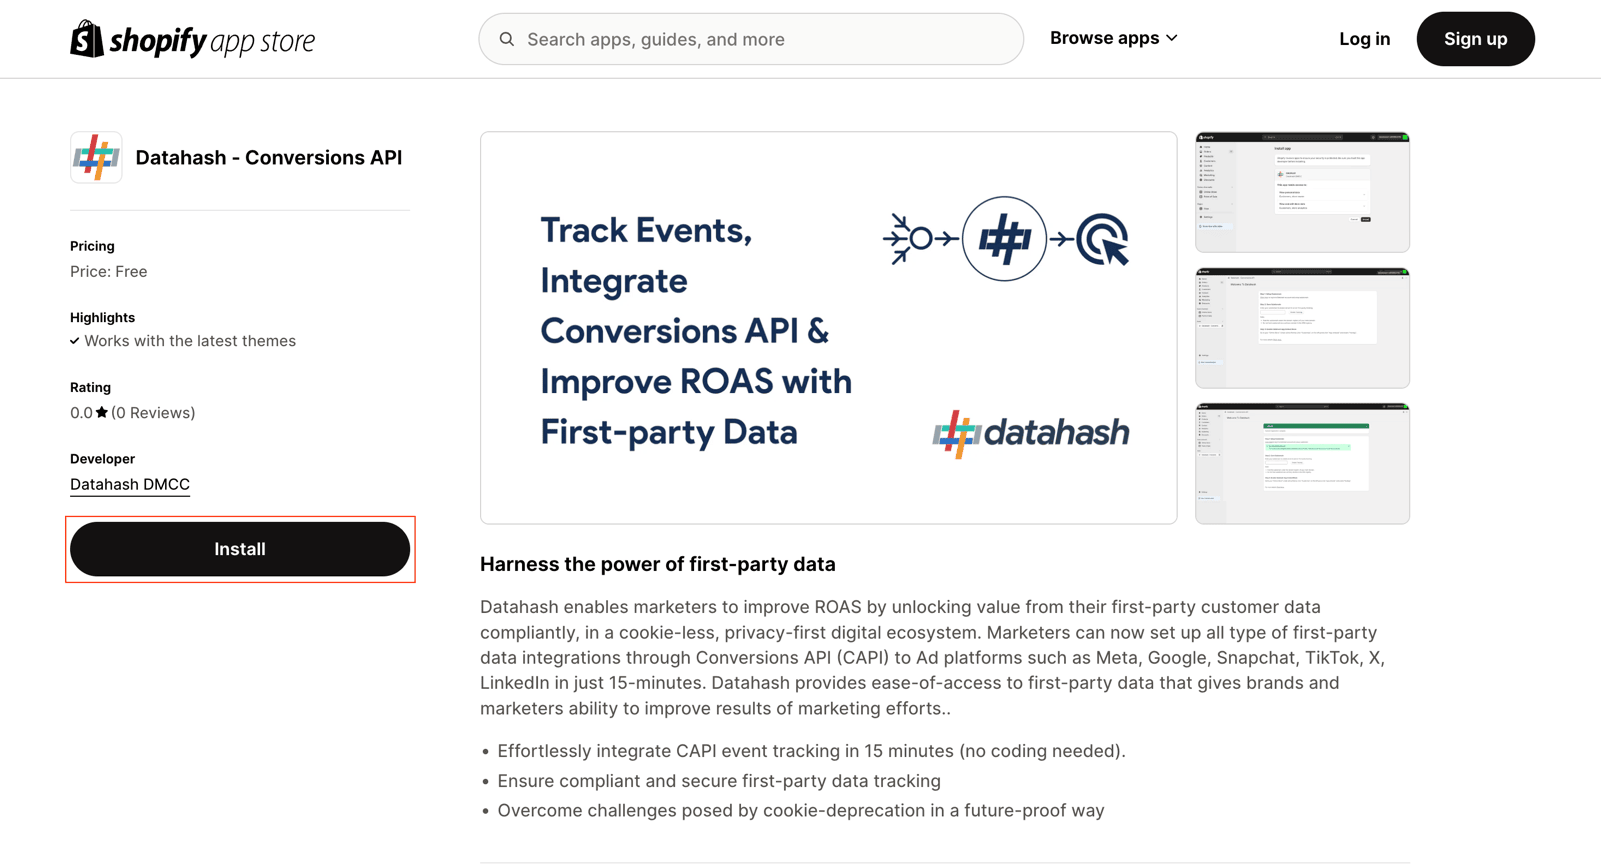
- Ensure you are logged in to the correct Shopify store.
- Click Install and grant the requested permissions.
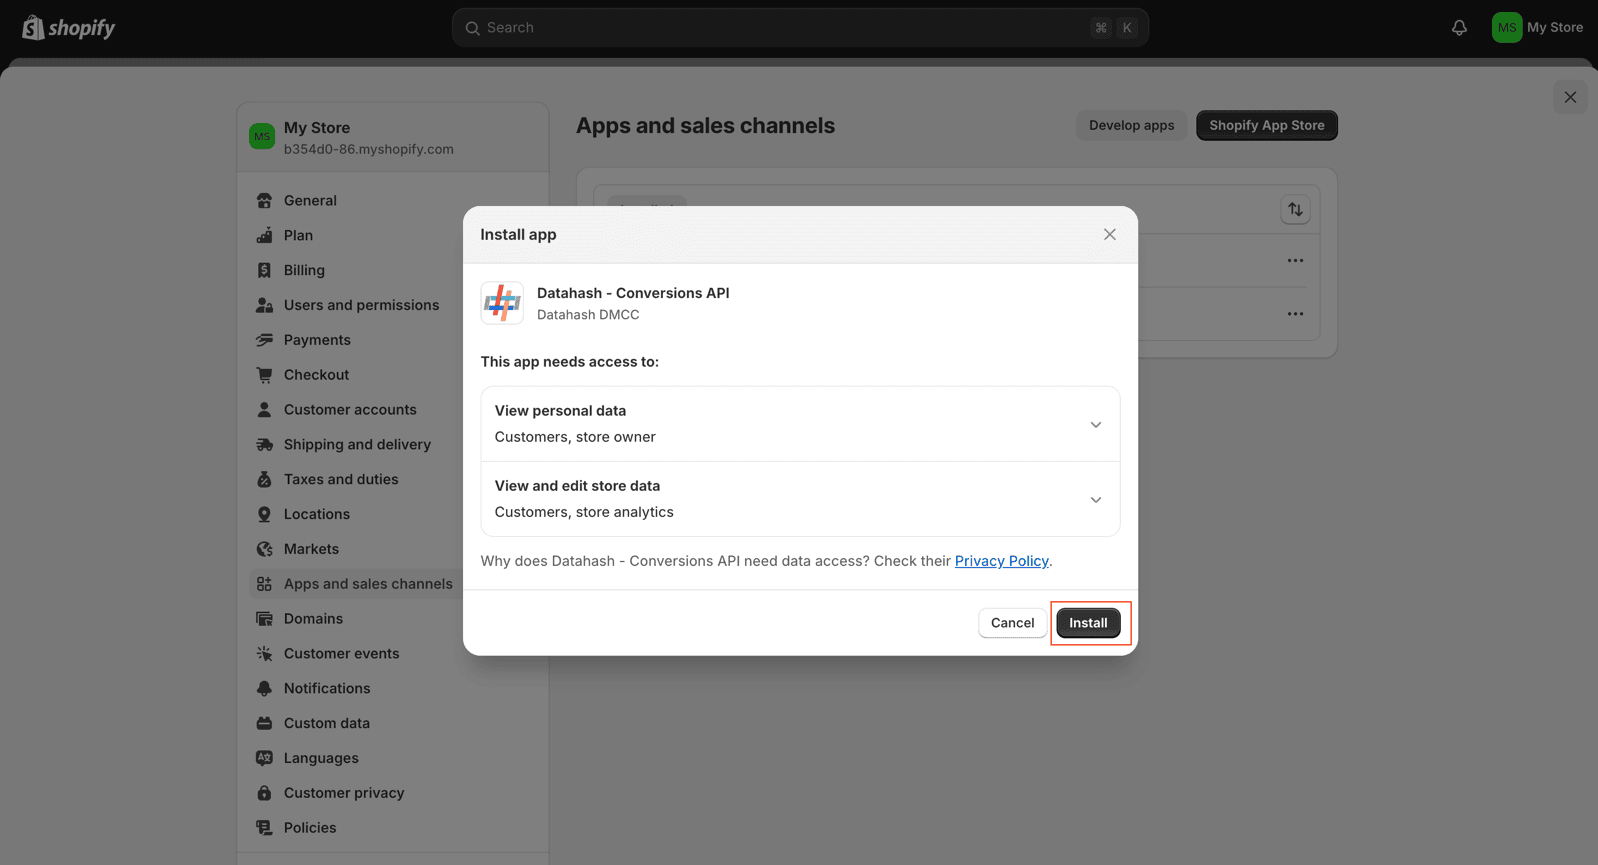
- After installation, you will land on the Datahash App page.
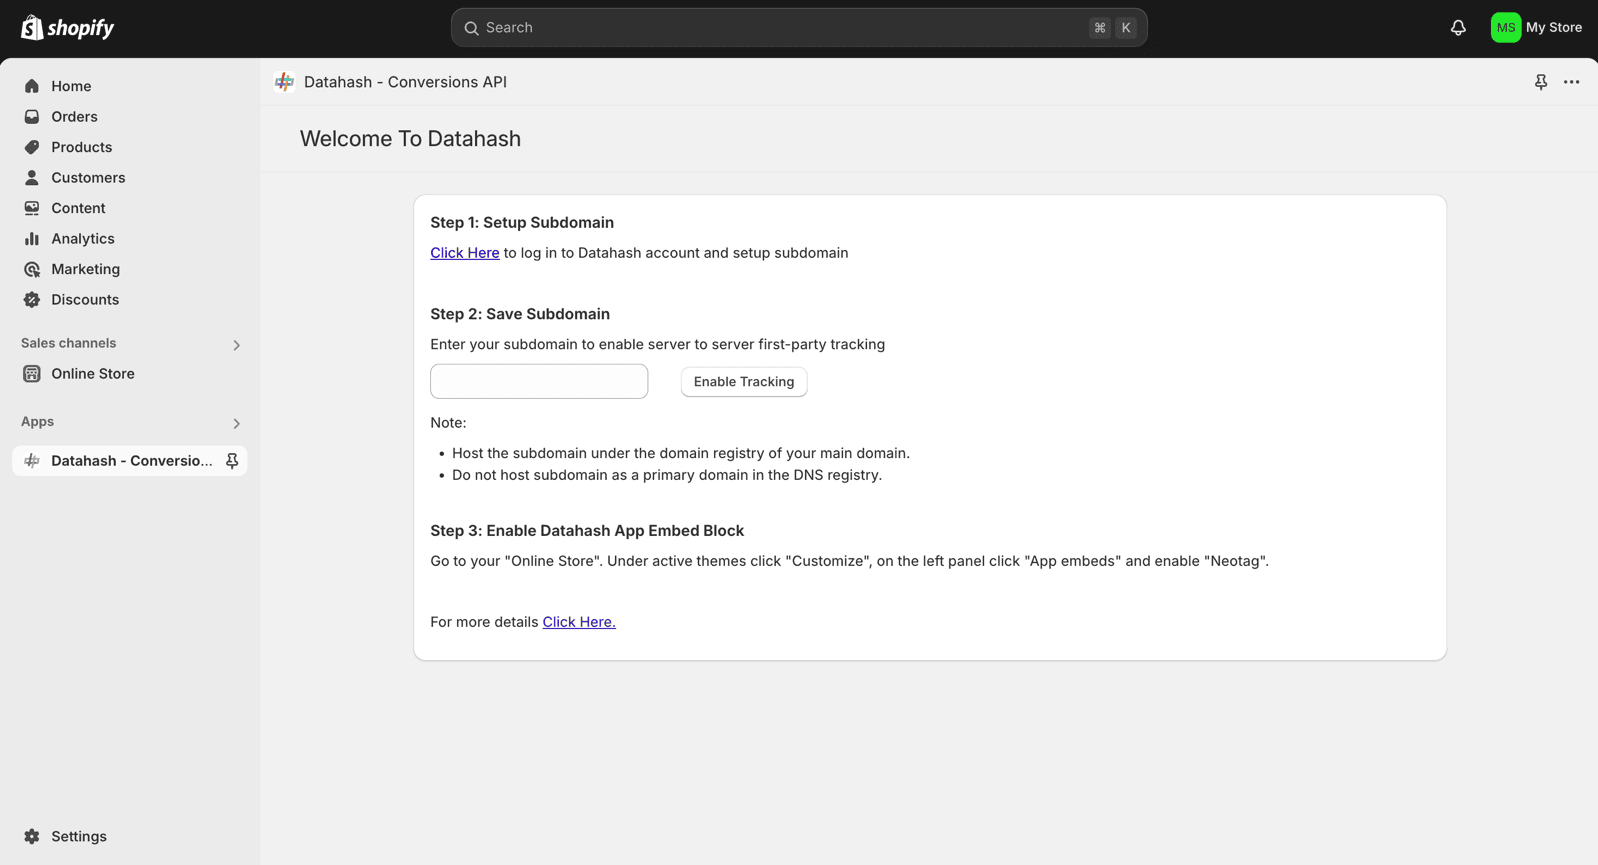
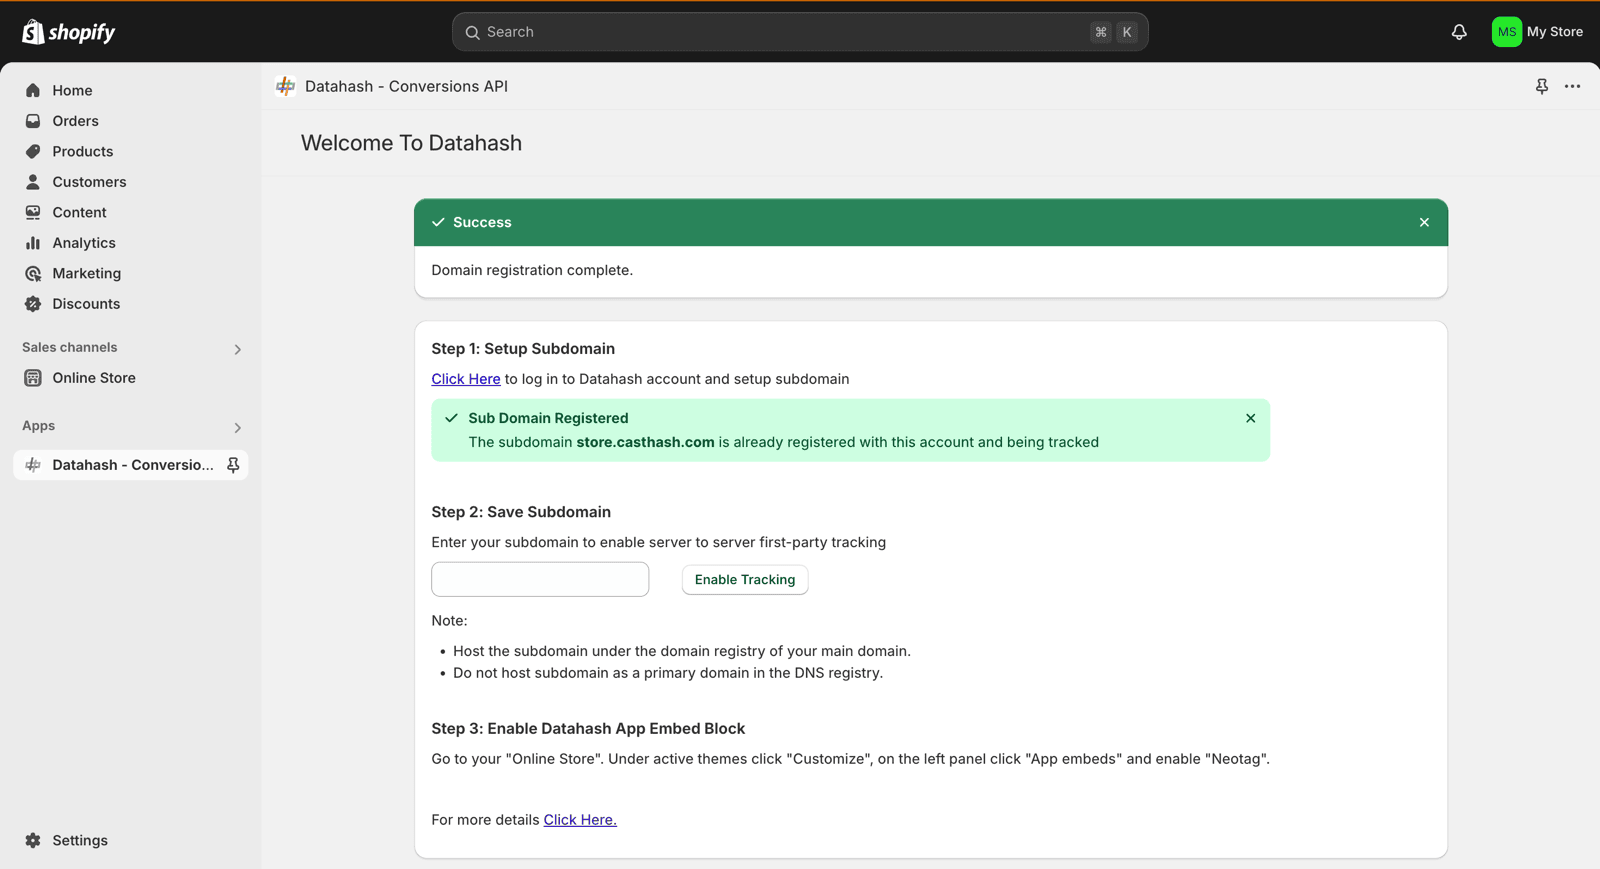
Step 4: Save Subdomain in Datahash
- In the Datahash App page within Shopify, enter your subdomain (e.g., tracking.yourstore.com).
- Copy the generated DNS records and add them to your domain provider.
- Return to the Datahash App, re-enter the subdomain, and click Enable Tracking.
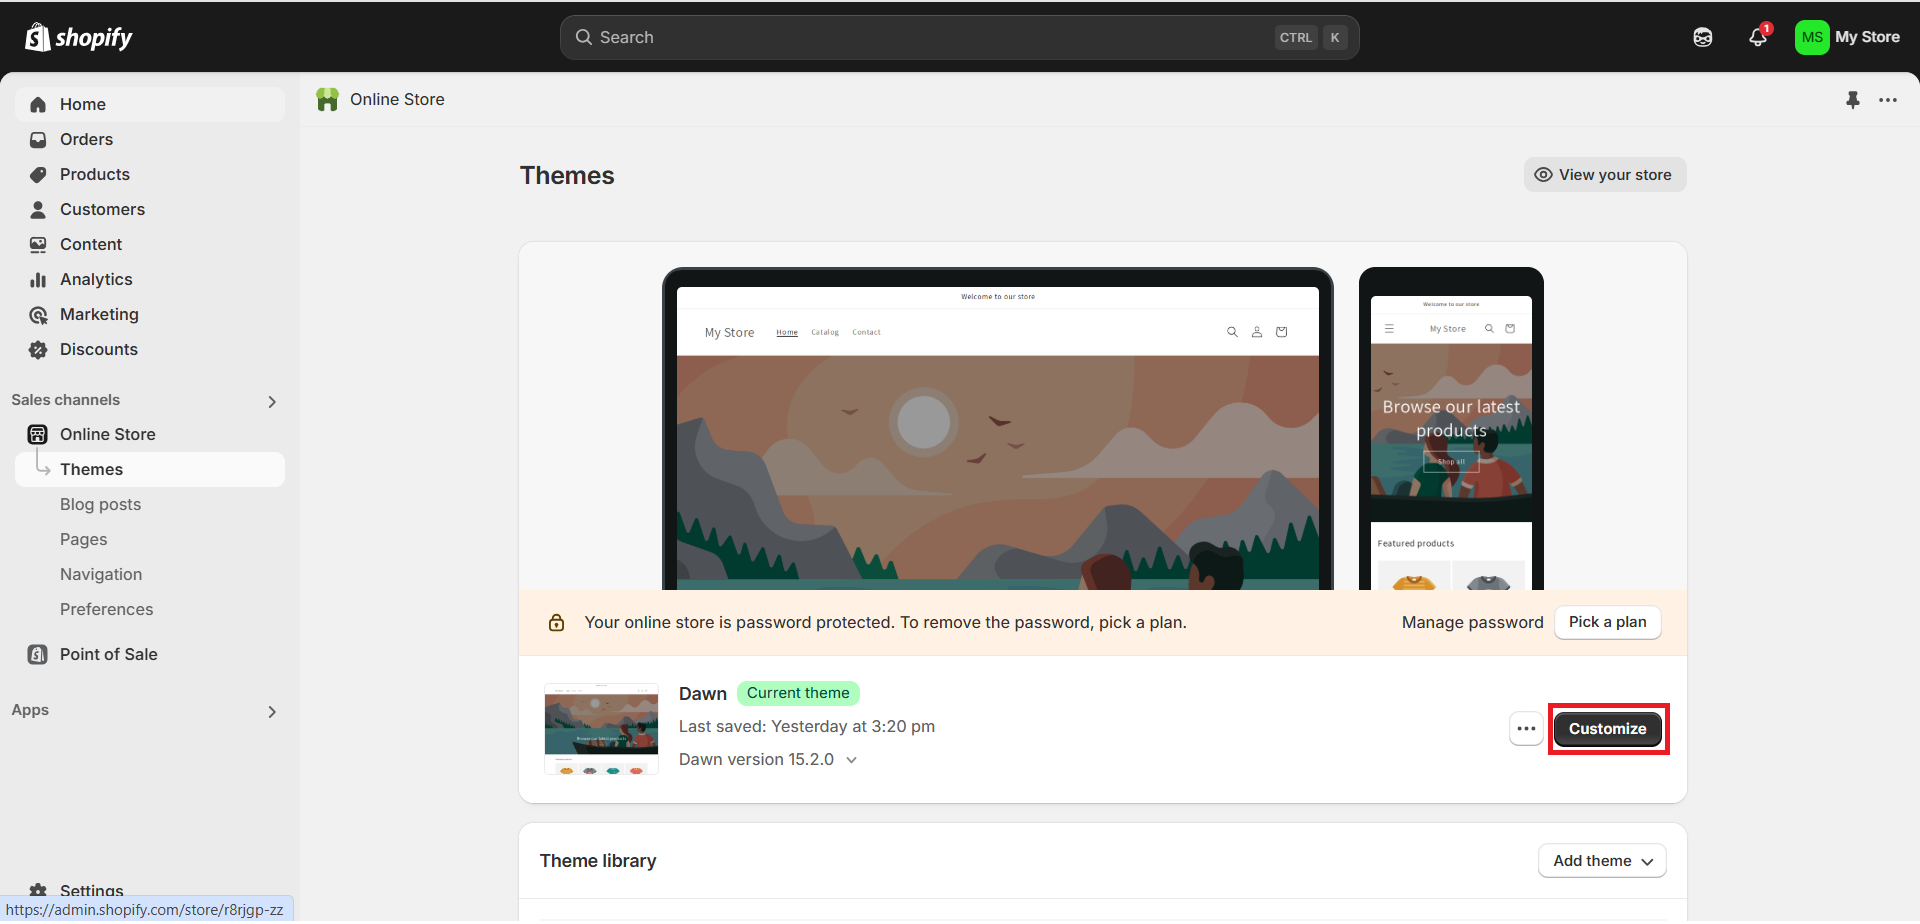
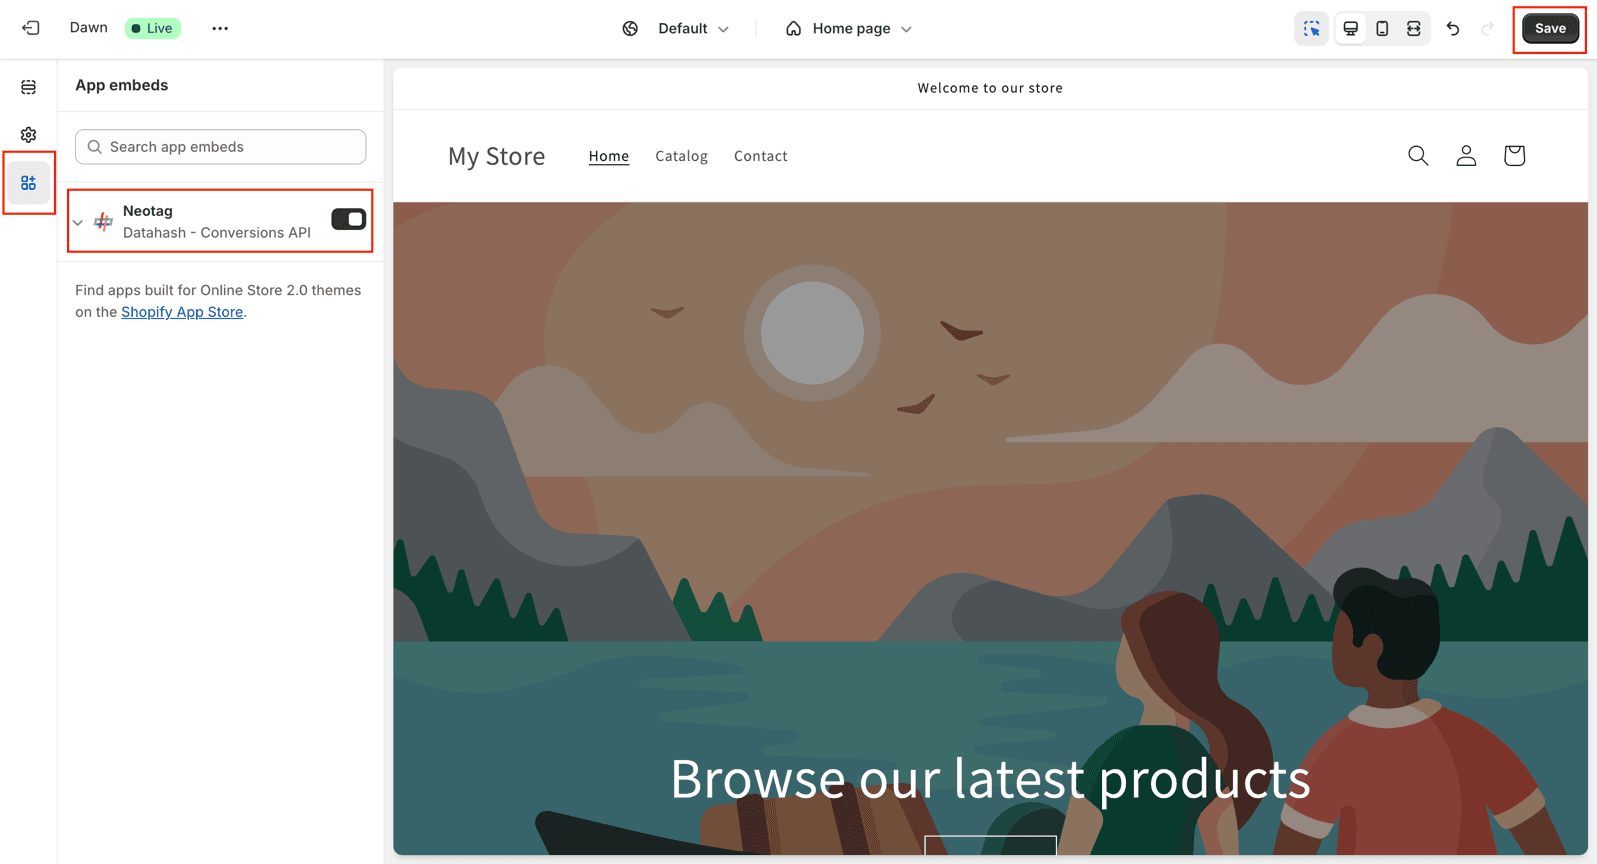
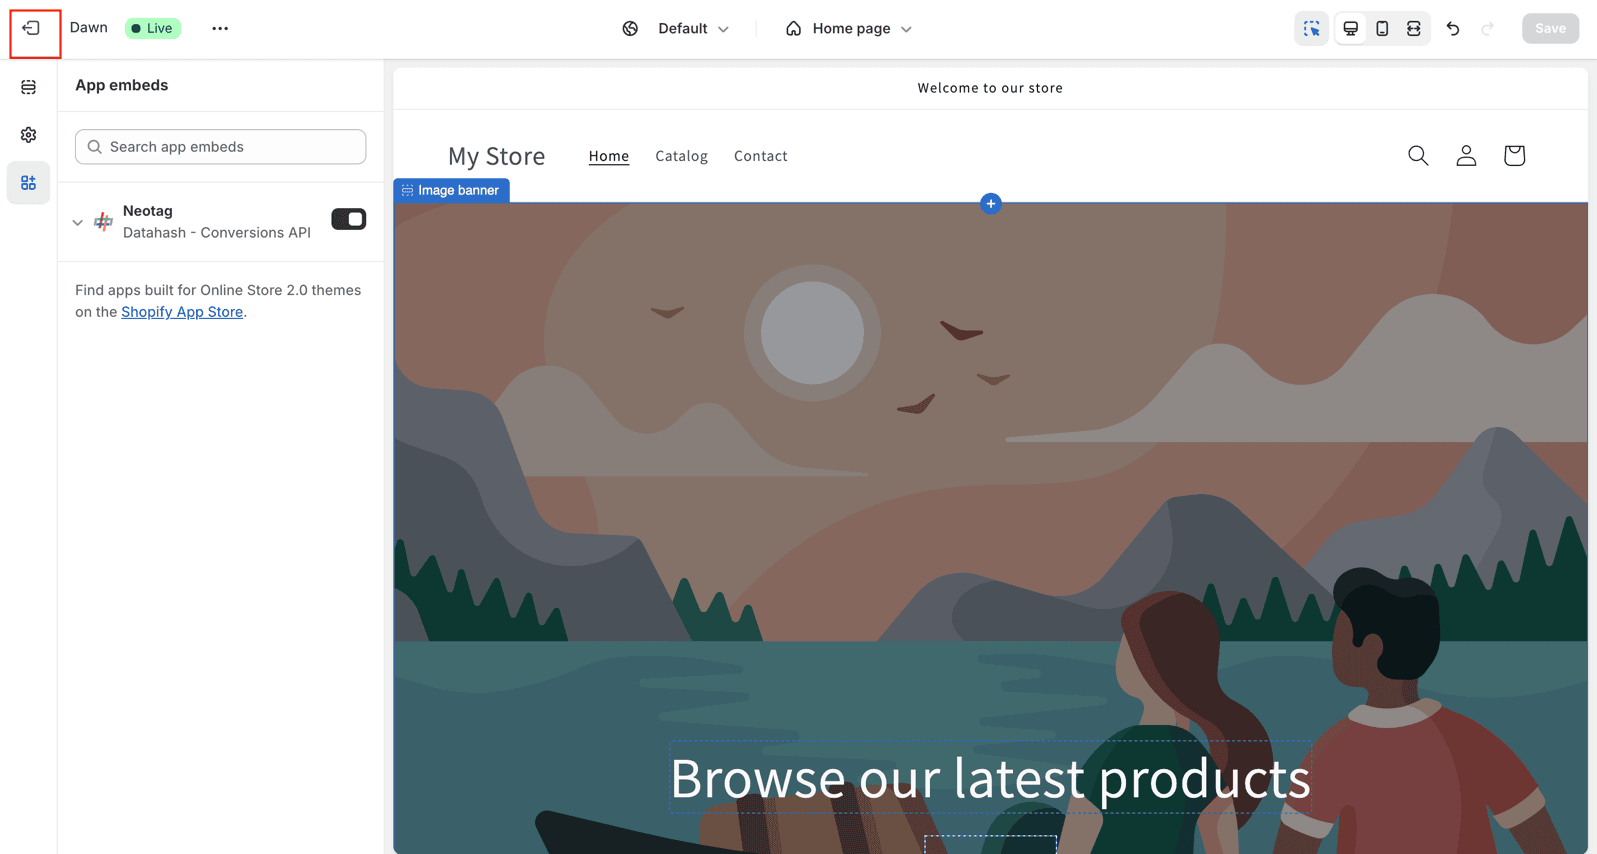
Step 5: Enable the Datahash App Embed Block
- In Shopify Admin, go to Online Store > Themes > Customize.
- In the left panel, select App embeds.
- Locate Neotag and enable it.
- Click Save and Publish.
Step 6: Enable Customer Events
- Exit the App embeds section by clicking Exit in the upper-right corner.
- In Shopify Admin, go to Settings > Customer Events.
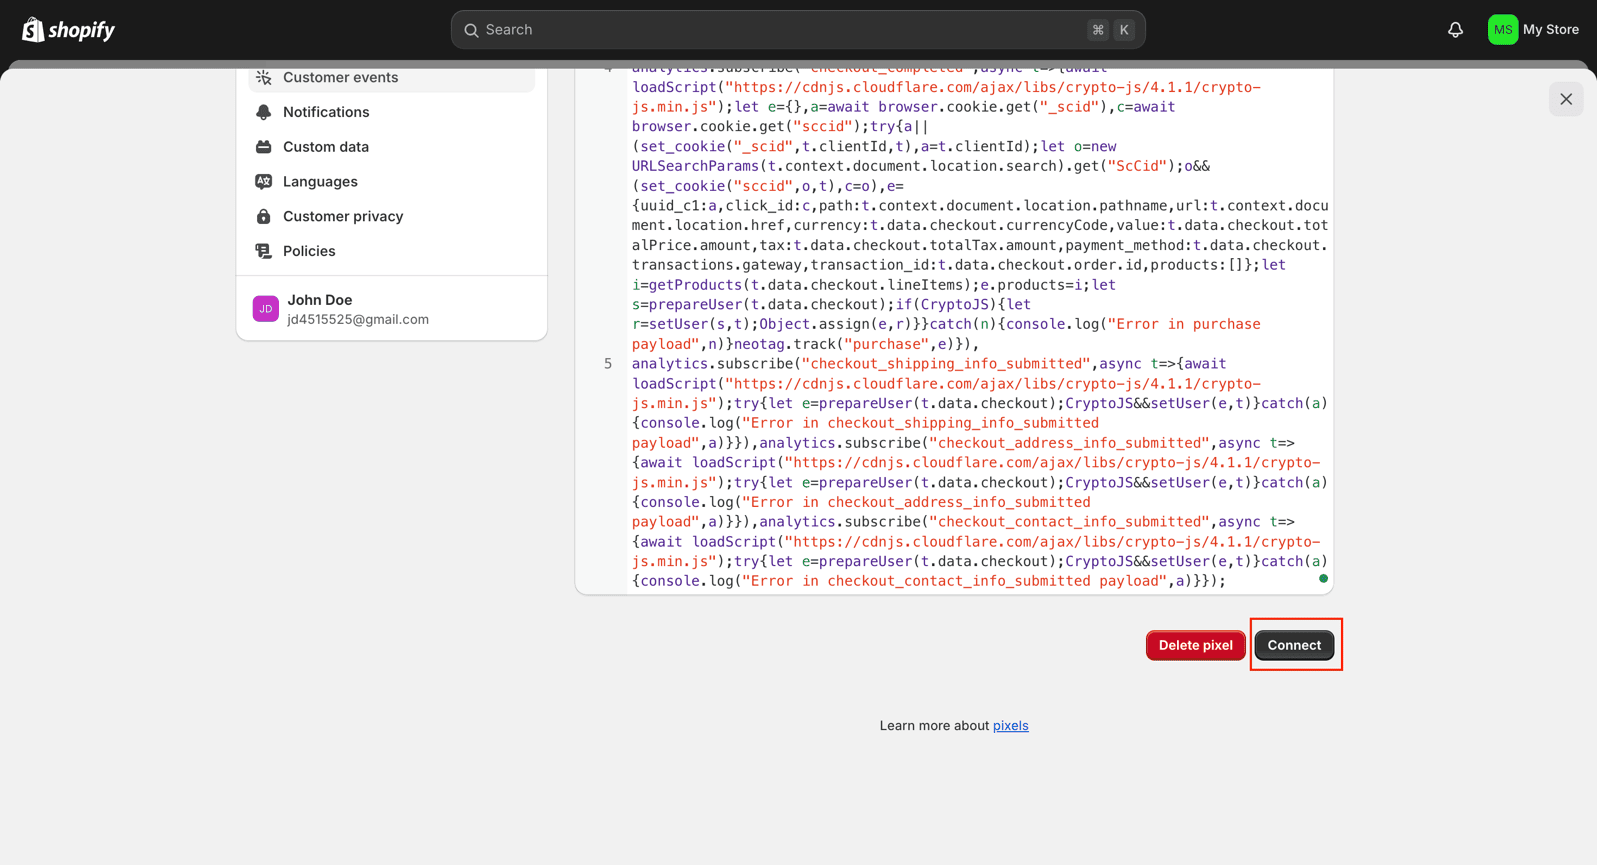
- Click Add Custom Pixel, give it a name, and click Add Pixel.

- Paste the tracking code from Datahash into the pixel code field.
- Give the pixel an appropriate name and click Add Pixel.
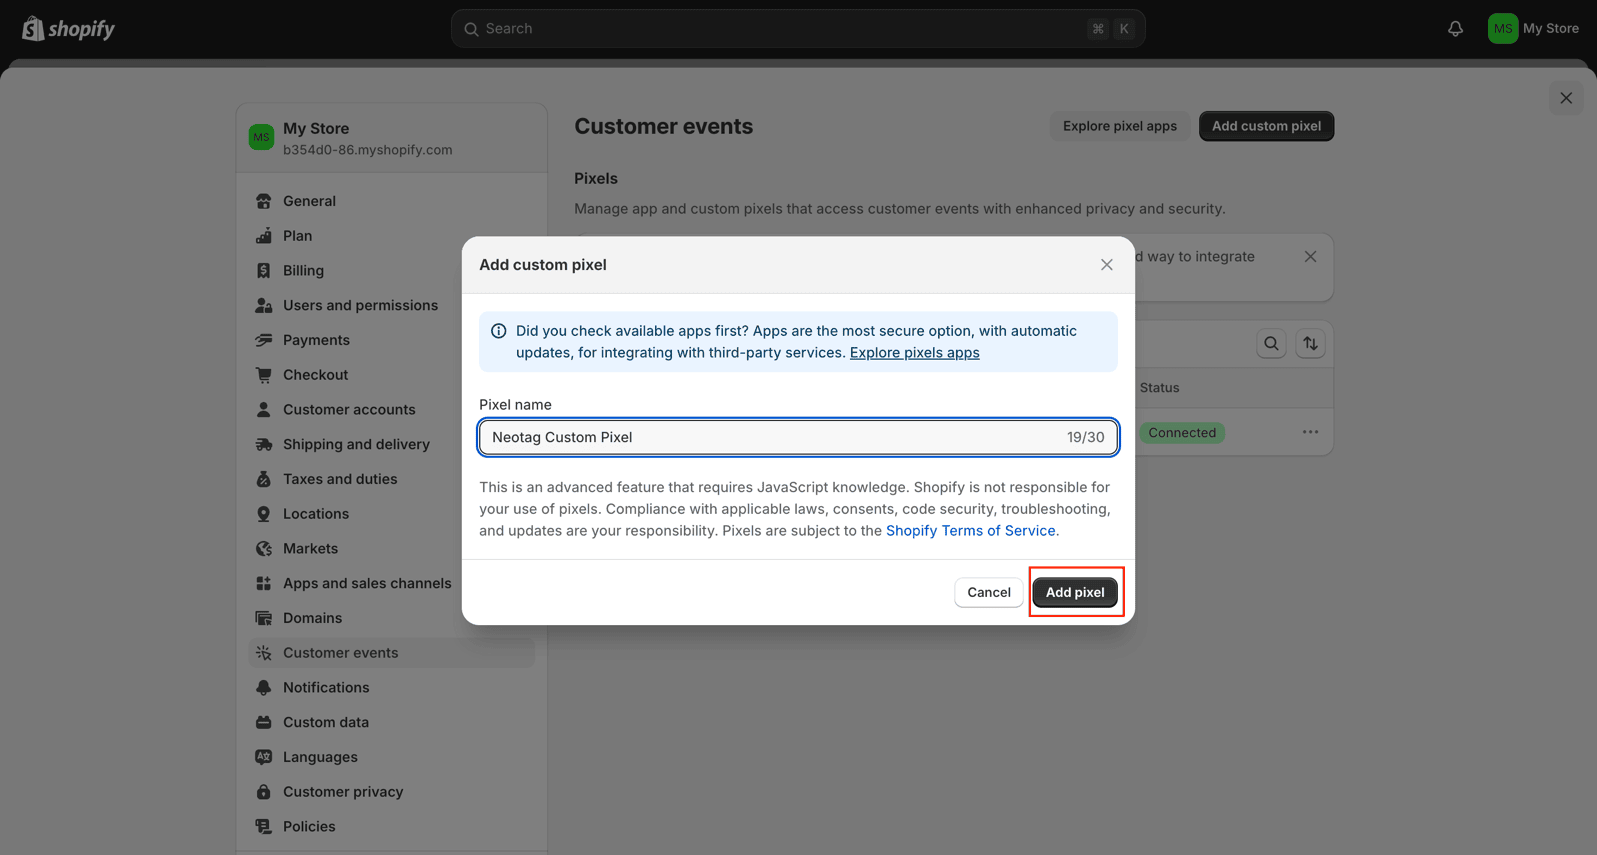
- Copy the code from the Shopify connector in the Datahash platform and paste it into Shopify.
- Click Save and then Connect.