Video Walkthrough
Getting Started
1. Log in to Datahash
- Go to https://studio.datahash.com/login
- Enter your username and password to sign in.
Select WhatsApp Connector
- In the Destinations section on the right, navigate to Meta category.
- Click on the “WhatsApp” connector tile.
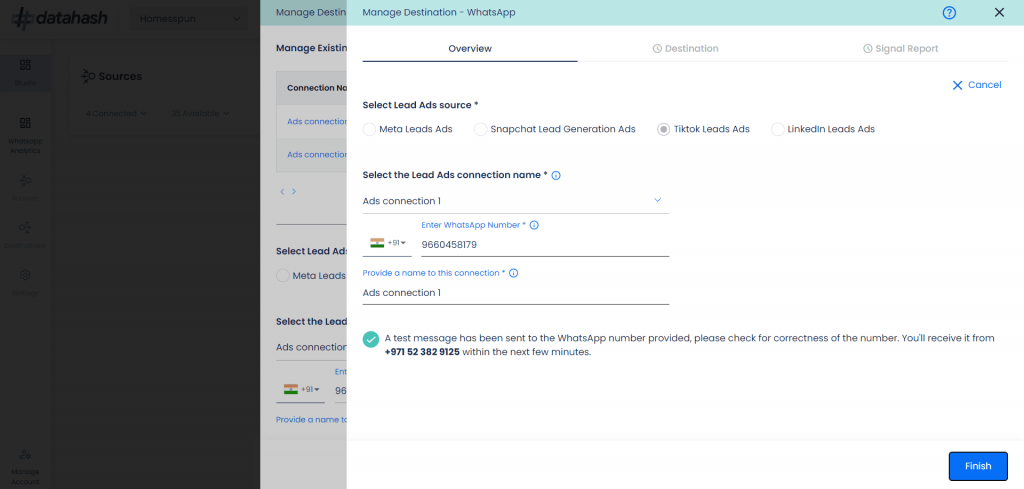
3. Choose TikTok Lead Ads Source
- Select TikTok Lead Ads as the source type.
- Choose the connection name you previously configured in the TikTok Lead Ads Source Connector.
- Enter the WhatsApp number where you want to receive the leads.
- Provide a name for this connection.
4. Test & Finish
- Click Test Connection — you should receive a WhatsApp message within a few minutes at the provided number.
- Once verified, click Finish to complete the setup.
- The connection will now be visible in your Dashboard.
Managing Connections
Add New Instance
- Repeat the same setup steps above for another WhatsApp destination.
- Provide a different connection name and WhatsApp number if needed.
- Test the connection and click Finish.
- The new instance (e.g., Ads connection 2) will appear in the Manage Existing Connections table.
Edit Existing Instance
- In the Manage Existing Connections table, click the connection name.
- Click the Edit icon (top-right) to enable edit mode
.
- Update any field values (e.g., WhatsApp number).
- Test the connection — you will receive a WhatsApp message again for verification.
- Click Finish to save changes.
(If you click Cancel during editing, the old configuration remains active.)