Video Walkthrough
Description
MySQL is an open-source relational database management system (RDBMS) that stores and manages data using Structured Query Language (SQL). It’s widely used for web applications, data warehousing, analytics, and enterprise solutions.
Prerequisites
Before starting the setup, make sure you have:
- MySQL Hostname – Server address of your MySQL instance
- Port – Default is usually 3306 unless configured otherwise
- MySQL Username – Account with read/write access
- MySQL Password – For the above username
- Database Name – The database where data will be inserted
- Table Name – The table where lead data will be pushed
Step-by-Step Setup
1. Log in to Datahash
- Go to https://studio.datahash.com/login
- Enter your credentials and log in
2. Select MySQL Connector
- Navigate to Destinations → Files in the right-hand panel
- Click the “MySQL” connector tile
3. Select Snapchat Lead Generation Ads Source
Choose Snapchat Lead Generation Ads as the source type
- Select your existing Snapchat Lead Ads connection name from the Source setup
- Provide a name for this destination connection
- Click Next
4. Provide MySQL Access Credentials
Fill in the required details:
- MySQL Hostname – Host server address
- Port – e.g., 3306
- MySQL Username – User with insert/write permissions
- Password – For the given username
- Database Name – Target database
- Table Name – Target table
- Click Validate Credentials
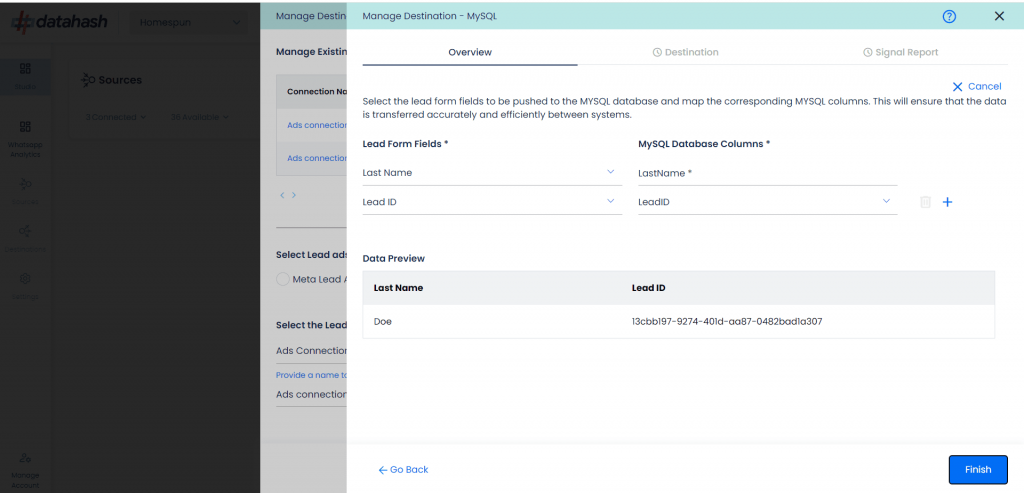
Field Mapping
- Map Snapchat Lead Form fields to MySQL table columns
- Lead ID (or ID field) mapping is mandatory
- Map as many additional fields as needed
- Click Test Connection
6. Finish Setup
- If test passes, click Finish
- The connection will now appear in the Dashboard
Managing Connections
Add New Instance
- Repeat the same steps with different credentials or mapping
- Validate credentials
- Map fields and test connection
- Click Finish
- New instance appears (e.g., Ads connection 2)
Edit Existing Instance
- Open the connection from the Manage Existing Instances table
- Click the Edit icon (top-right)
- Update fields as needed
- Validate credentials & test connection
- Click Finish to apply changes
(Cancel will keep the old configuration active)


