Video Walkthrough
Description
HubSpot is an AI-powered customer platform with software, integrations, and resources to help you connect your marketing, sales, and service teams.
Integrating Datahash with HubSpot enables you to automatically import leads, audiences, or events from Meta Lead Ads, enriching your CRM data with behavioral insights for more targeted engagement and improved conversion strategies.
Prerequisites
- An active HubSpot account
- A defined field in HubSpot CRM to capture the Meta Lead ID
Setup Instructions
1. Login to Datahash
- Go to Datahash Studio
- Enter your credentials
2. Select HubSpot as Destination
- Navigate to CRM category under Destinations (right section)
- Click the HubSpot connector tile
3. Prepare HubSpot Environment
- Ensure your HubSpot account is active
- Create or confirm the Meta Lead ID field in the CRM module you plan to integrate
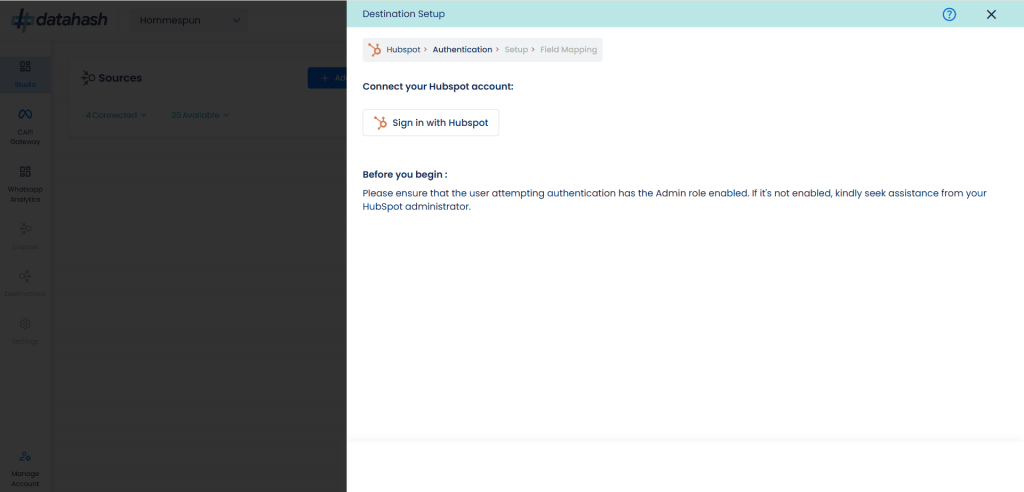
4. Authenticate with HubSpot
- Click Sign in with HubSpot

- Enter your credentials
- Grant the requested permissions to enable Datahash integration
5. Select Source & Name the Connection
- Choose Meta Lead Ads as the source type
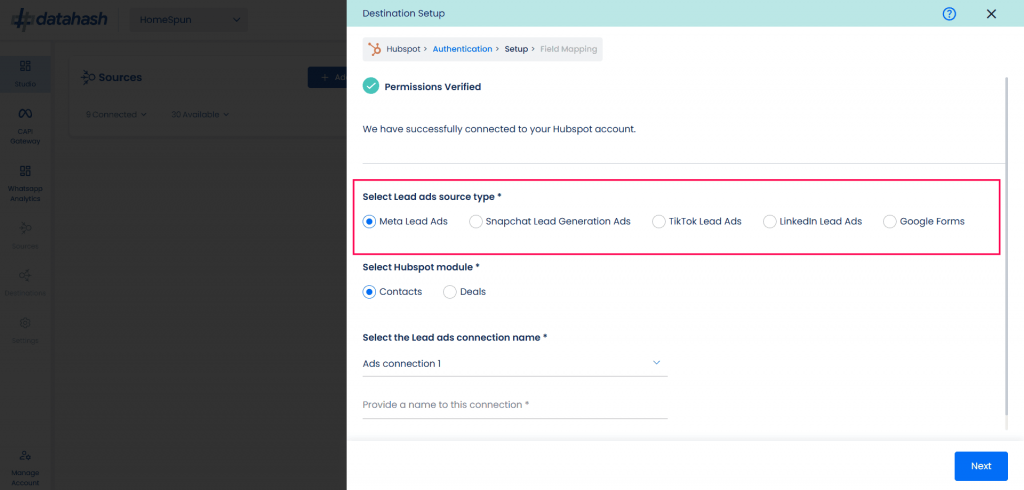
- Choose the HubSpot module where the leads should be sent
- Select the connection name from your Source setup (Meta Lead Ads Source)
- Provide a name for this connection
- Click Next
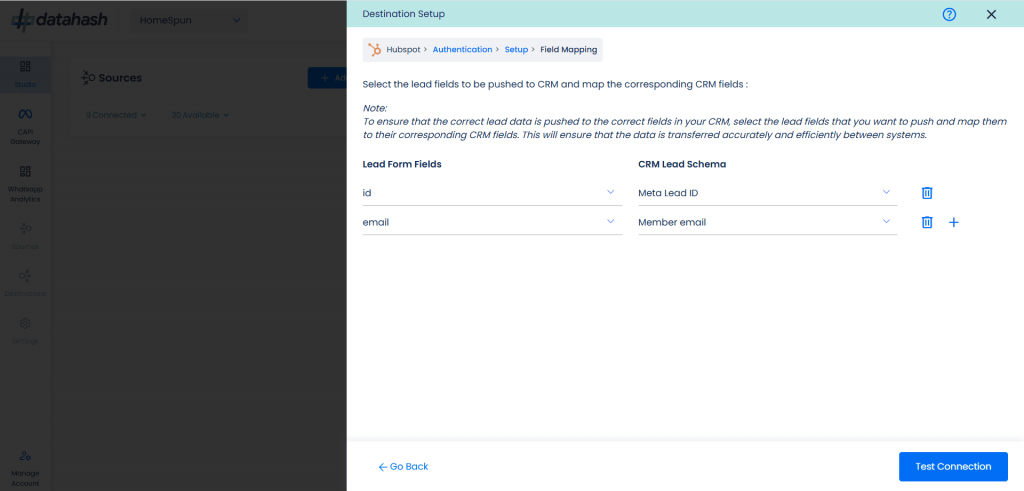
6. Map Fields
- Map each Meta Lead Form field to the corresponding HubSpot schema field
- Meta Lead ID mapping is mandatory
- Map any other HubSpot-mandatory fields (marked with an asterisk)
- Map as many additional fields as needed to ensure complete data transfer
7. Test & Finish
- Click Test Connection
- If the connection passes, click Finish
- The connected instance will now appear in your dashboard
Managing Instances
Add a New Instance
1. Click the Edit icon in Manage Connections
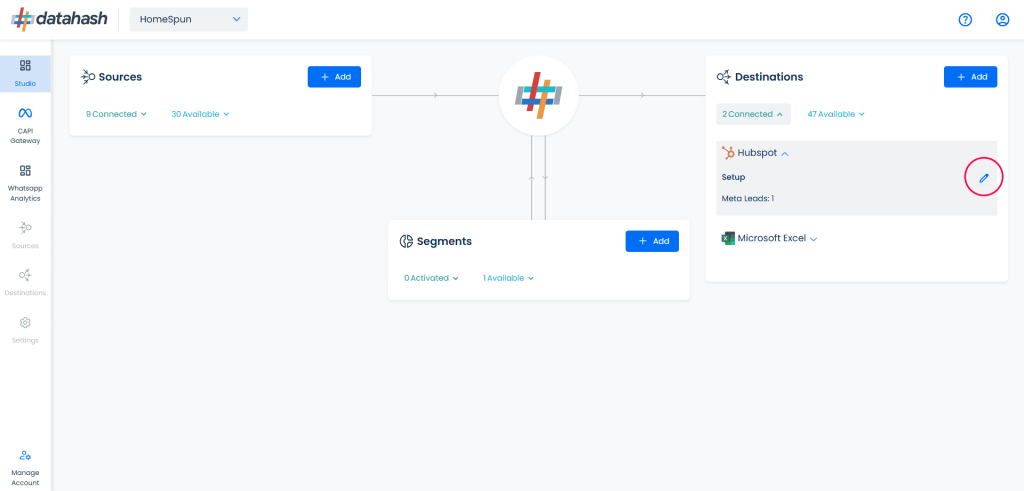
2. Repeat the setup process:
- Select Meta Lead Ads as source type

- Select the Lead ads connection name and provide a name to this connection.

- Map all required fields (including Meta Lead ID and mandatory CRM fields)
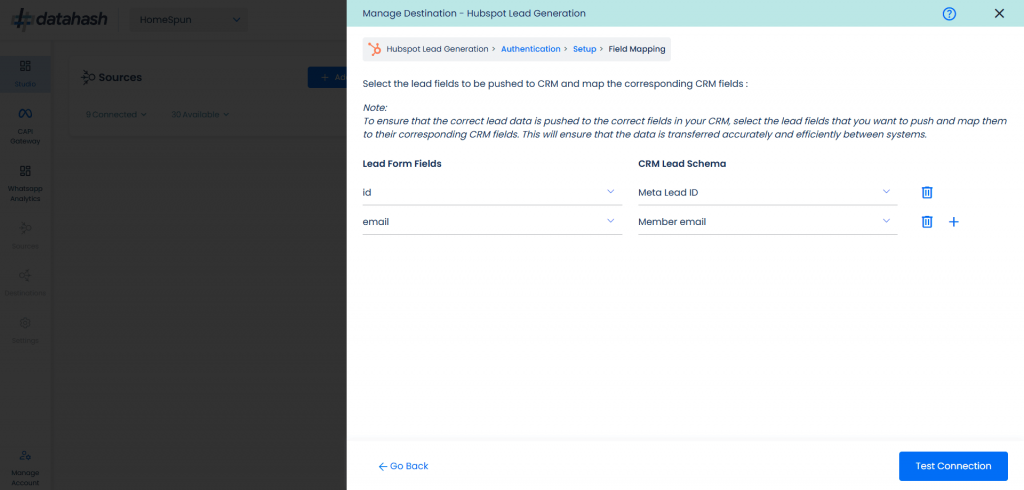
- Click Test Connection then Finish
3. The new instance will appear in the Manage Existing Connections table
Edit an Existing Instance
1. Click the connection name in the Manage Existing Connections table
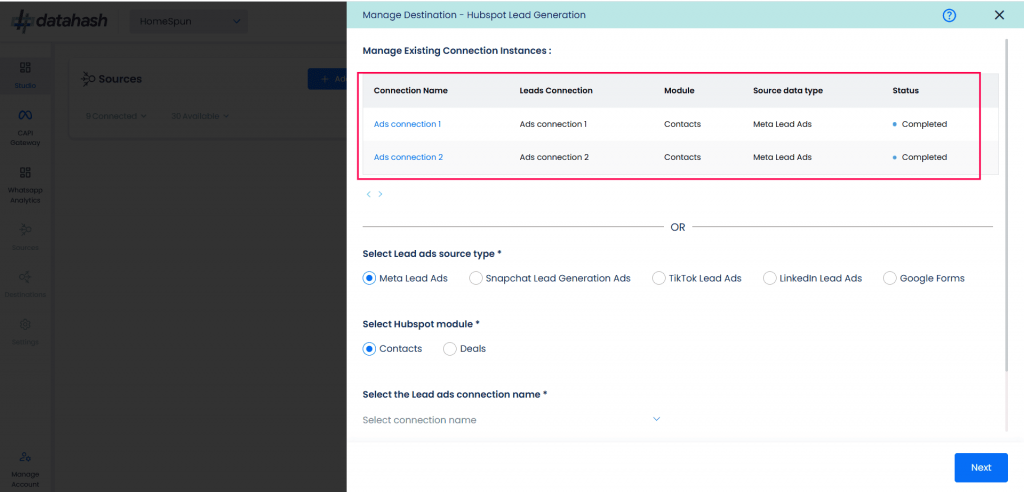
2. Click the Edit icon (top right corner)
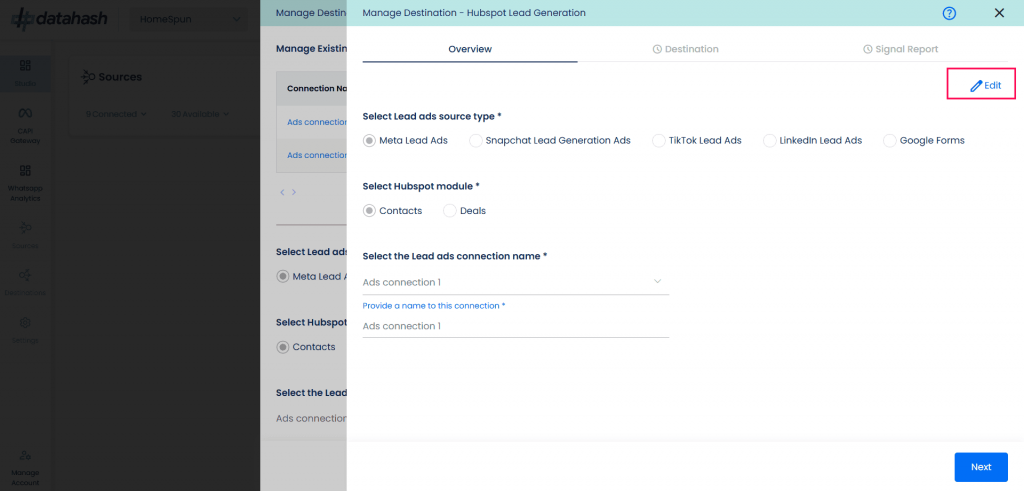

3. Update required values
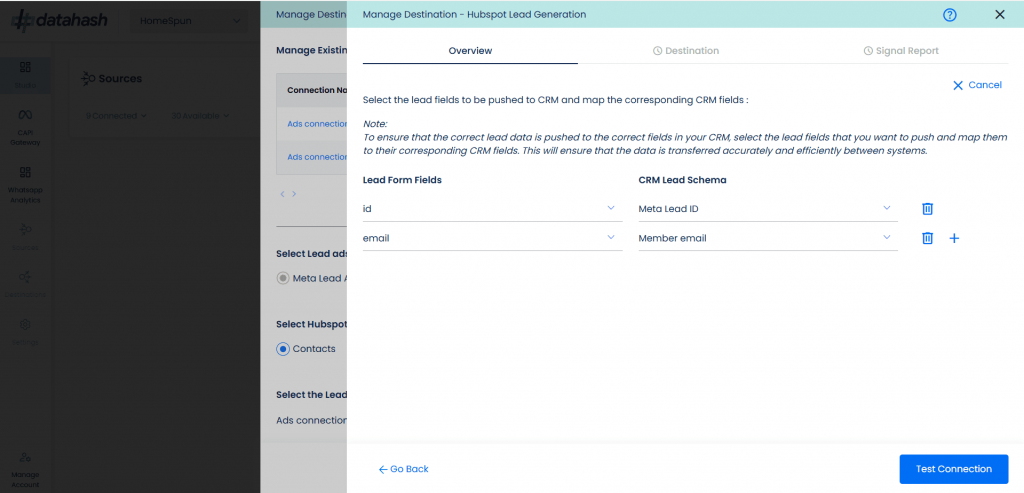
4. Click Test Connection then Finish

5. If you click Cancel during editing, the previous configuration will remain unchanged


